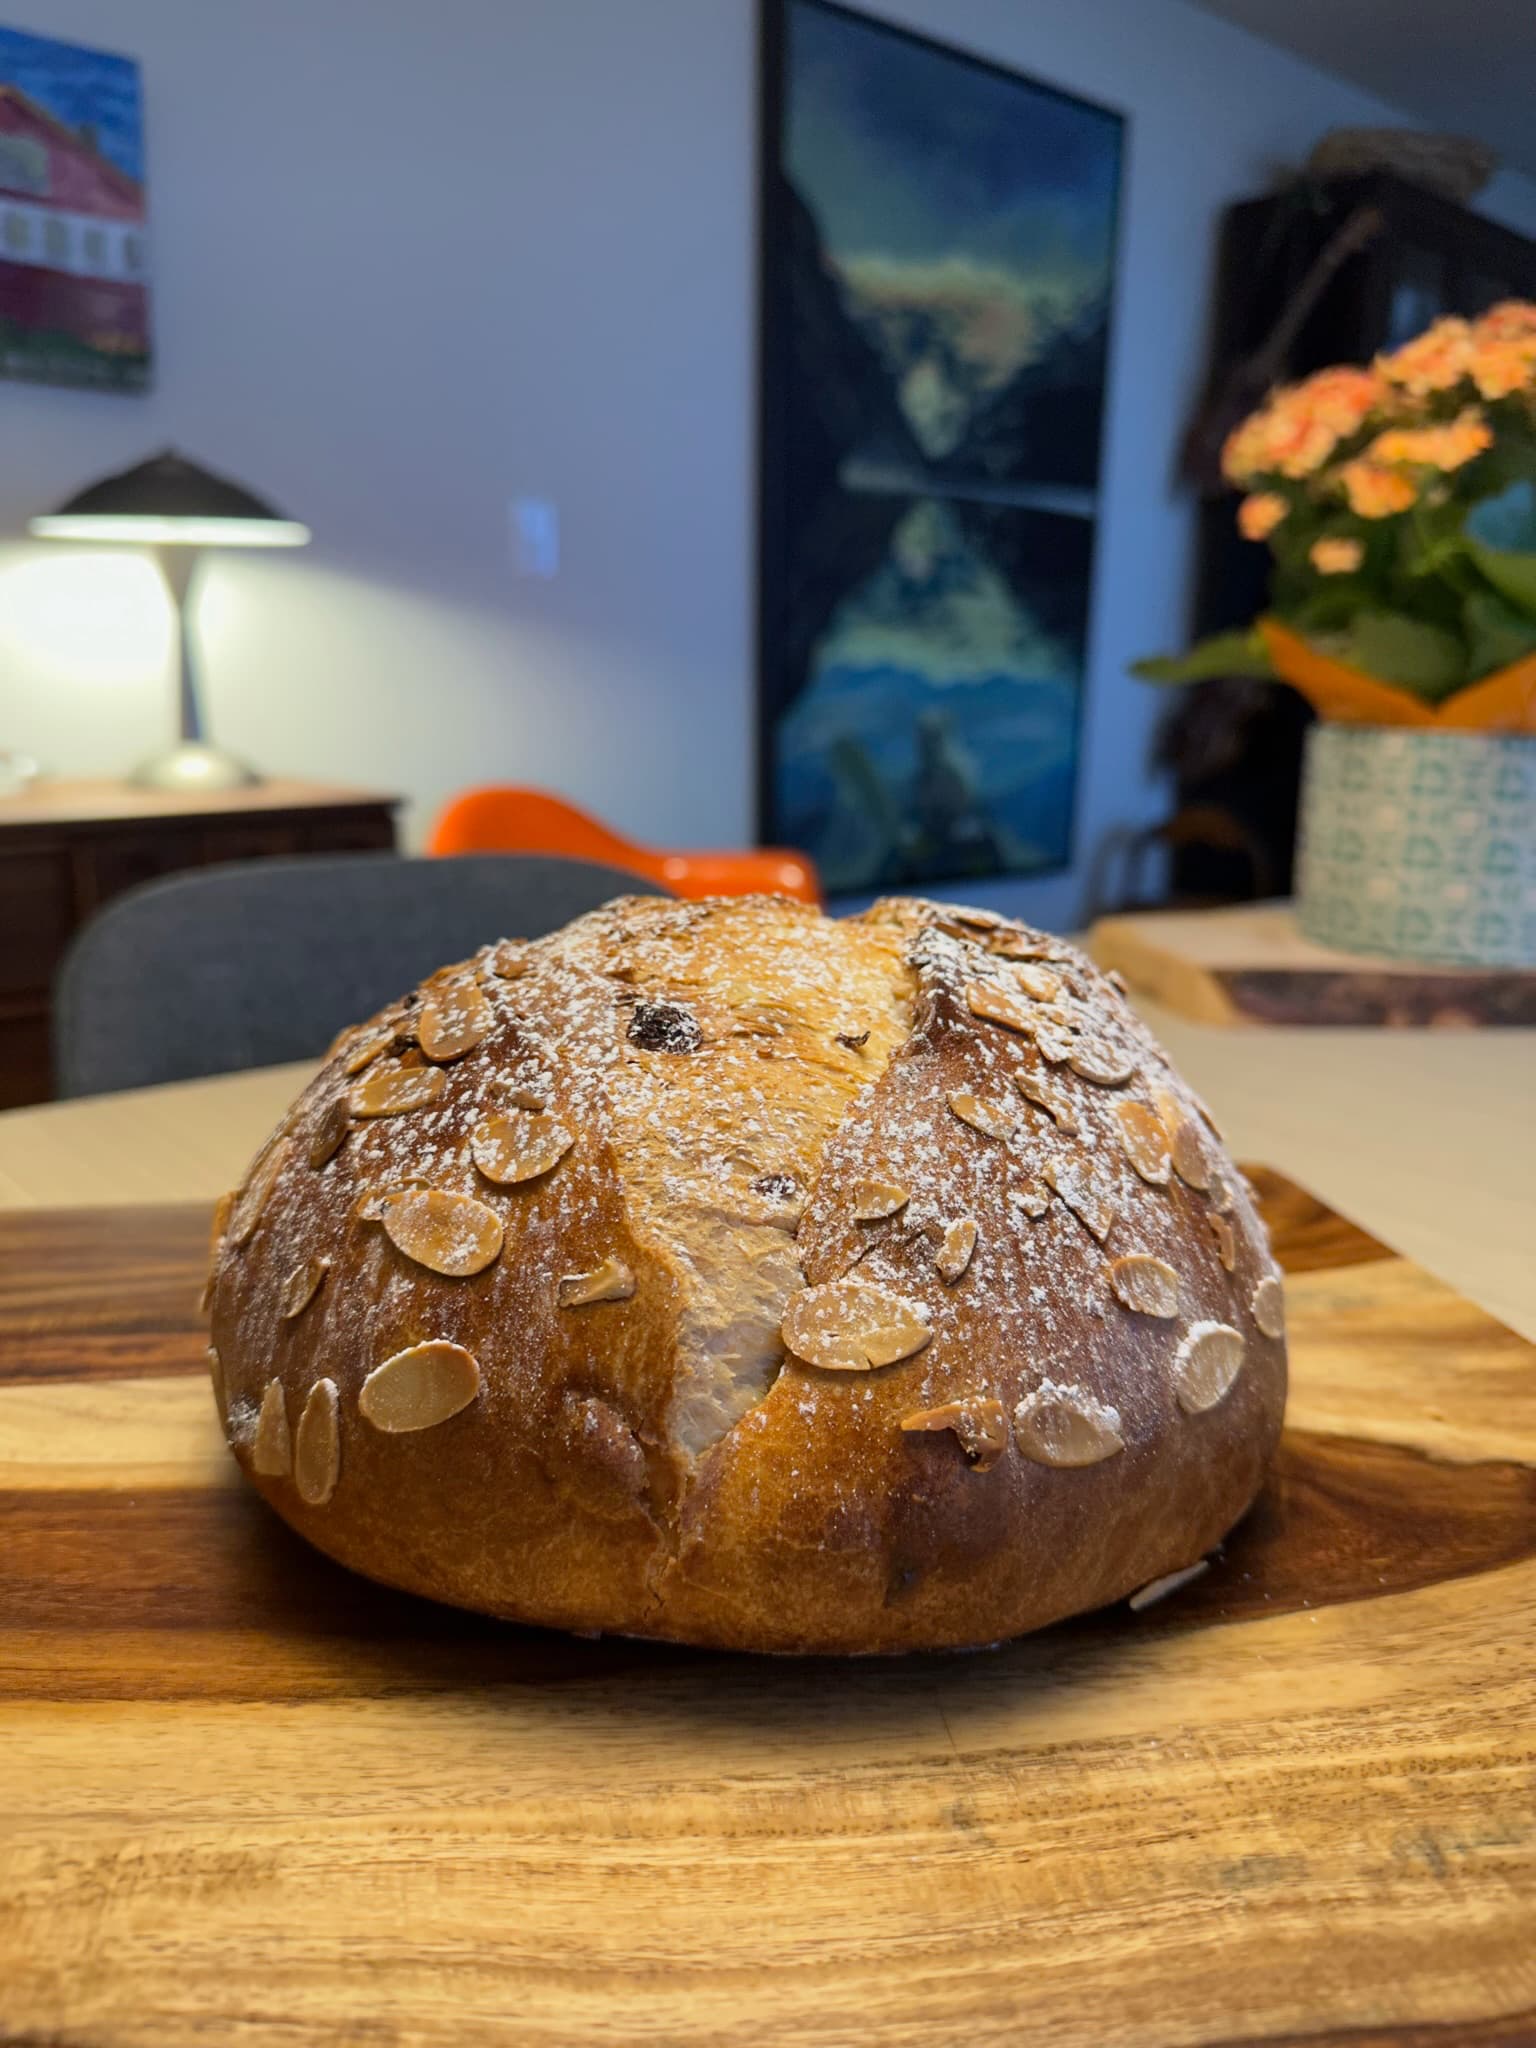
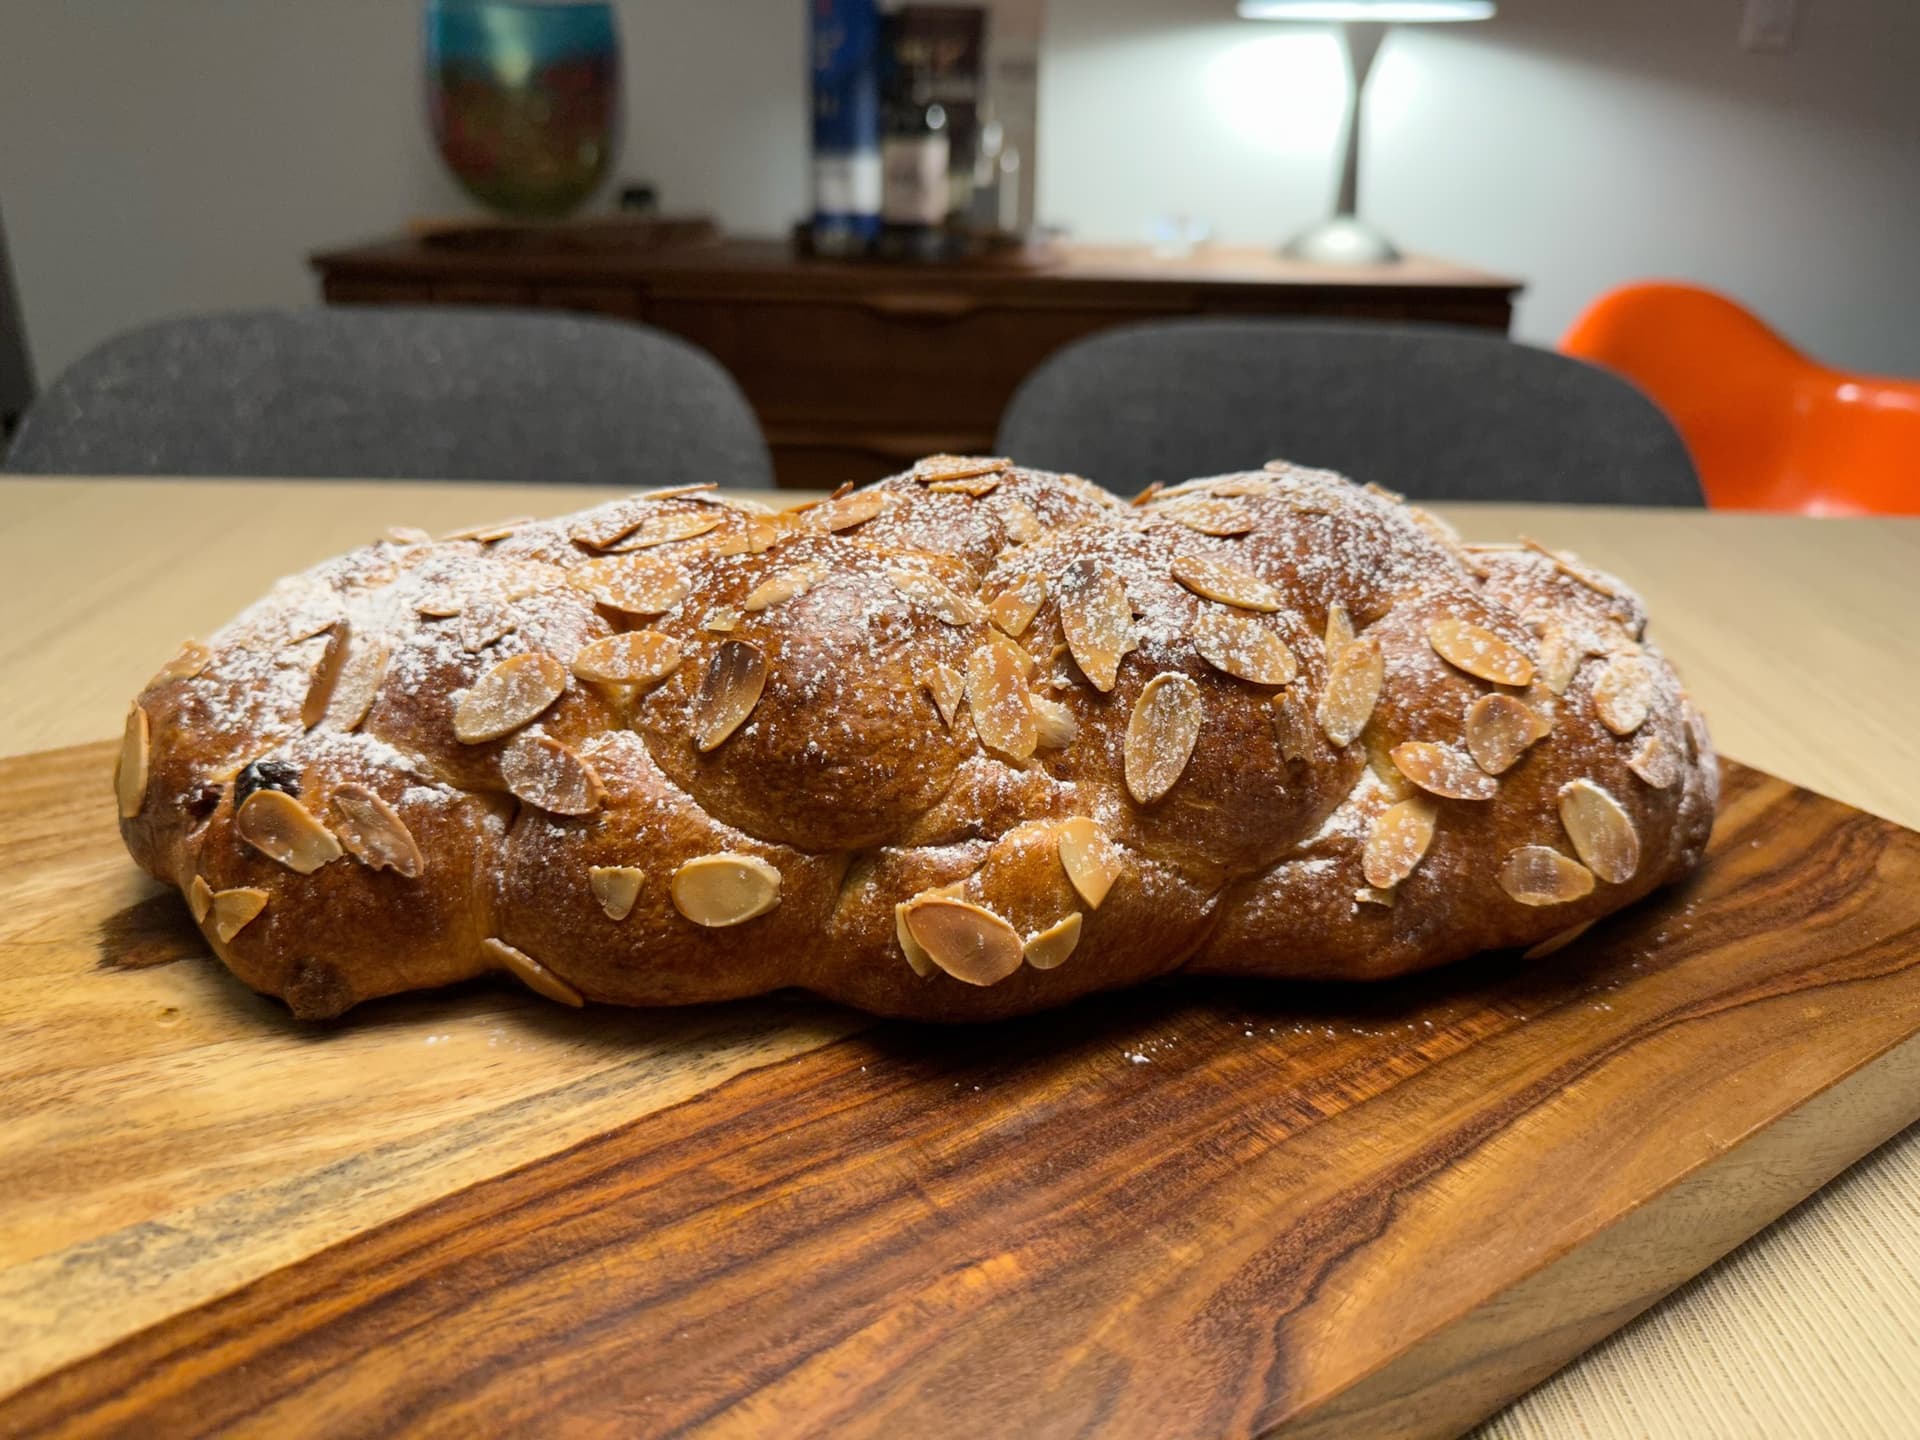
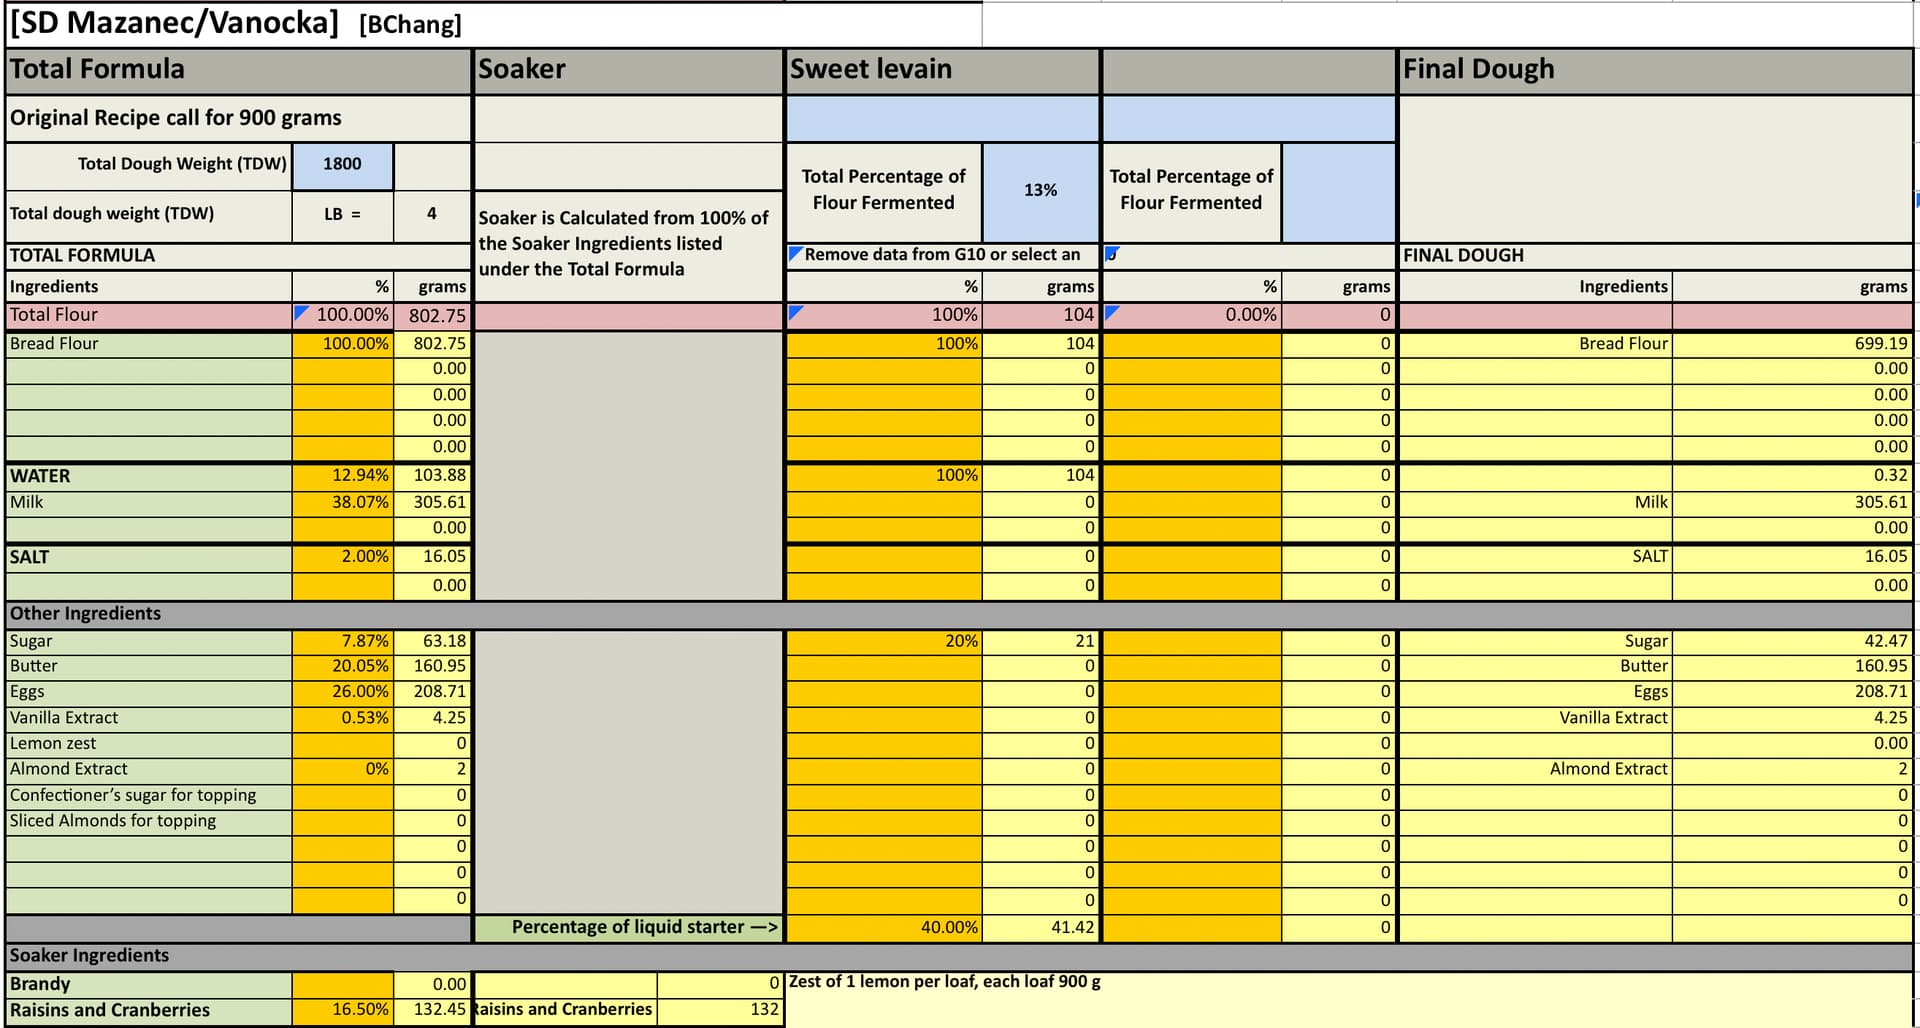
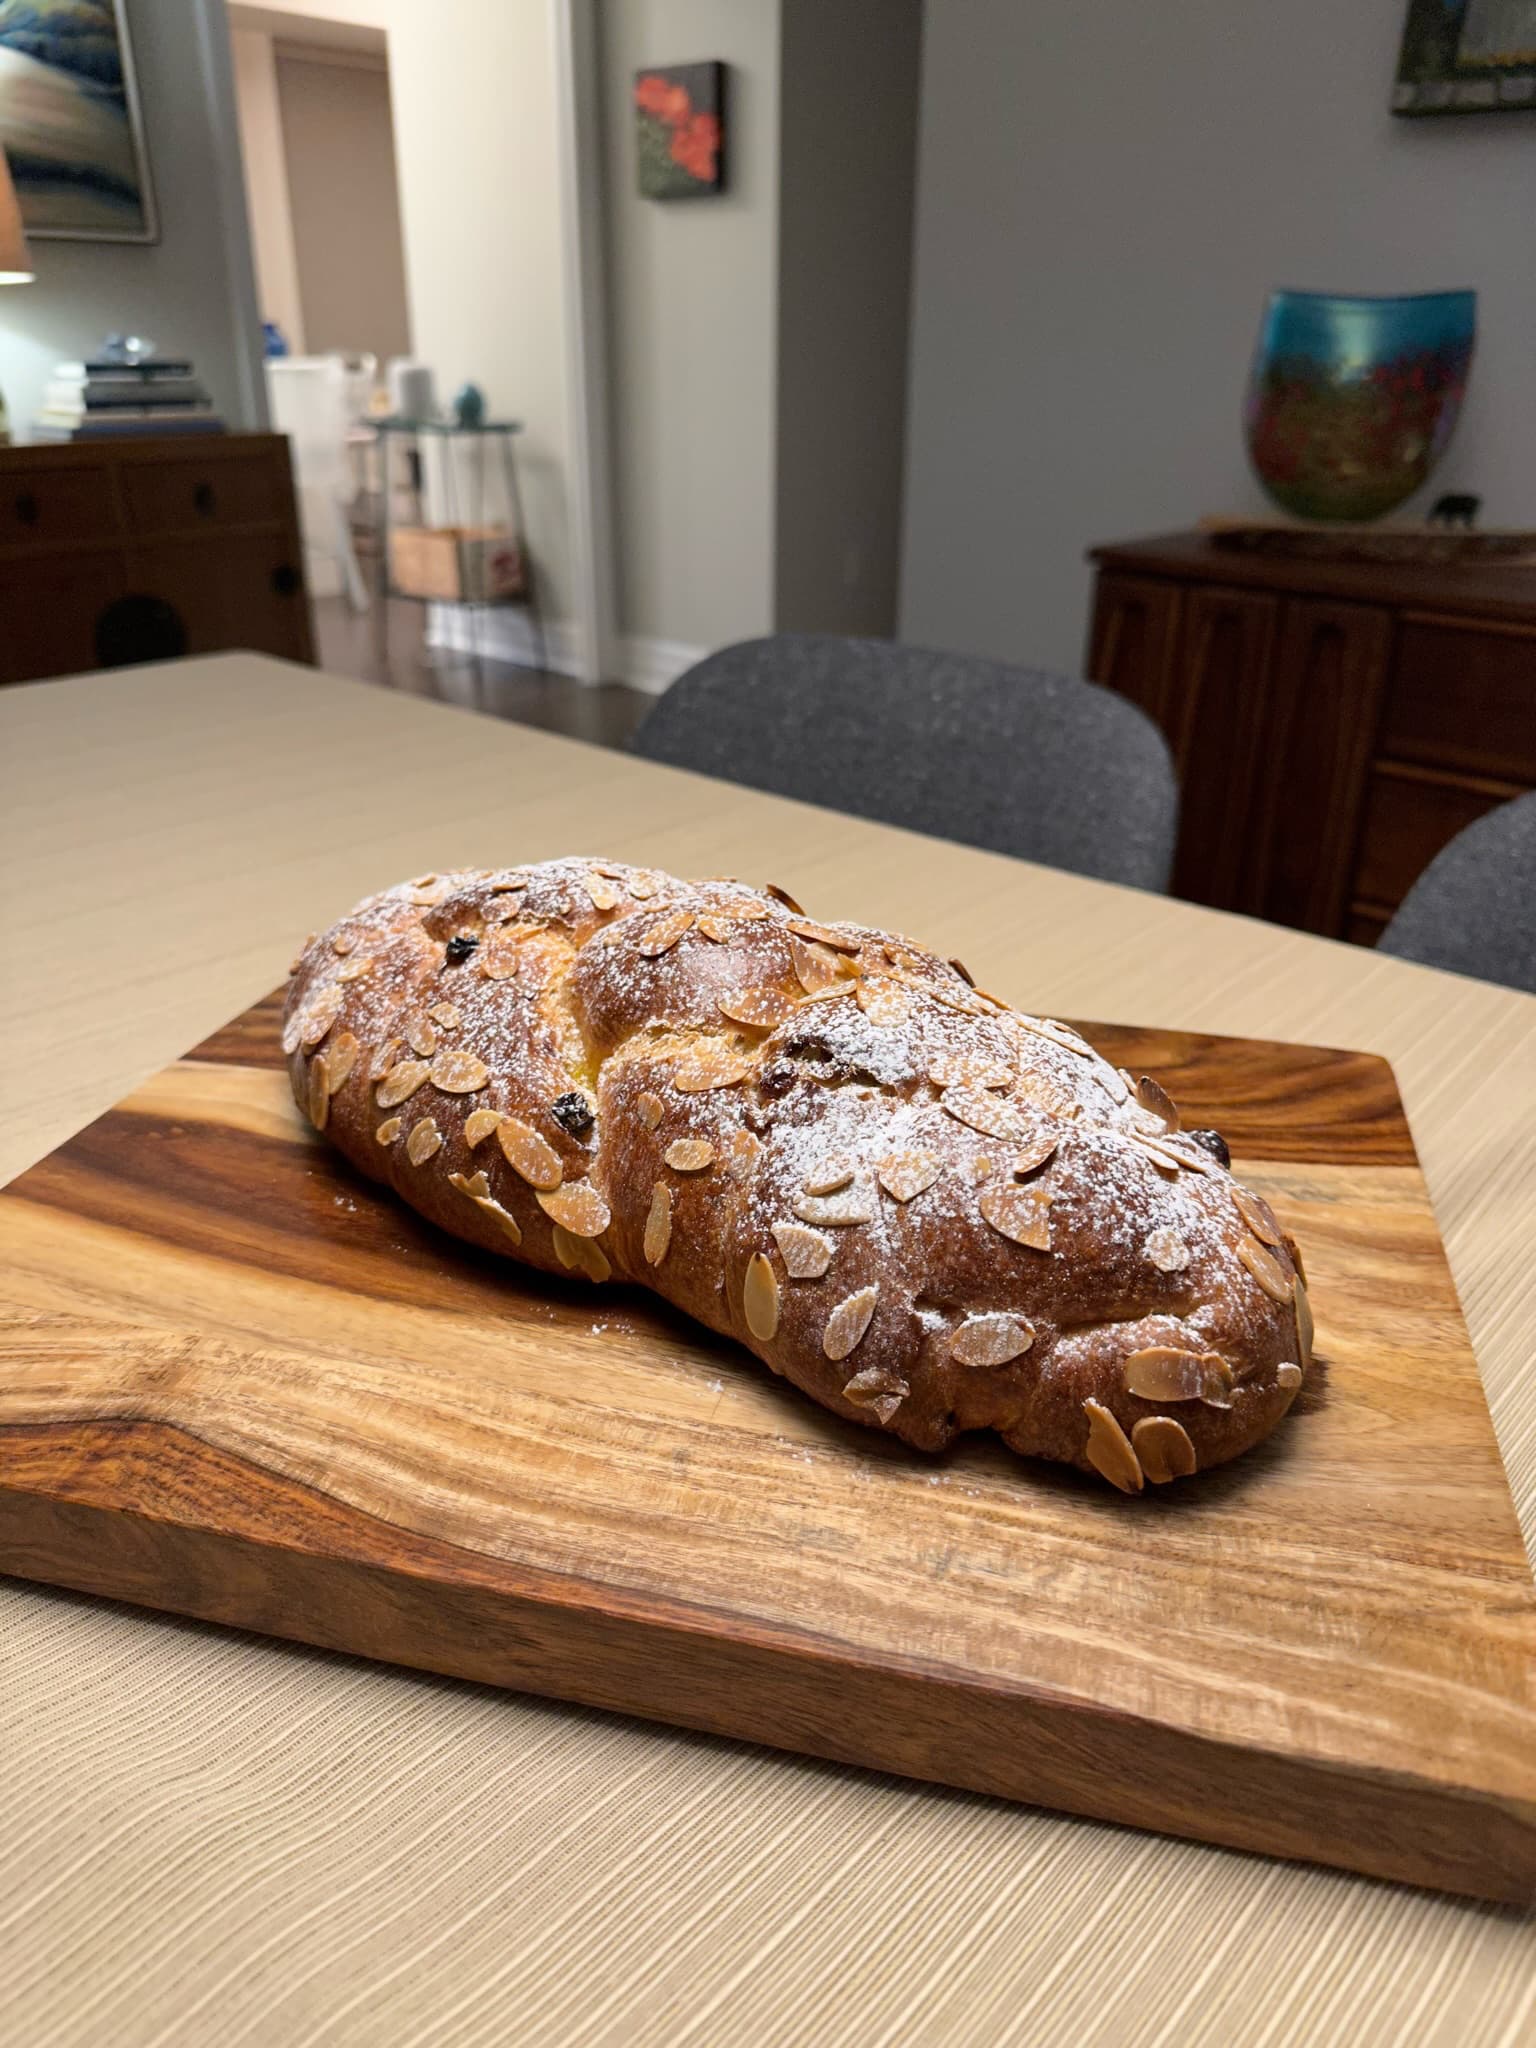
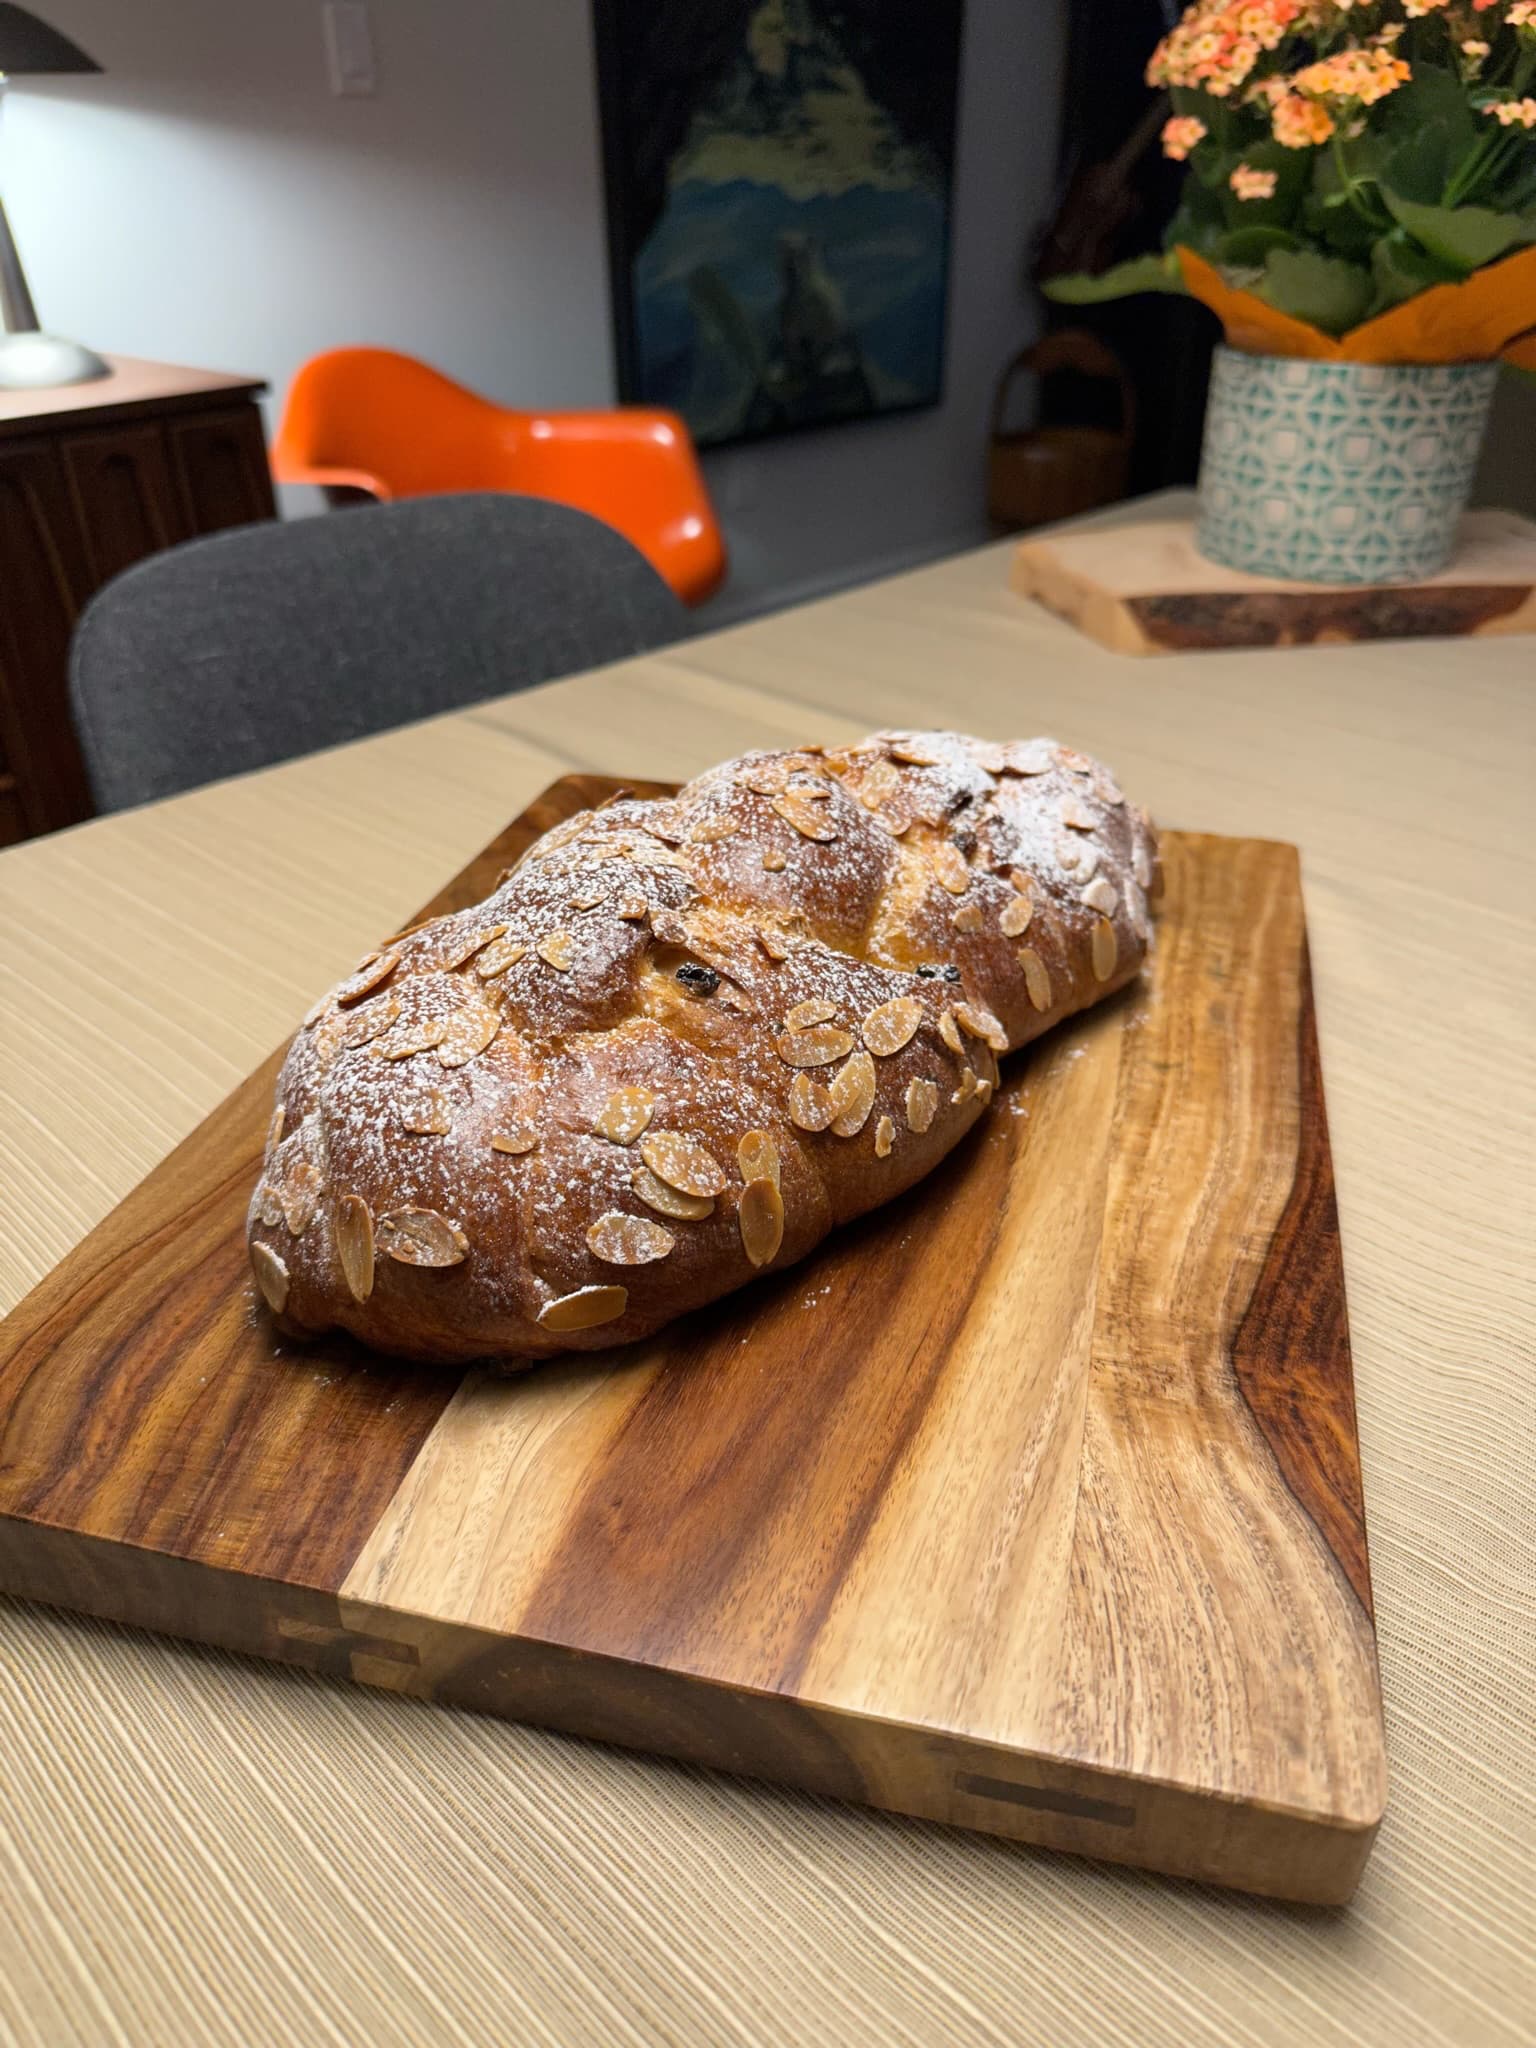
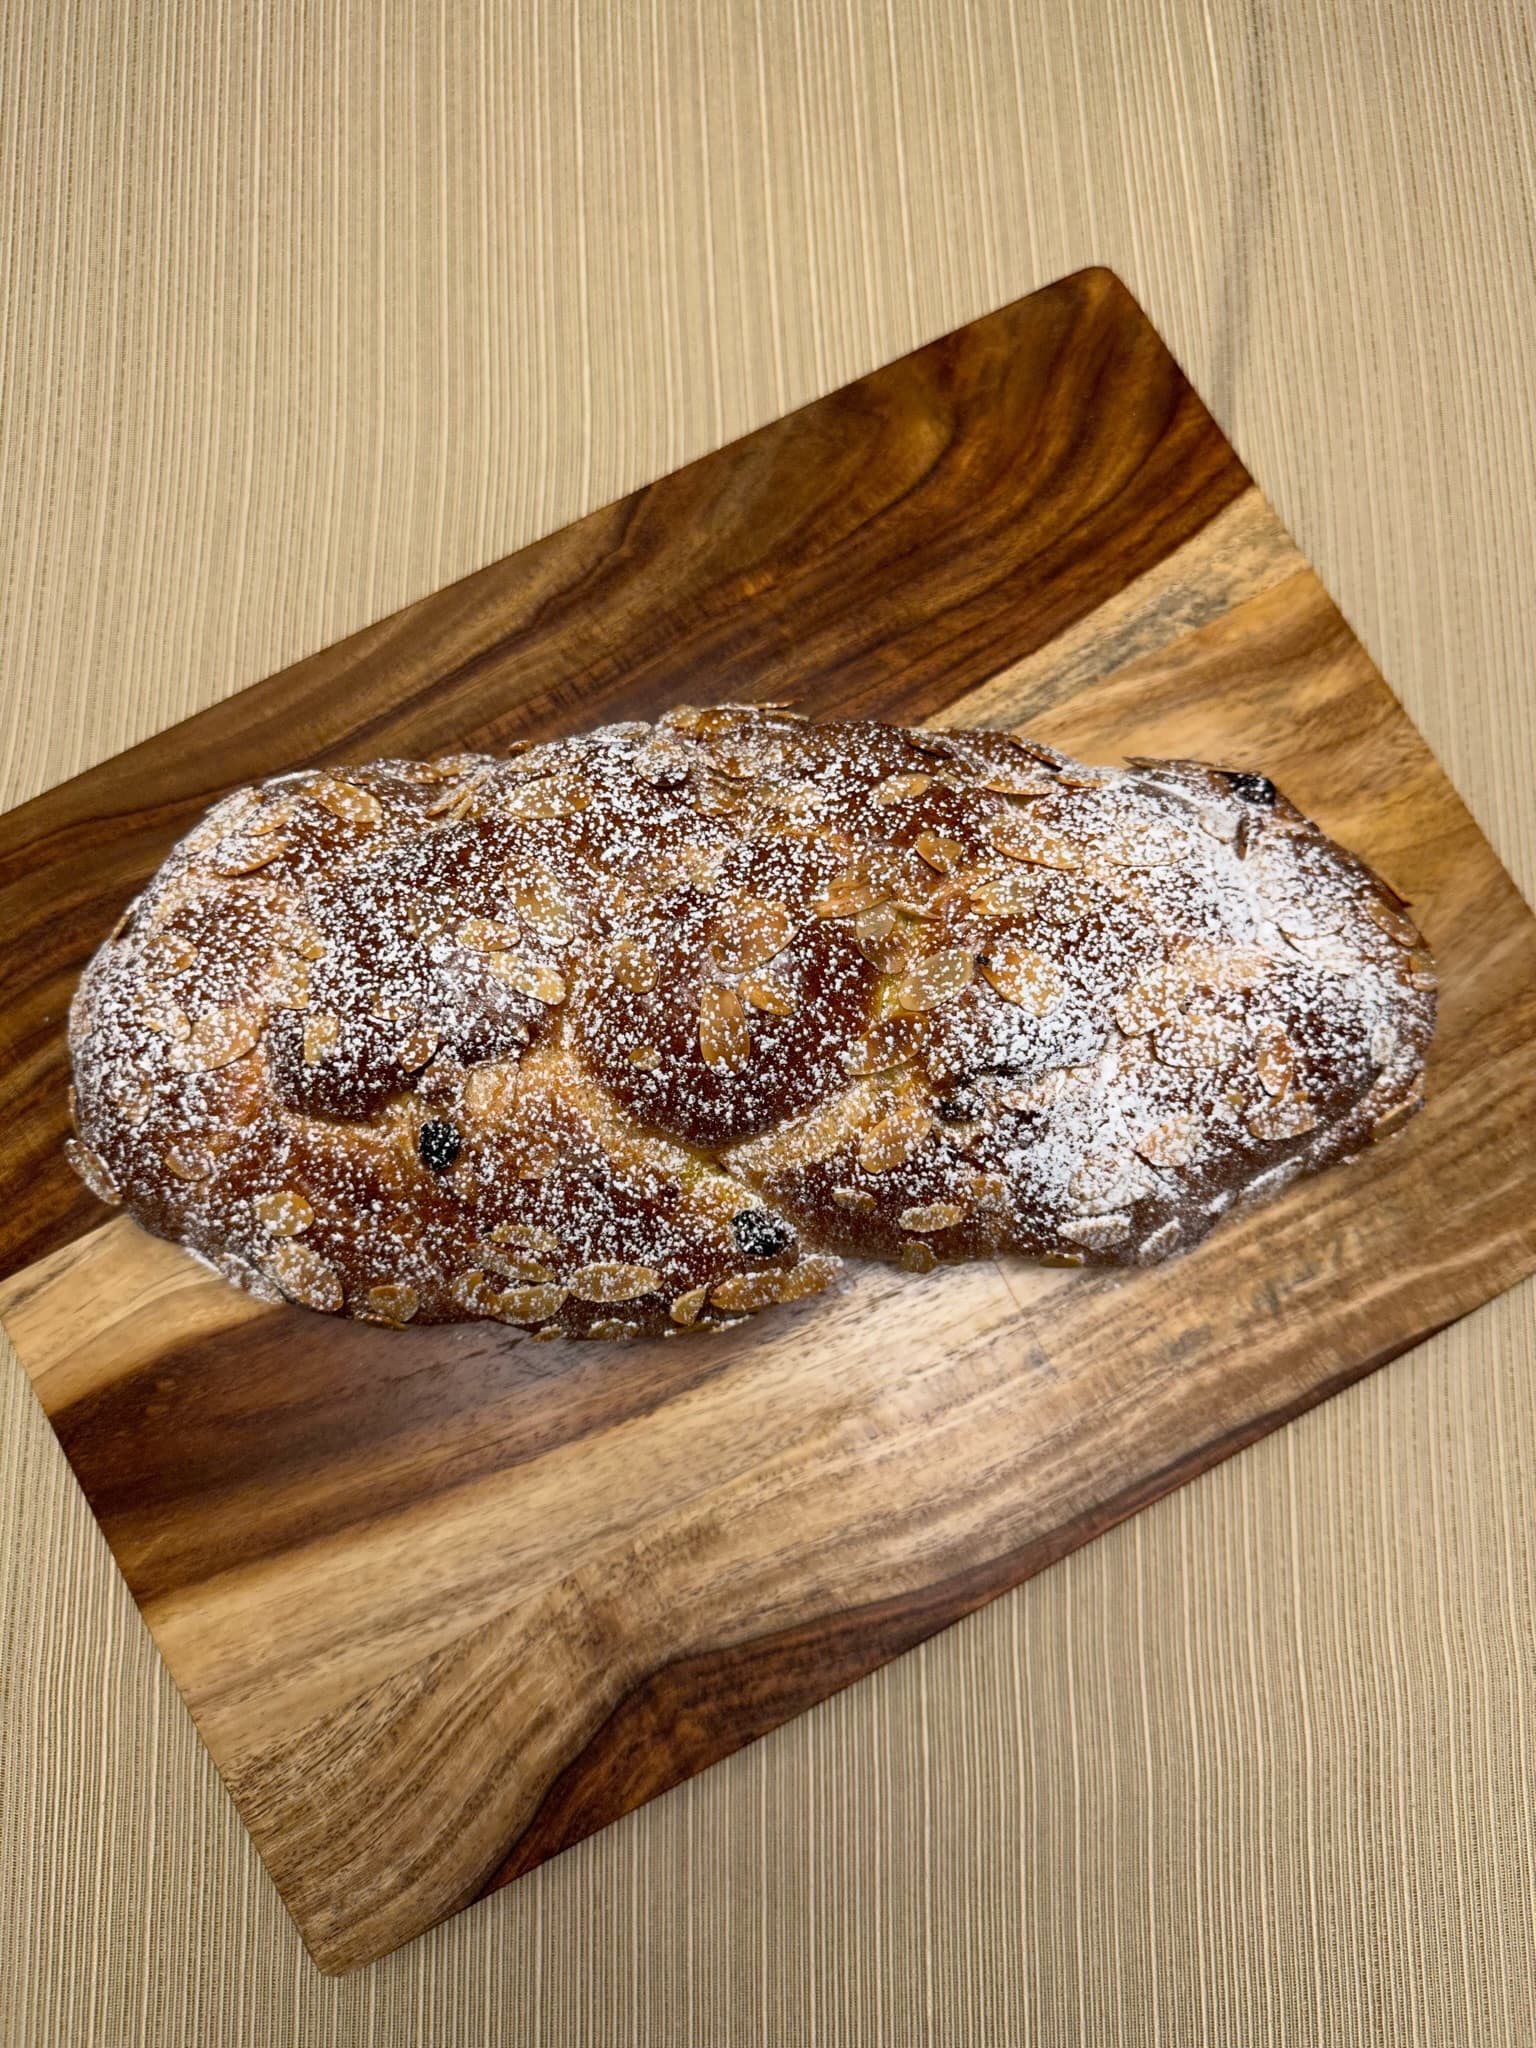
This year we will be away until just before Christmas. As a result, I need to do at least some of my Christmas baking before we go. I’ve been eyeing the mazanec recipe from Maurizio Leo since Easter. I realize that Mazanec is an Easter bread, but the recipes for Mazanec and Vanocka are so similar and since Vanocka is a christmas bread I thought I would try making these. The Mazanec seems to be shaped as a boule and given a cross scoring. The Vanocka seems to typically be plaited in two layers, I decided to do a six strand plait because I enjoy doing them and like the way they look.
I followed Maurizio’s recipe except that I used half raisins and half cranberries since I thought they would be nice and a bit more Chrismassy. I also used brandy to soak the dried fruit instead of rum. My fermentation took longer than Maurizio’s but I think both loaves turned out well. I’ve adjusted the directions to reflect my experience with the timing. I had to stagger the baking since both would not fit well in my oven. I gave the Mazanec a cold retard so that I could bake it the following morning.
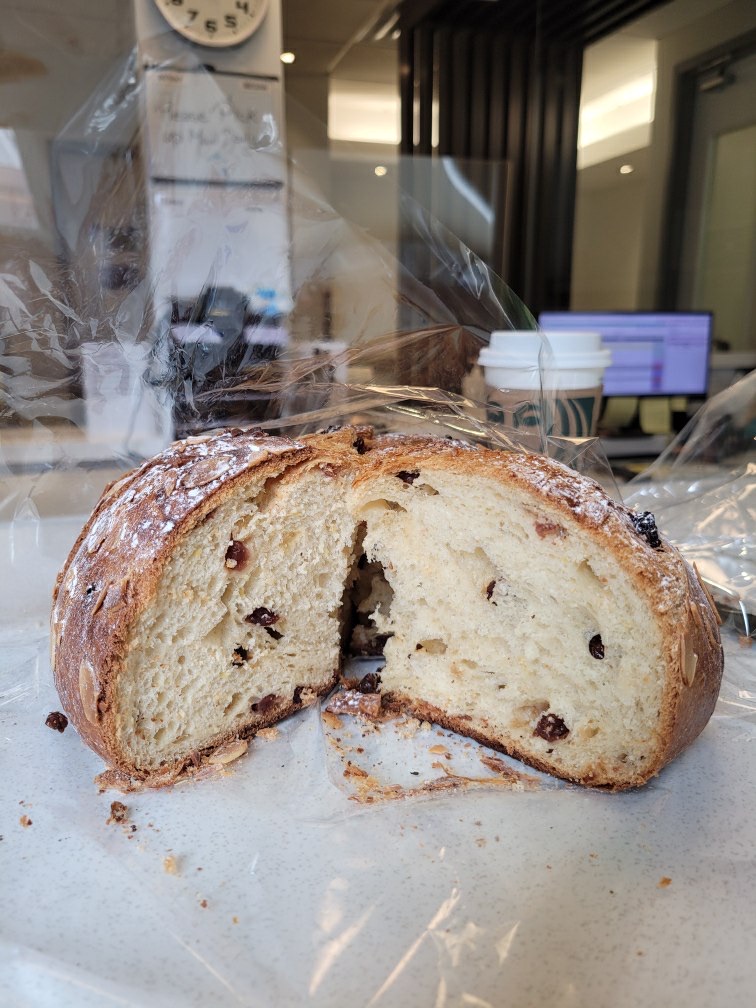
These breads are slightly sweet, enriched with butter and eggs and have hints of vanilla, almond and lemon. I hope the recipients of these loaves enjoy them.
Directions
Make the levain and soak the raisins and cranberries the night before.
In the evening, when your sourdough starter is ripe (when you’d typically give it a refreshment), make the levain. Cover the jar loosely and let the levain ripen overnight at warm room temperature about 75°F. In a small bowl, combine the raisins/cranberries and brandy (use enough brandy so they’re just covered). Cover the bowl.
Mix the dough In the morning, about 12 hours later, your starter should be bubbly on top and at the sides, have risen in the jar, have a sour aroma, and have a loose consistency. If it was cold in your kitchen overnight or it isn’t displaying these signs, give it one more hour to rise and check again. Cut butter into small pieces, place them on a plate, and set them aside to soften to room temperature. To the bowl of a stand mixer fitted with the dough hook attachment, add the flour, milk, eggs, sugar, salt, vanilla extract, almond extract (if using), zest of two lemons, and the ripe levain. Set the mixer to low speed and mix until all the ingredients are combined and no dry bits of flour remain. Turn up the mixer to medium-low and mix for 3 to 5 minutes, until the dough starts to clump around the dough hook. This is a small amount of dough in the mixer, so if at any time the dough fails to effectively move around with the dough hook, you can switch to the paddle attachment. This is a moderately strong dough at this point, and should mostly pull away from the bottom of the mixing bowl. Let the dough rest 10 minutes in the mixing bowl, uncovered. The butter should be at room temperature by this time (meaning a finger should easily push into a piece with little resistance). If you used the paddle to mix, switch back to the dough hook, and with the mixer turned on to low speed, add the butter, one piece at a time, waiting to add the next until the previous is incorporated, 4 to 6 minutes total. Once all of the butter is added, turn the mixer up to medium-low and continue to mix until the dough smooths and once again begins clinging to the dough hook, 2 to 3 minutes. The dough will be cohesive, smooth, and elastic at the end of mixing. Add the drained raisins and cranberries now and mix until well incorporated. Transfer the dough to another large container (or leave it in the mixing bowl) for bulk fermentation.
Bulk ferment the dough Cover the dough with a reusable airtight cover and let it rise at 82°F for a total of 3-4 hours. During this time, you’ll give the dough one set of “stretches and folds” to give it additional strength. Finally, let the dough rest, covered, for the remaining 3 hours of bulk fermentation.
Shape the dough
Check your dough; after 3-4 hours, it should have risen about 10-20% in the bulk fermentation container, have a few scattered bubbles, be smoother with a slightly domed top, and be moderately light and fluffy to the touch. If the dough still looks sluggish or feels dense after 4 hours, give it another 30 minutes to rise. Line the inside of an 8-inch round banneton or kitchen bowl with a clean kitchen towel and lightly dust with bread flour. Lightly flour the top of the dough and gently scrape it out to your work surface flour side down. Using a bench scraper and floured hand, flip the dough over and shape it into a very tight round by pushing and pulling the dough with the scraper against the work surface. Pushing and pulling will create tension on the top of the dough, creating a uniformly smooth surface. Using your scraper, scoop up the dough, flip it over, and place it in the prepared banneton, seam side up. The seam on the bottom should be completely sealed. If it’s not, pinch the bottom closed with your fingers. Cover the banneton with a large plastic bag (or another bowl cover) and seal.
For shaping Vanocka, divide dough into six equal portions. Pre-shape as a boule. To form each piece into a strand about 14” long. On an un-floured board, flatten each piece with the palm of your hand. Using a rolling pin, roll out each piece to about ¼ inch thickness. Then roll up each piece into a tight tube. Using the palms of your hands, lengthen each piece by rolling each tube back and forth on the bench with light pressure. Start with your hands together in the middle of the tube and, as you roll it, move your hands gradually outward. Taper the ends of the tube by rotating your wrists slightly so that the thumb side of your hand is slightly elevated, as you near the ends of the tube.)
Braid the loaf. Braiding somewhat loosely, not too tight.
Proof the dough
Proof the dough at a warm temperature 82°F for about 6 hours. Extend the proof time as necessary until the dough is puffy and a poke slowly springs back.
Bake and finish
Heat the oven to 400°F (200°C) with a rack in the middle and a baking stone on top (if you don’t have a baking stone, you can bake directly on a 13x18-inch half sheet pan ). In a small bowl, whisk together the remaining egg and 15 grams milk for the egg wash. Place a piece of parchment paper on top of a pizza peel or upside-down sheet pan. Tip the proofed dough out to the center of the parchment paper so the seam is facing down. Lightly brush the entire surface of the dough with the egg wash. Using a razor blade, baker’s lame, or sharp knife, make a cross shape with two shallow straight lines that intersect right at the top-center of the dough. Sprinkle on the sliced almonds (if using), slide the parchment paper onto the baking stone or sheet pan, and bake for 20 minutes at 400°F. After 20 minutes, rotate the parchment paper halfway and reduce the oven to 350°F (175°C). Bake the mazanec for another 25 to 30 minutes, until it’s golden brown and the internal temperature is around 200°F (93°C). Remove from the oven and let cool completely on a wire rack. If desired, fill a fine-meshed strainer with confectioners’ sugar and liberally dust the top of the mazanec. This is best the day it’s baked, but can be stored on the counter for 3 days, covered.
I hope the recipients enjoy this bread.
I’ll post photos of the Mazanec once it has cooled enough to sprinkle with the icing sugar.