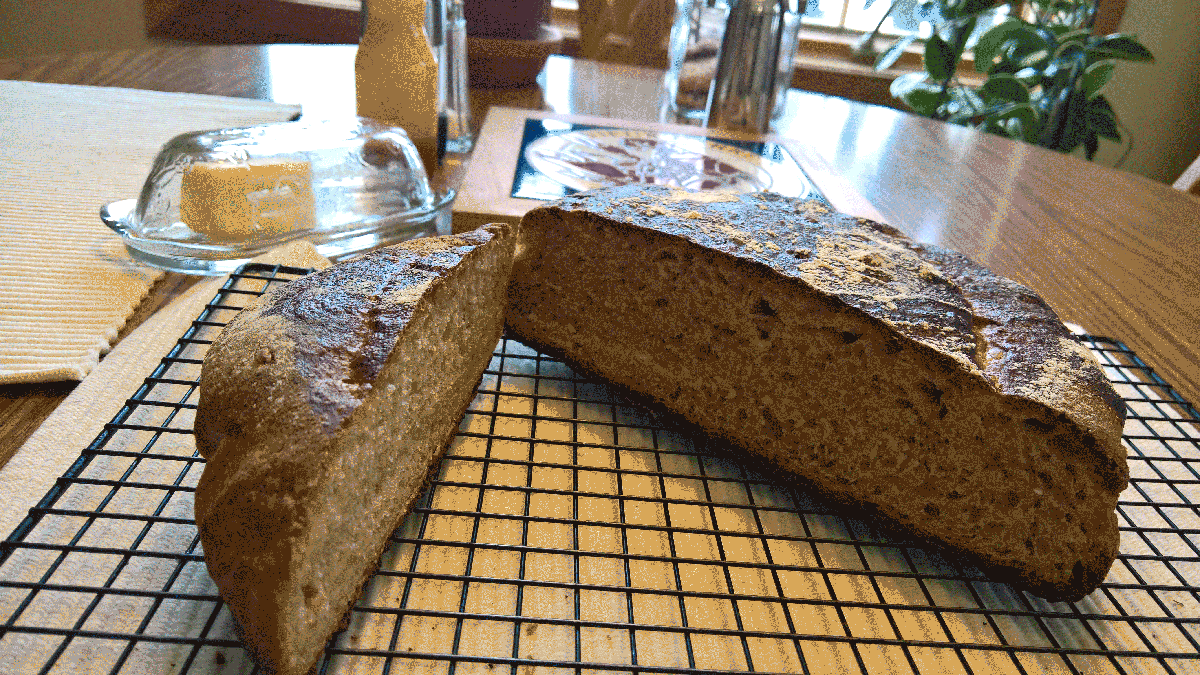
Artisan Sourdough Spelt Bread with Spelt Berries.
_https://en.wikipedia.org/wiki/Spelt _
In a 100 gram serving, uncooked spelt provides 338 calories and is an excellent source (20% or more of the Daily Value) of protein, dietary fiber, several B vitamins and numerous dietary minerals (table). Richest nutrient contents include manganese (143% DV), phosphorus (57% DV) and niacin (46% DV). Cooking substantially reduces many nutrient contents.[10] Spelt contains about 70% total carbohydrates, including 11% as dietary fiber, and is low in fat (table).
Based on the no-knead bread and the Tartine Method of gluten development
Prep Time: 2 hours
Cook Time: 45 minutes
Total Time: 12 hours
Yield: 1 Loaf
Ingredients
• 2 cups (256g) Organic spelt flour
• 2 cups (256g) white bread flour (I prefer King Arthur General Purpose)
• 1 1/2 tsp. salt
• ¼ cup honey
• 1 1/2 cups purified water (354g)
• ½ t instant yeast
• 3/4 cup starter
Instructions
• Mix together the dry ingredients. (spelt, white flour, salt, yeast)
• Dissolve 3/4 cup starter and ¼ cup honey into purified water warmed to about 80
• Add water / starter to dry ingredients and stir until the water is incorporated.
Once you have a sticky loaf, pull away from the sides of the bowl with a scraper, while spraying the sides of the bowl with olive oil to help prevent sticking. Turn the loaf over several times in the oiled bowl with the scraper. Spray to top with a light coating of olive oil to trap the moisture. Let rest 20 minutes to begin the yeast feast.
_At this point, I prefer the Tartine method (https://www.bing.com/videos/search?q=Youtube+Tartine+Method+video&view=detail&mid=D771C7EA0D99326EE8A9D771C7EA0D99326EE8A9&FORM=VIRE) .Perhaps its partly because I love to play with the dough, but I also personally find that the technique improves the internal structure of the bread which makes it easier to handle during the process and yields a better crus_t
• Using the Tartine Method (see video) stretch and fold the dough on 20-minute intervals
• Cover with plastic and let rise in the refrigerator 10-14 hours (I do this overnight).
• After the dough has risen to almost twice its original size, take it out of the fridge, and allow it to warm to room temperature (I use the proofing setting on my oven for this) – about 1 hour.
• Follow video instruction for folding and the tension pulls. (Add wheat berries to the top of the stretched dough, prior to folding and tensioning)
• Cover loosely with plastic and rest for 20 minutes.
• Transfer to well-floured towel or proofing basket. Cover with damp towel and let rise about 2 hours. (I use my proofing oven and refresh the towel with warm water on ½ hour intervals. After 1 ½ hours, I move the proofing bowl to the stove top and preheat my cloche to 450° in the oven for ½ hour).
• Turn the loaf out of the bowl into the baking vessel (I like to use a piece of parchment paper over the proofing bowl to help control the loaf when transferring it to the very hot vessel.)
If you want to apply a stencil or crust treatment, do it quickly and immediately after transferring the loaf to the cloche
• Bake in covered La Cloche or Dutch oven preheated to 450° for 30 minutes.
• Remove cover; reduce heat to 425 degrees and bake an additional 20 minutes.
When you take the loaf out of the oven, the internal temperature should be between 205-210°
• Let cool completely on rack. At least an hour.
As you can see from the picture, the loaf doesn’t last long after cooling. The smell drove my wife and I nuts and we cut into it as soon as possible. I like to cut the boules in the middle and from both sides, so that I can push the ends together in the wrapper and preserve the moisture in the fridge.
I hope this is helpful, and that you have as much fun as I did.
Dan Kline
