I’ve been making a kind of pan gallego de moña a lot recently. I love making it and feel like I’m really perfecting it, except for one thing: often it has a pretty well distributed irregular open crumb, which is what I want, but sometimes I get very large cavities, typically right around the moña near the top. The bread is still delicious but I don’t like this much unbroken open space as it makes for awkward sandwich slices etc.
I don’t understand exactly what is causing this. Any ideas? I can supply more detail on method and proportions I use if needed but I thought I’d see if there might be more general explanations I could look into before I launched into deep specifics…
Thanks for your thoughts…
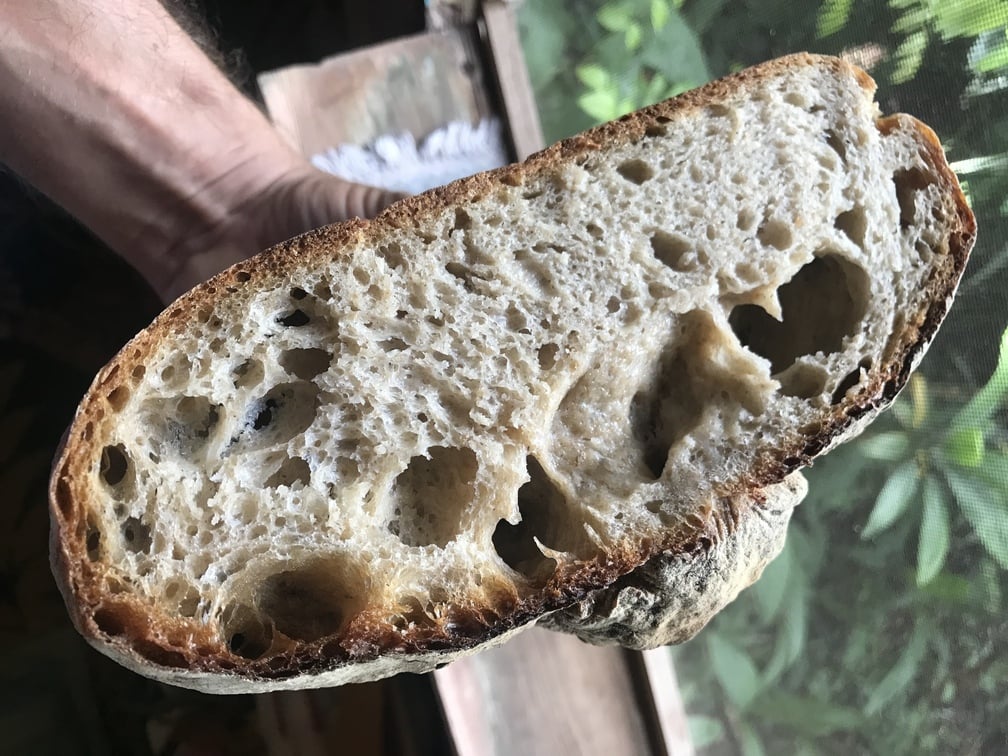
edited to add photo showing a typical example of the issue
The crumb in your picture is probably caused by one of two conditions; either very hydrated dough, or under-fermented dough. I am guessing the later simply because you have been pursuing pan gallego de moña enough to know what the ‘feel’ of the dough should be so not likely to be overly hydrated.
The mouse holes in the crumb cannot be achieved with regular dough consistency associated with sourdough breads. To make it intentionally you need a dough that is very, very hydrated, like coccodrillo bread dough, like, more liquid than solid. I can usually achieve that crumb making a very hydrated ciabatta dough. Personally, I like the mouse holes, a lot! However, they are problematic when dressing a slice of bread with honey.
When the holes in a crumb are 1-inch (25mm) or larger) they are often refereed to as “mouse holes”.
I also get a weird crumb when I make pan gallego. I think pulling up and twisting the top of the dough rips some holes inside, at least when I do the shaping.
Thank for these insights–and for teaching me the term “mouse holes”.
Hydration is consistently 80%. I don’t use bread flour, but an ap (with about 20% whole grain), in case that might have something to do with it, but it feels good to work with…
Slightly underproofing seems very possible: it’s been very warm here and I’ve been using a modest amount of salt (1%), so I’ve gradually shortened proofing times, thinking it best to err on the side of less because I want it to keep its shape well and have a nice spring in the oven, but I may well have been overcompensating. still doesn’t seem like the only factor, but that might be contributing…
Ok, thabks, that’s encouraging to hear that this is very common!
Also the idea that making the moña has something to do with this is a very interesting one. Maybe I’ll have to experiment with modifying my technique and review some videos of again more closely–or just accept it as the nature of the beast…
It’s hardly a huge problem–it just bugs me not knowing why it happens sometimes but not at other times!
This video is interesting and there are subtitles if you don’t speak Spanish. Even if you speak a little Spanish, you’ll pick up on what she’s saying because she speaks very slowly and with a ton of enunciation, and a neat Eastern European accent.
Do you mean overproofing? I think of underproofing mouse holes as being surrounded by really dense areas, and overproofing mouse holes being surrounded by less dense areas.
What I was thinking of is called “fool’s crumb” and is caused by under-fermentation, learned about it from Trevor Wilson’s book, “Open Crumb Mastery”. Search the term “fool’s crumb”.
I have experienced the situation of under-proofing during bulk fermentation of higher hydration dough. This will cause mouse holes on the top of the loaf, and denser crumb on the bottom. The more the dough is under-proofed during bulk, the more mouse holes on top. It doesn’t take much, just a little under-proofing during bulk is all it takes.
The video you posted is of open crumb, the pic from the OP is not open crumb. Fool’s crumb will “fool” one into think they have open crumb when the do not.
Gotcha. I’m prone to being fooled by dough bubbles when I laminate a dough during the bulk fermentation – so much air is trapped via mechanical means as opposed to fermentation co2 production, and if I’m not careful, I think the bulk fermentation is finished too soon.
This thread has a good pic of a fool’s crumb with the doming of the bread shape too.
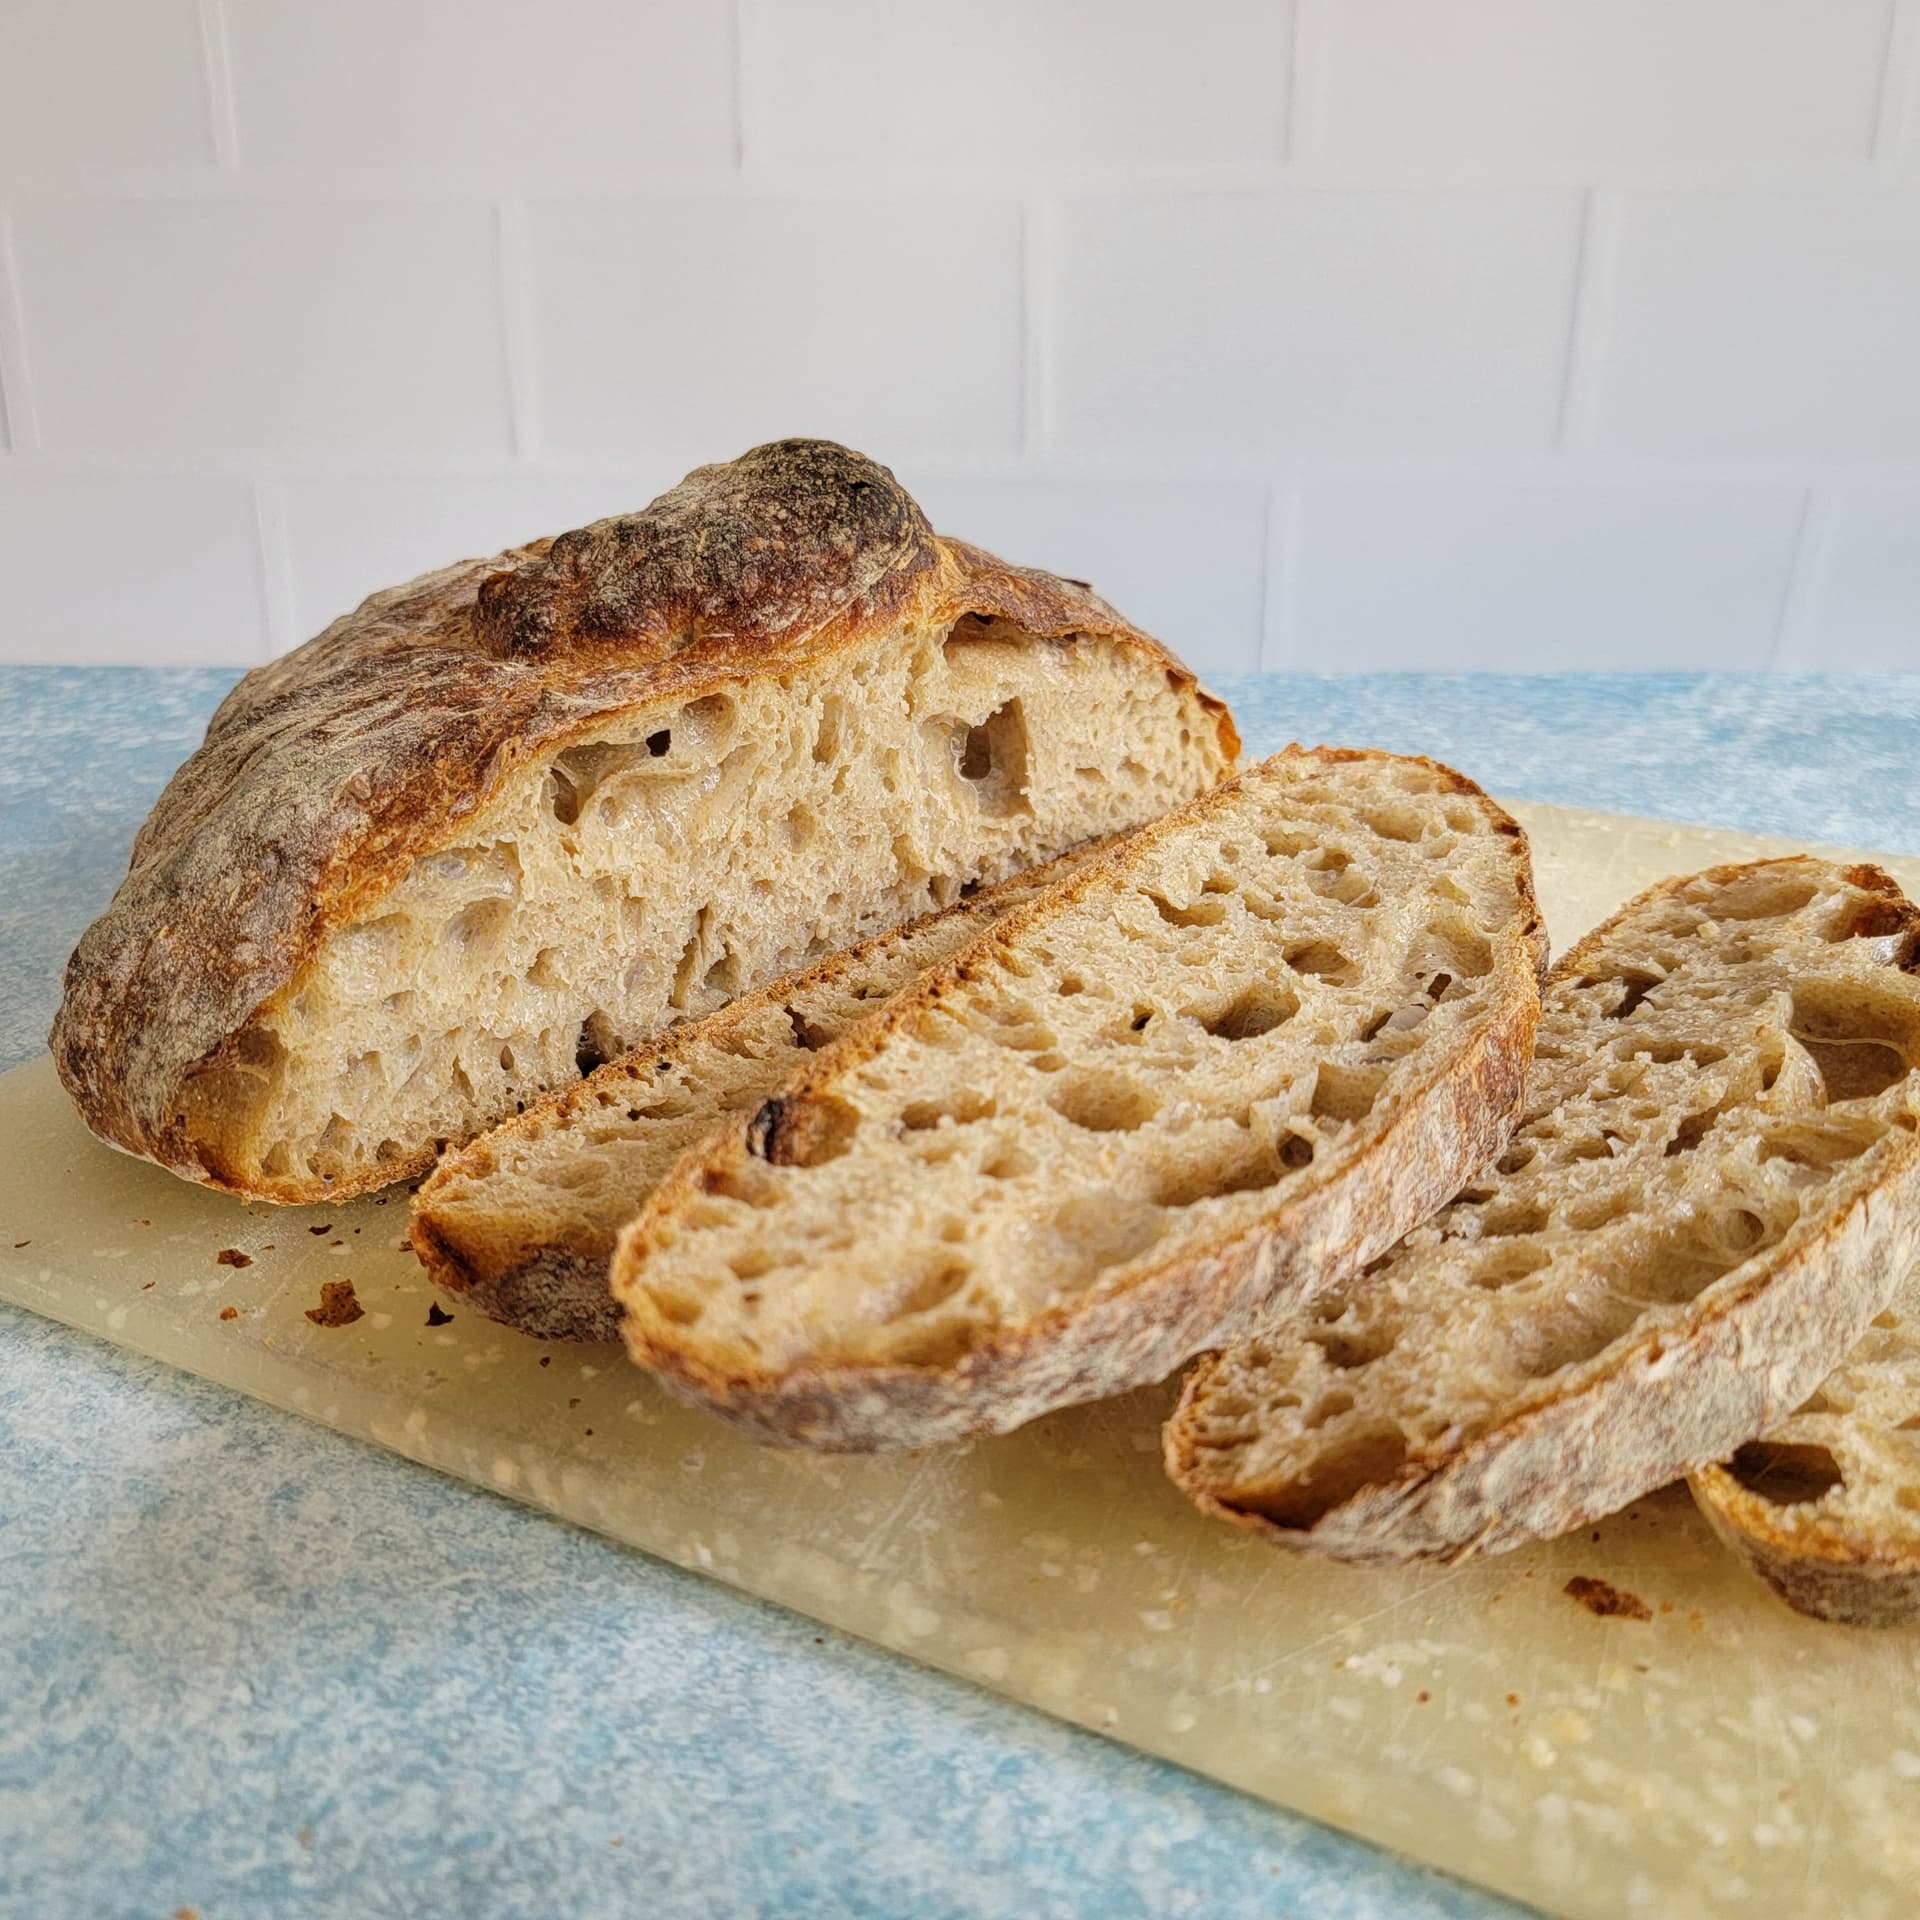
I now believe I have indeed been underproofing these a bit. It really fits the available evidence from the clues you guys have shared and the further research I’ve done along these lines. I made another one the other day and I think I may have underproofed that one a bit too (long story) but the crumb structure was better than the example I showed above.
That is a cool graphic! You inspired me to work on my pan gallego game. My first bake was over shaped and over proofed. My second turned out good with basically a 10-minute time span between dumping the dough onto my countertop and loading it into the oven. Hot kitchen…so maybe I’d do 15 minutes in the winter.
I just watched that video again all the way through. I understood all the important bits, but her accent was distracting because I found it so fascinating. To me it almost sounds a little Portugese at times–I wonder if she learned that language first, or maybe I’m just hearing things…
Anyway, the part about only letting it rest for 15-20 minutes before baking surprised me. I shape it very much as she does there, being careful not to squeeze out the air, but the loaves I make I have been proofing 1-1 1/2 hrs–the most recent i pushed to 2 because I seemed to have underproofed some of the others in recent weeks (and just to clarify, it’s not cold here: the kitchen was probably high 70s the whole time). How does this work: How can a loaf loaf not be underproofed after only 15 minutes? Or is it because she used yeast? Or does it mean that the bulk ferment prior to shaping needs to be more thorough to compensate? I’m struggling to make sense of this particularly in light of earlier discussion in this thread…
I think this bread is a different beast when it comes to internal structure. You’re not flipping it out of a proofing basket and I think that’s why there are a lot of air bubbles on the top of each slice … well that and the pulling up of the moña stretching the top of the dough.
My dough almost doubled during the first rise – perhaps you could say it would have more than doubled even except I did it fair amount of stretching and folding after it had already started expanding.
After dumping it onto the counter, I barely shaped it and also barely gave it time to have bubbles rise to the top.
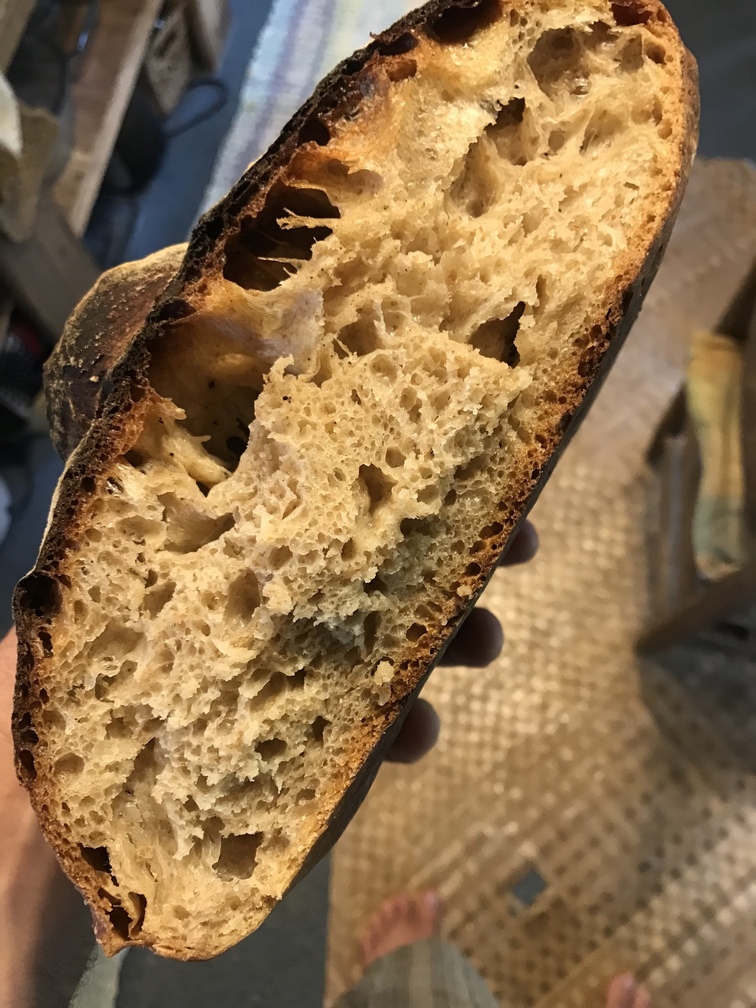
Hmm, ok! Thank you. You definitely must be on to something regarding the moña formation contributing greatly to the formation of the holes. Here’s my far less glamorous shot of my most recent iteration I finished yesterday.
Maybe there’s something I’m not seeing but it really doesn’t look like classic fools crumb–unlike some of my slightly underproofed ones the top and bottom seem more similar and the only real “mouse holes” are immediately around or beneath the moña.
I’d like to experiment more with the “no proof” method you and she are doing, but I’m wondering if it will work as well in my toaster oven without bottom heat control nor a baking stone. I must rely on a preheated metal tray for all my bottom heat (and as you may have noticed, the oven’s tiny size tends to over-heat the top of a tall loaf, hence the very crispy moñas). I’d also like to experiment with alternative moña making techniques–I’ve seen a video of similar bread being mass produced where they didn’t stretch but simply poked their fingers into the dough to create a moña without actually pulling, twisting, or knotting (no idea now how to find it again, sorry!). Perhaps (probably?) this would create a different structure. Also, this guy on IG has a video demonstrating 3 distinct ways to “empiruchar” or “hacer la moña”. I tried but I cannot figure out if there’s a way to link to the reel here but his account is “opelouro” and the reel is from 18 april of this year if you want to find it. 1 method resembles that woman’s technique but 2 are certainly a little different.
Your loaf doesn’t look under proofed to me. The denser areas are not very dense and the crumb looks like the panes gallegos that I overproofed recently – the dough more than doubled in the bucket, then spent probably 1.5 hours getting warm on the counter during a preshape, bench rest, shape, final proof. The crumb kinda collapsed downward except for the top where bigger bubbles were trapped and twisted around.
All that said, it just occurred to me that another issue could be the metal tray in your oven having less thermal mass than a stone, steel or ceramic baker. You’re probably getting expansion of air in the dough more intensely from the heat on top.
For the bread I put in the oven faster, I started the preheat while it was approaching the end of the first rise.
Here’s the Instagram post of opelouro shaping the moña in different ways.
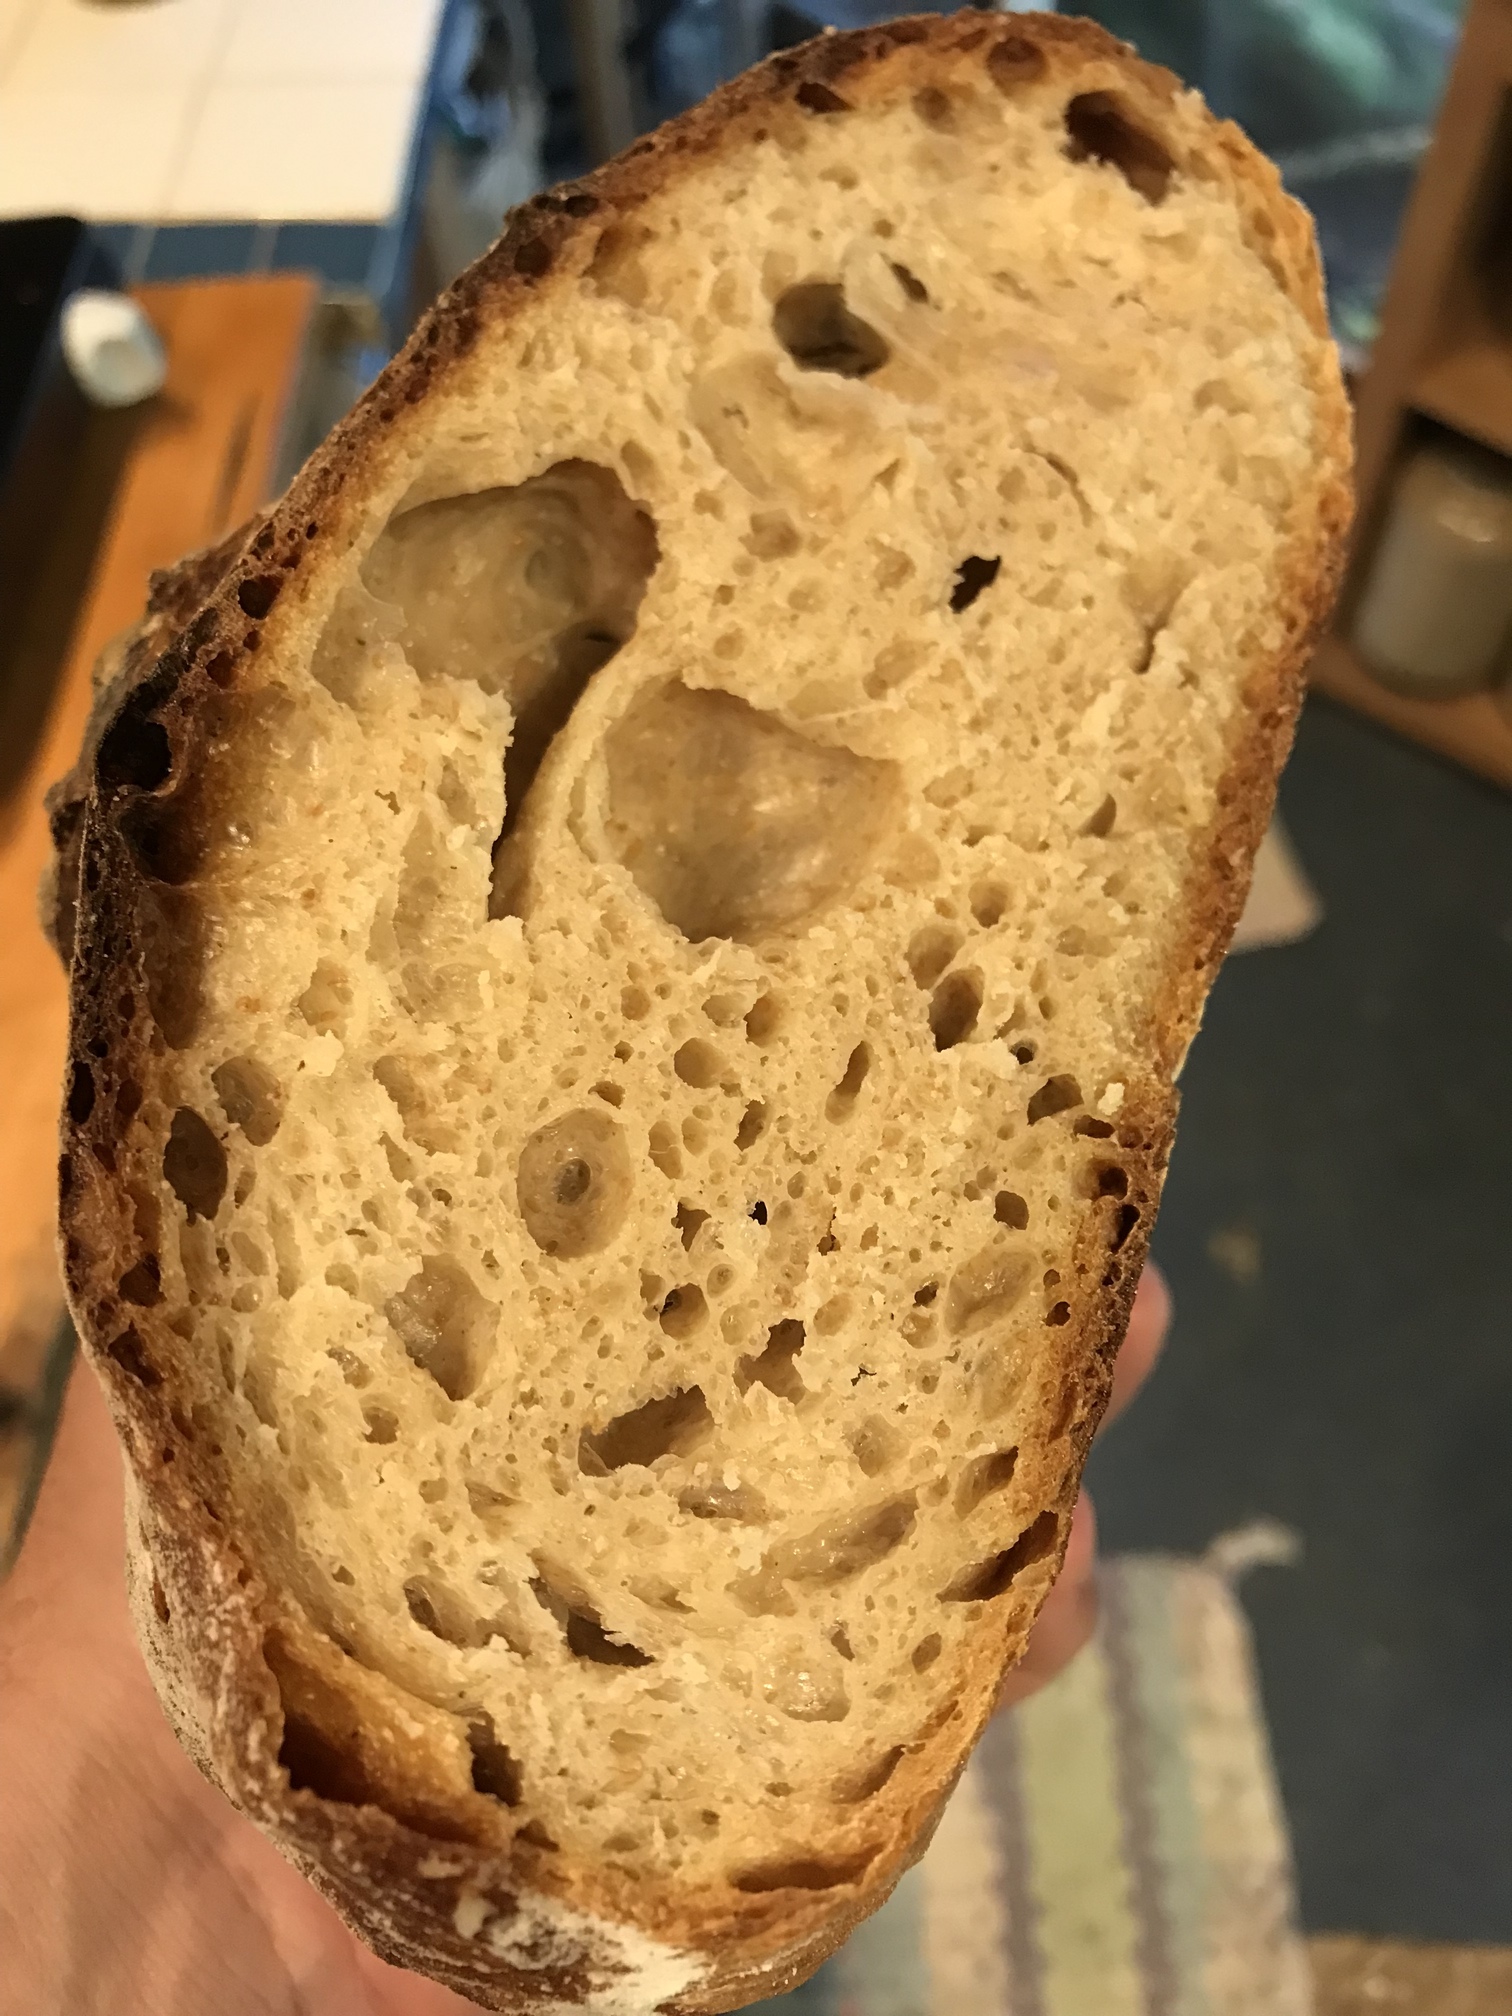
So, just to update, I made another of these today, just like the previous one but this time I rested it for just under 20 mins after shaping and before doing the moña and baking.
It seems to compare favorably with the others. if anything at first glance the holes seem better distributed. I’ve still got some big holes right beneath the moña, supporting that hypothesis. I might make some minor tweaks next time but overall this is a success. Learning I don’t have to proof these like most of my other loaves and may get even better results is a happy game changer for me, offering more flexibility–I can do overnight rises and have fresh bread even earlier in the morning if I time it well.
This has really been helpful and enlightening. Thanks again for sharing your experience and insights! It’s helped my get out of my rut approach things with a fresh eye and a deeper understanding.