100% Stoneground Whole Wheat Hokkaido Sourdough Milk Bread

Back from two weeks off without any baking. My starter was refreshed two weeks ago at 50% hydration, given 1 hour at room temperature then refrigerated. The pH had only dropped to 4.4 or so when I returned so there was plenty of food left. I discarded some, then brought the hydration up to 100% and did a small feed. He tripled in 3 hours but had not yet peaked, so I discarded and fed him again. 5 hours later he had peaked at 3.5-4x with the dome just starting to flatten. He was ready to build a levain for this bake.

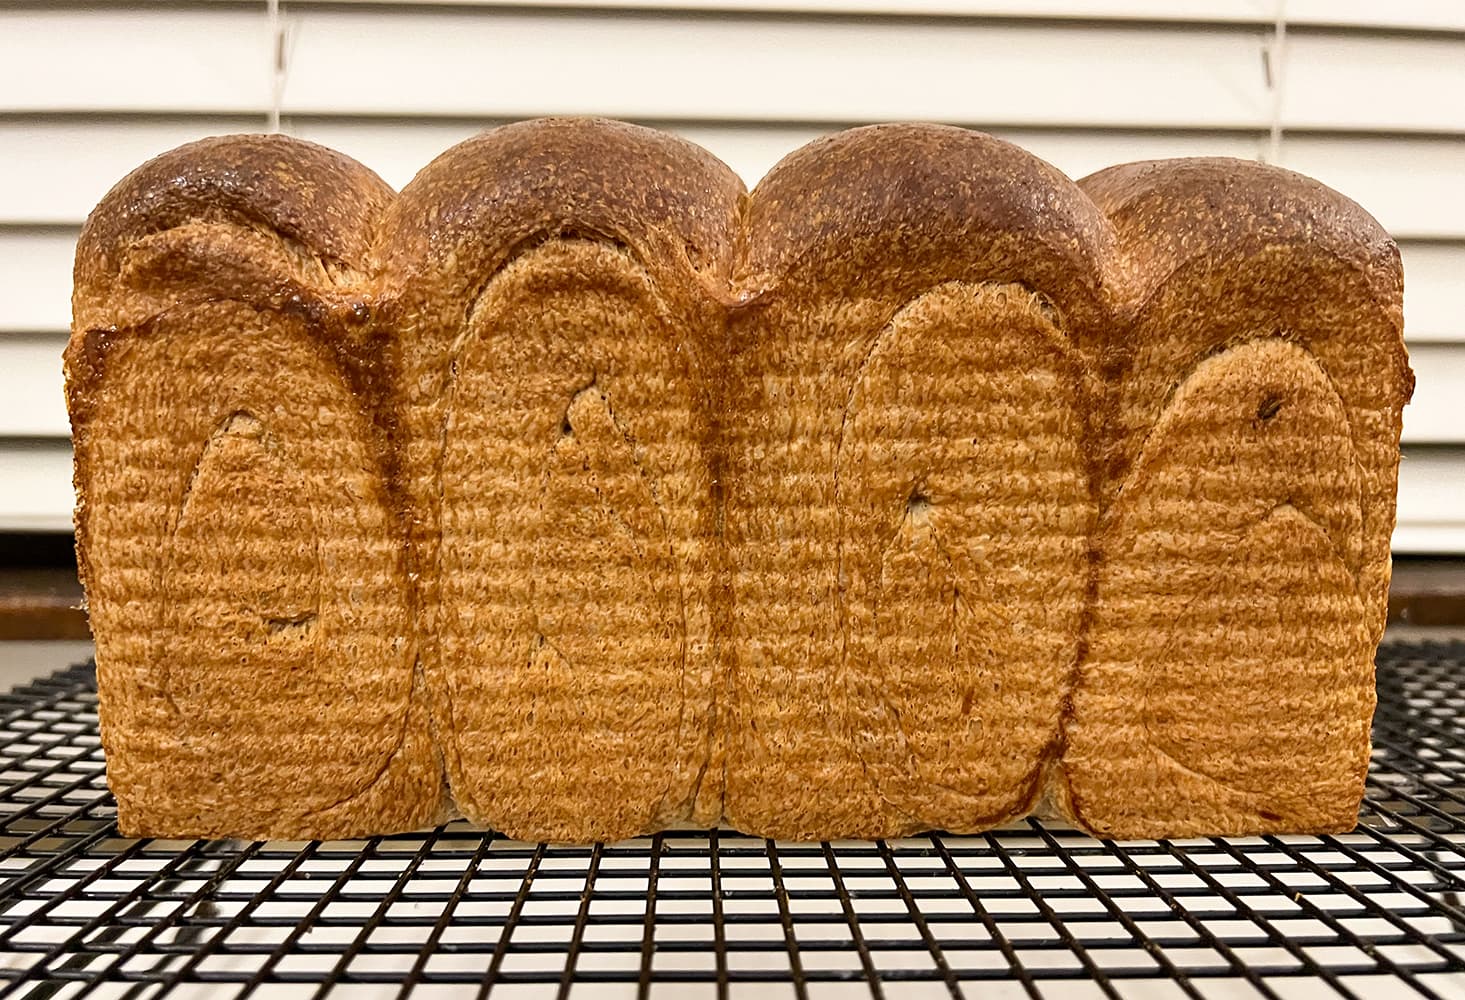
You may have noticed my gradually increasing the whole wheat in my Hokkaido sourdough milk breads lately. This recipe is based on Melissa’s original recipe. I finally decided it was time to do 100% whole wheat and this didn’t disappoint.

Sweet Stiff Starter
• 53g stoneground unsifted organic whole wheat flour
• 24g water
• 18g light brown sugar
• 18g sourdough starter ~100% hydration
1:1.33:2.9:1 starter:water:flour:sugar

Tangzhong classic 1:5 ratio
• 89g milk (adjusted down to 1:5 ratio from original)
• 18g stoneground unsifted organic whole wheat flourWhole Wheat flour

Dough Dry Ingredients
• 9 g vital wheat gluten
· 424 g stoneground unsifted organic whole wheat flour
• 54g sugar 12.5%
• 7g salt 1.6%

Dough Wet Ingredients
• 180g milk (consider adding more milk 5 g next time, dough was stiff)
• 50g egg beaten (about 1 lg egg)
• 60g butter 13.9% softened but do not melt, unless you are mixing with the mixer then melt. Combine with 30 g of flour to make easier to add to dough if hand mixing.

Total flour = 431 g

Total weight 920 g

Pre-bake Wash
• 1 egg beaten
• 1 Tbsp milk

Post-bake Wash
• 1 Tbsp butter

Instructions
Starter
Mix the starter ingredients in a jar or pyrex container with space for at least 50% growth. (See gallery where 150ml grows to approximately 225ml.)
Press down with your knuckles to create a uniform surface and to push out air.
At room temperature, it typically takes up to 10 hours for this sweet stiff levain to be at peak.
Tangzhong
In a sauce pan set on med-low heat, whisk the milk and flour until blended. Then cook for several minutes until thickened, stirring regularly with a spoon or heat-resistant spatula. Let cool in the pan or, for faster results, in a new bowl.

Dough
In the bowl of a stand mixer, briefly whisk the dry dough ingredients, and then add the sweet stiff starter, separating it into 5-6 portions as you add it to the bowl.
Now pour/scrape in all the wet ingredients (including the tangzhong), with the melted butter last. With the dough hook attachment, mix on low speed for a minute, scrape down the sides, and then mix on medium speed for 15-20 minutes. The dough will seem very soft, but as you approach the 15-20 minute mark, it should not stick to your hands and should pass the windowpane test.
Transfer the dough to a lightly oiled bowl, form it into a ball, flip it smooth side up, cover and let rise for 6-12 hours depending on room temperature. You can place the dough into the fridge to chill the dough for about 1.5 hours, this makes rolling the dough easier.
Prepare your pans by greasing them or line with parchment paper.
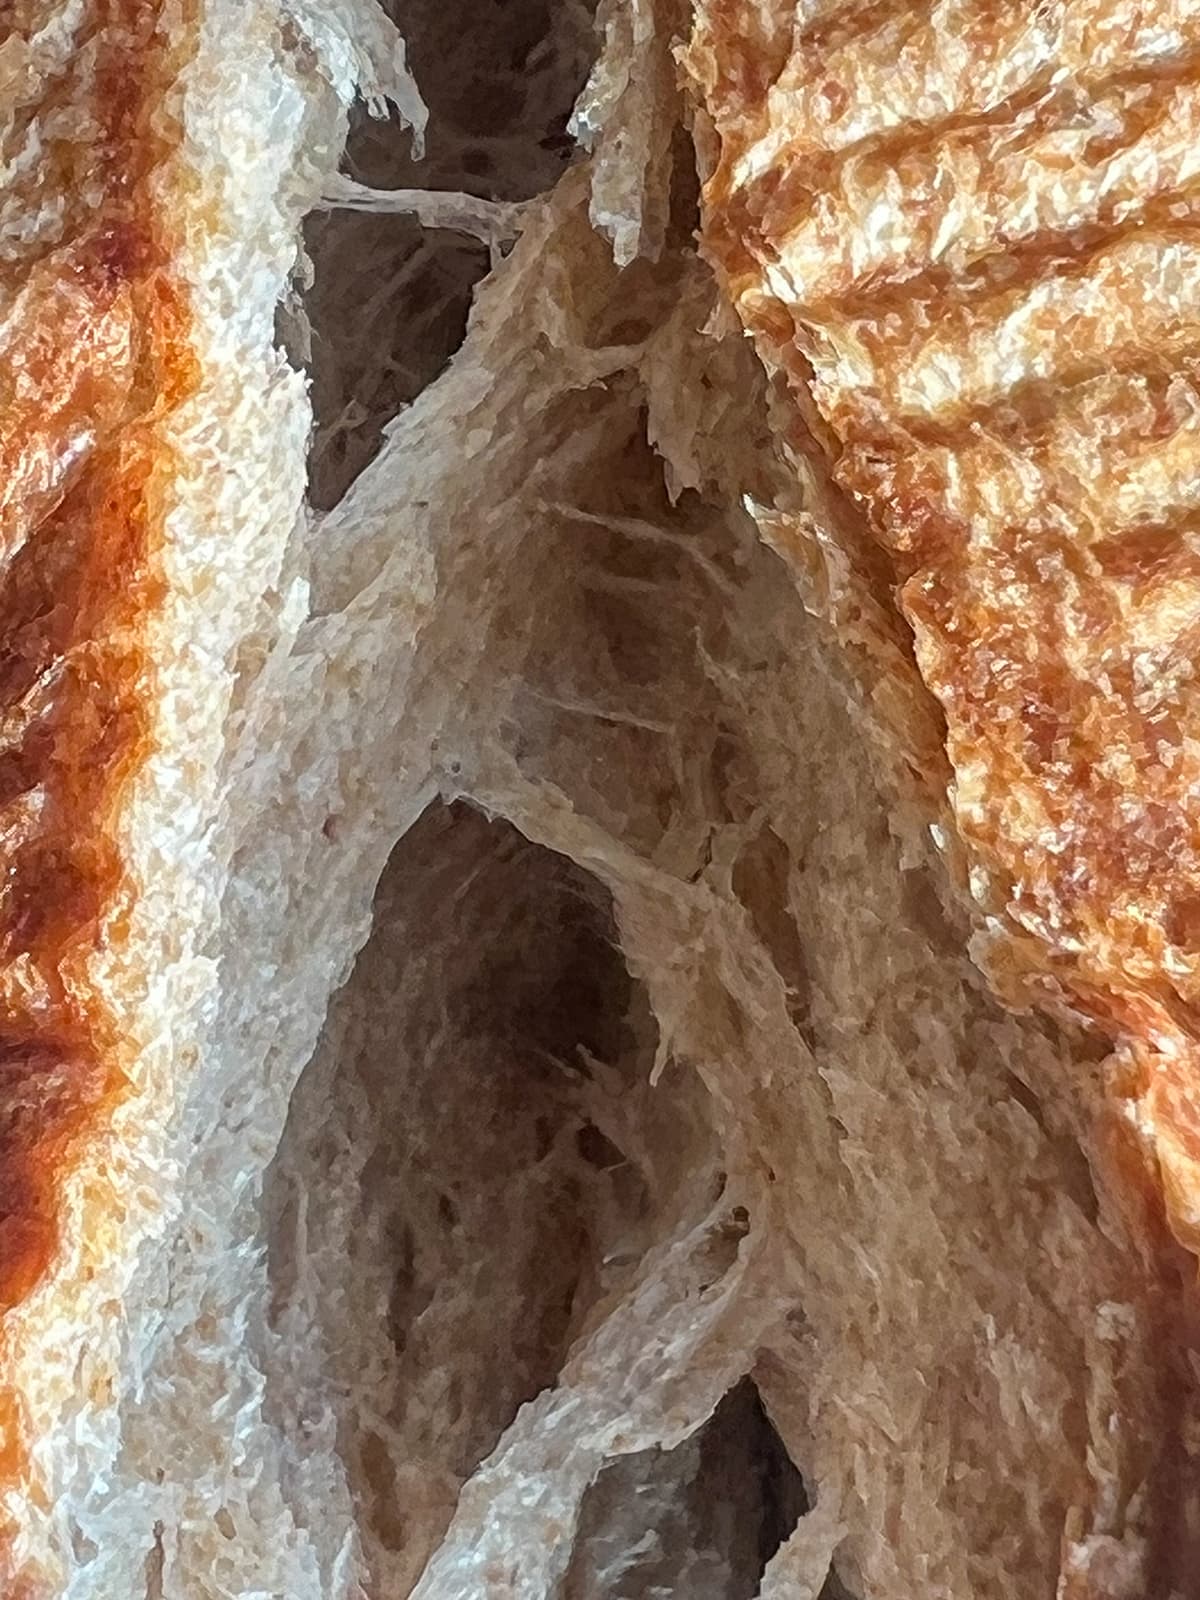
Scrape the dough out onto a clean counter top. Lightly flour the bench. Press the dough into a rectangle and divide it into four. Shape each tightly into a boule, allow to rest 5 mins. Using a rolling pin roll each ball out and then letterfold. Turn 90* and using a rolling pin roll each out to at least 8”. Roll each into a tight roll with some tension. Arrange the rolls of dough inside your lined pan alternating the direction of the swirls. This should allow a greater rise during proof and in the oven.
Cover and let proof for 2-4 hours (more if you put the dough in the refrigerator). I proof until the top of the dough comes to within 1 cm of the top edge of the pan.
Preheat the oven to 350F and brush the dough with the egg-milk wash. Just prior to baking brush with the egg-milk wash again.

Bake the loaves for 50 minutes or until the internal temperature is at least 190F. Shield your loaf if it gets brown early in the baking process. After 50 mins remove the bread from the pan and bake a further 10 mins by placing the loaf directly in the oven on the rack with the oven turned down to 325ÂşF. You can brush the top of the loaf with butter if you wish at this point while the bread is still hot.


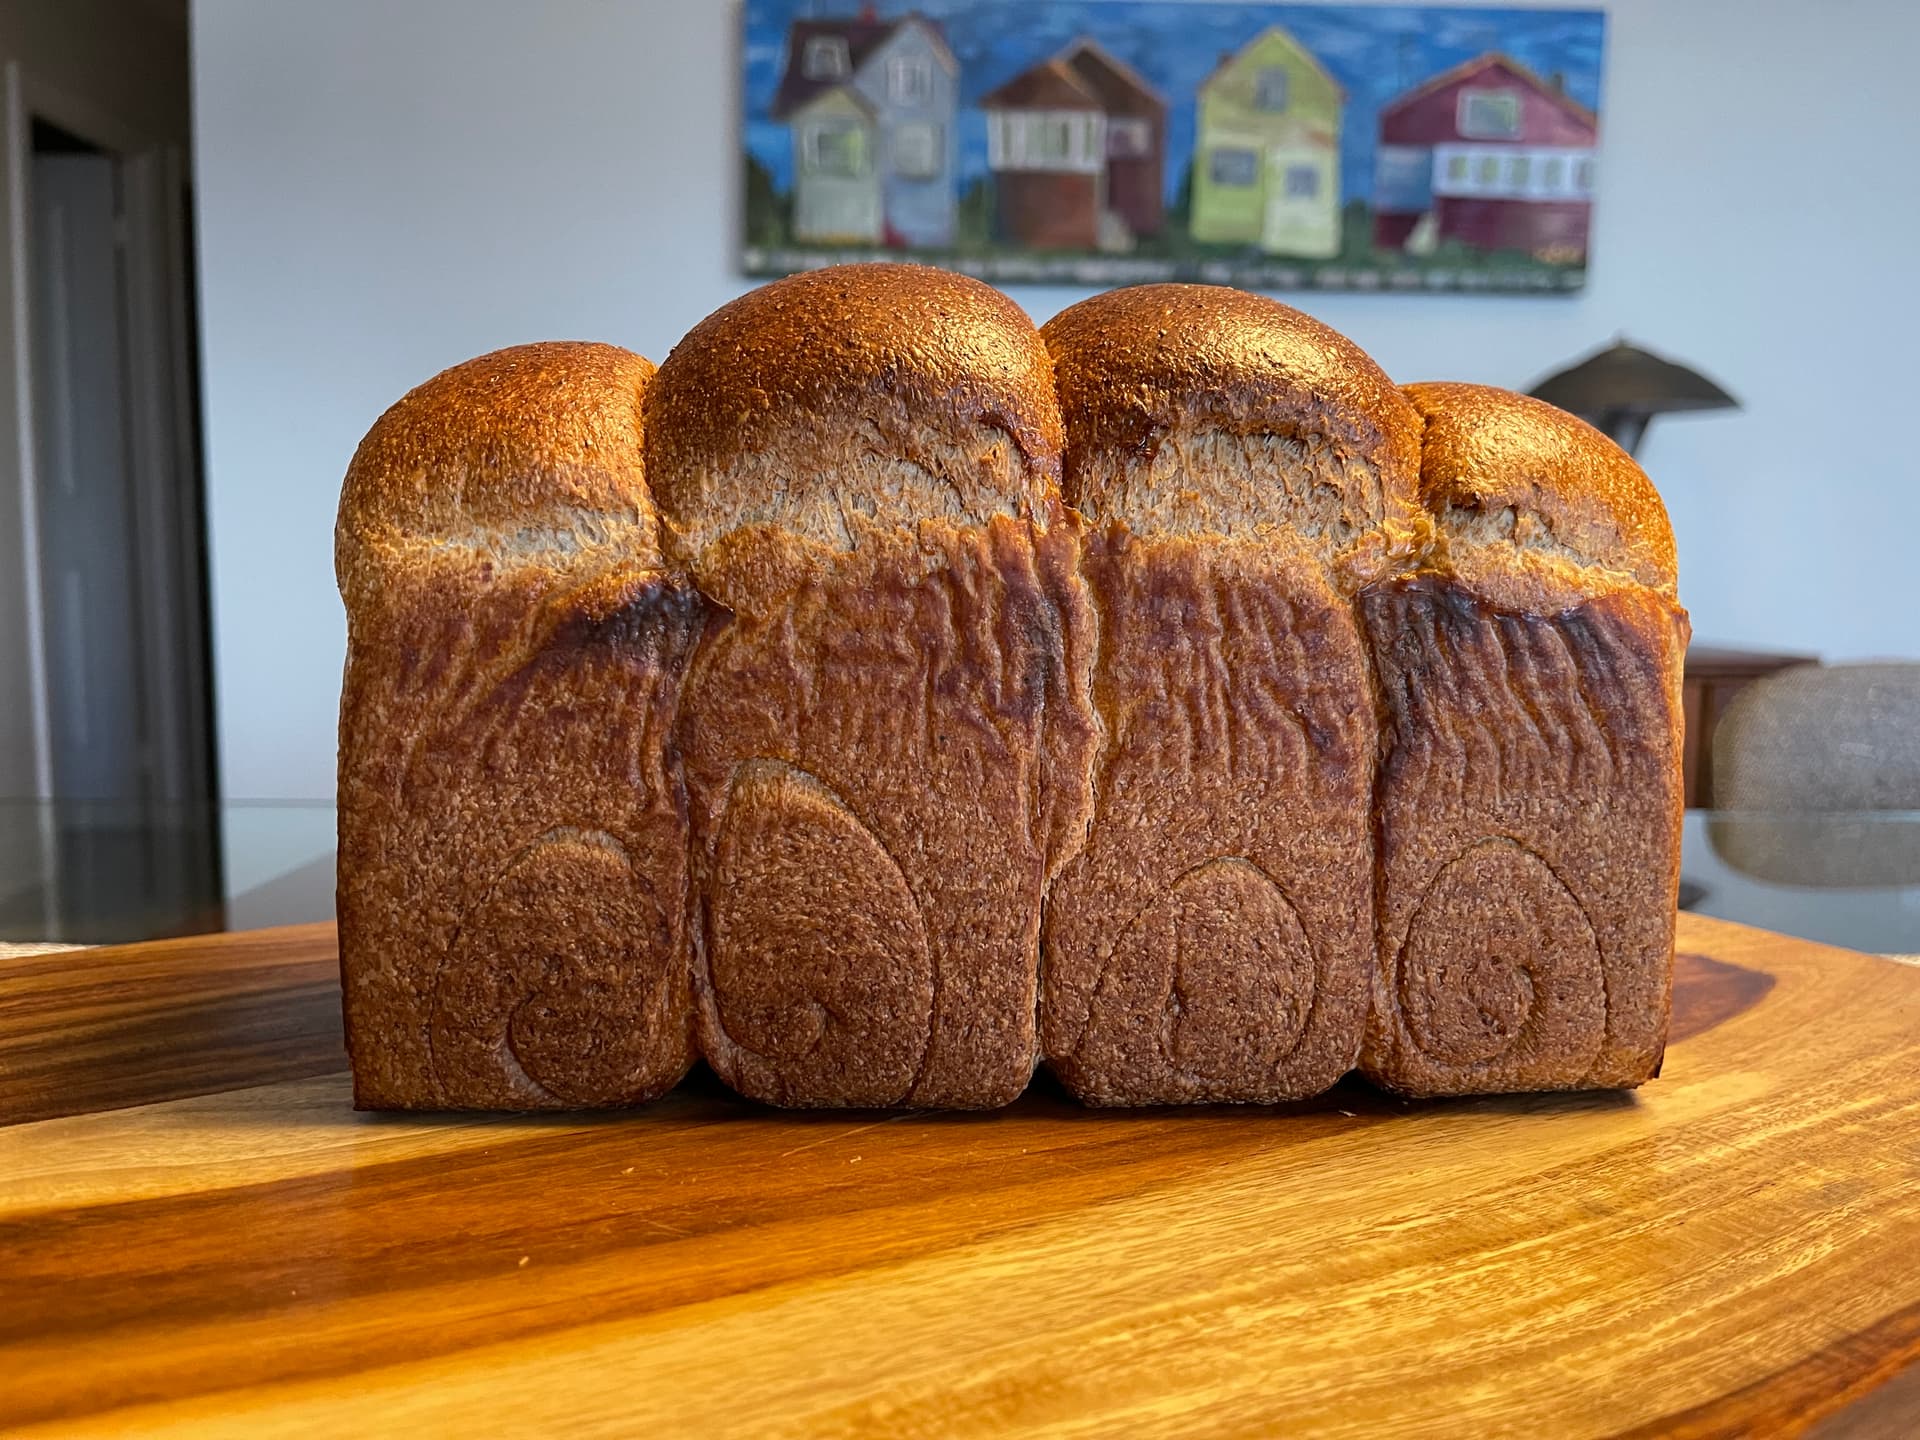
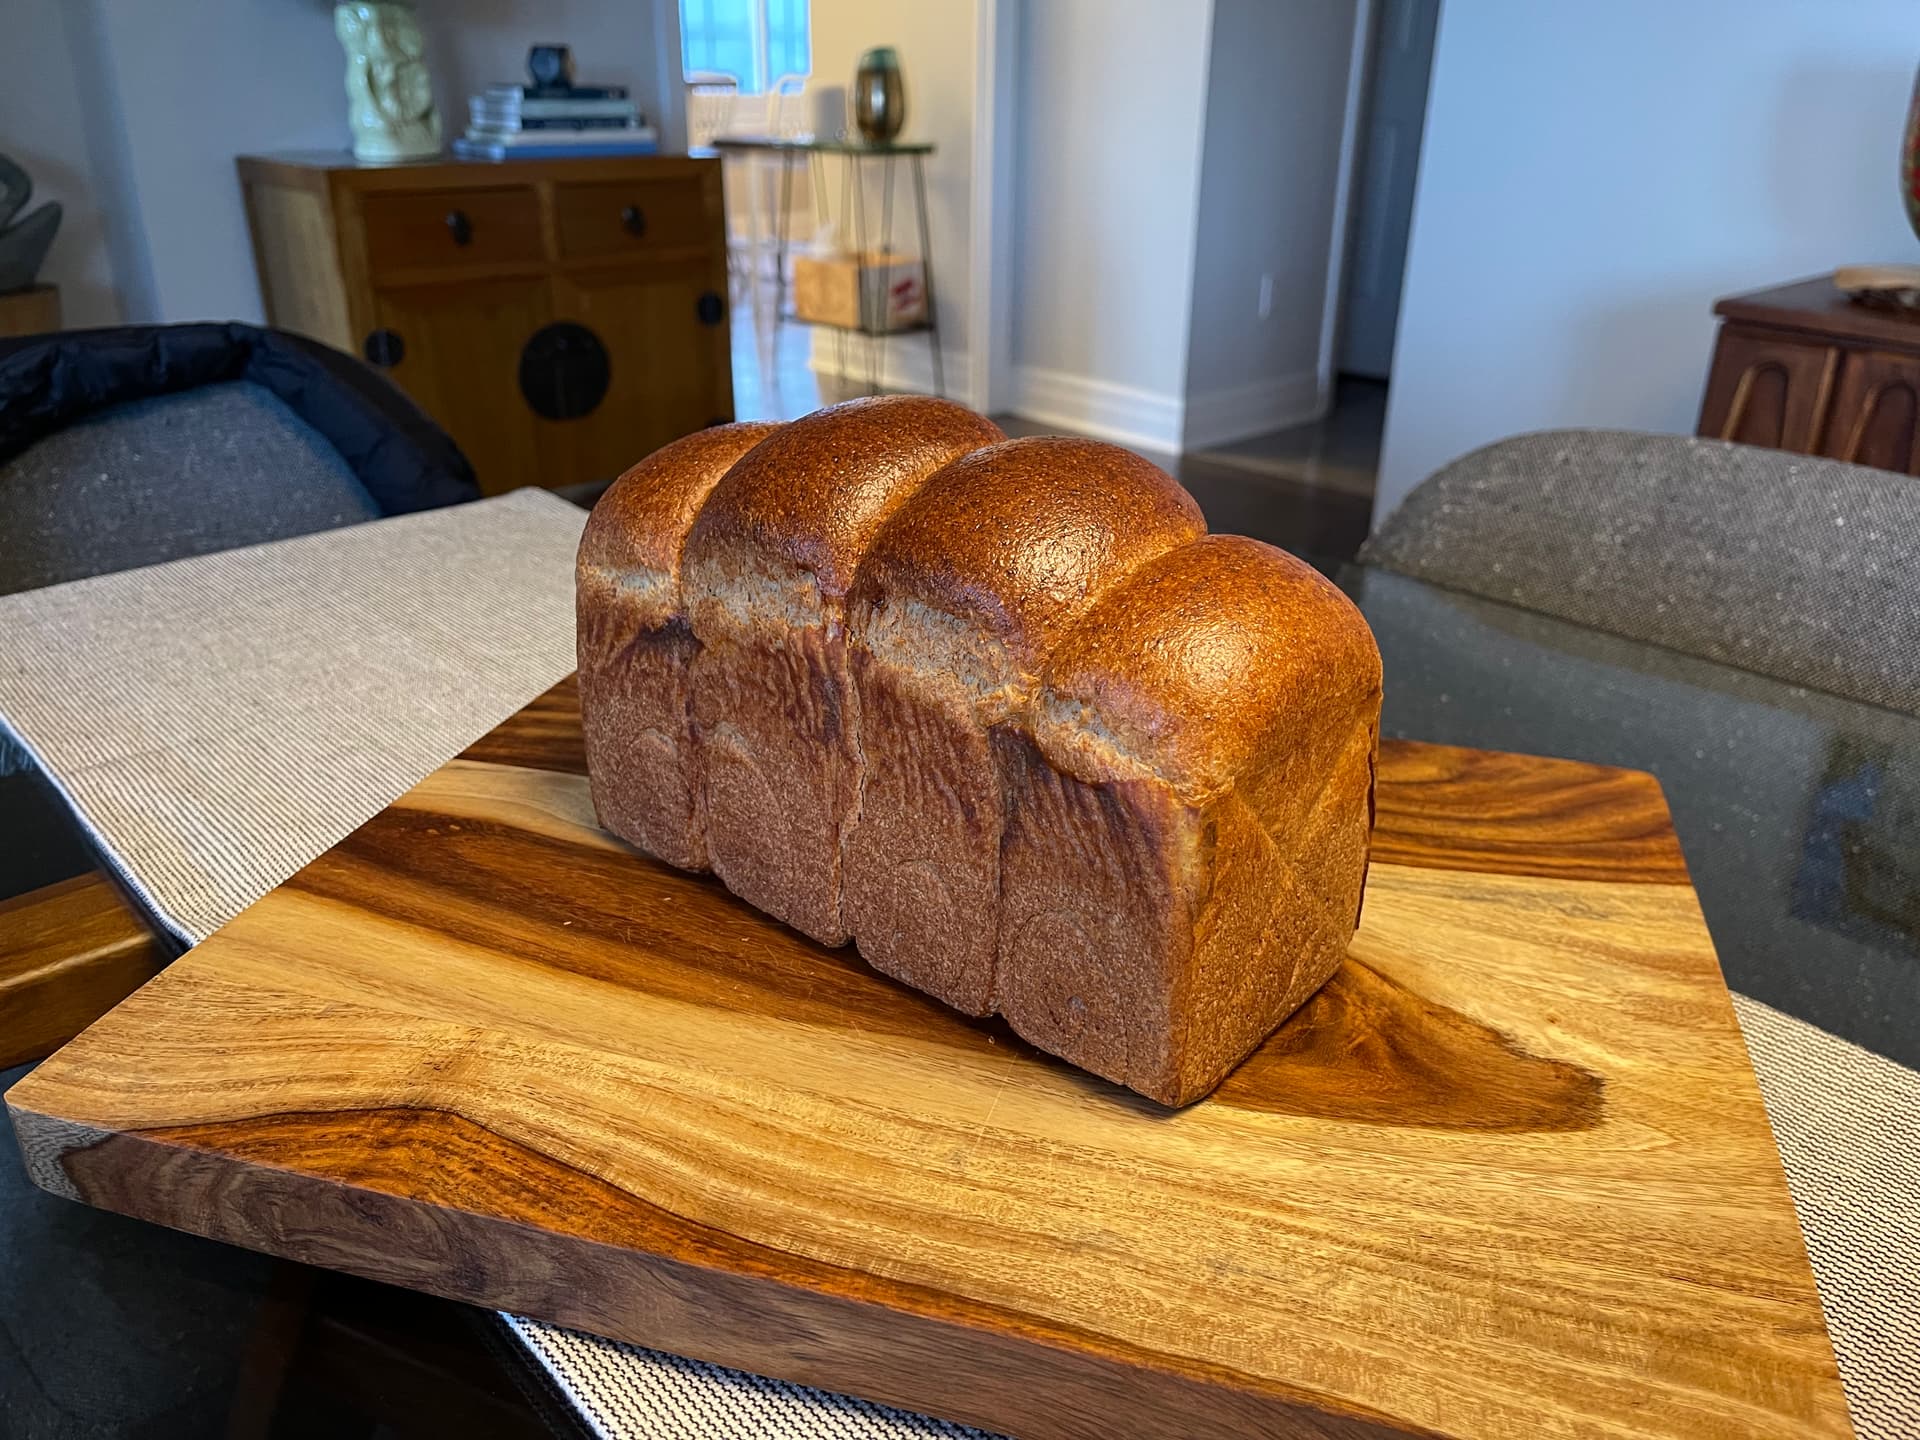
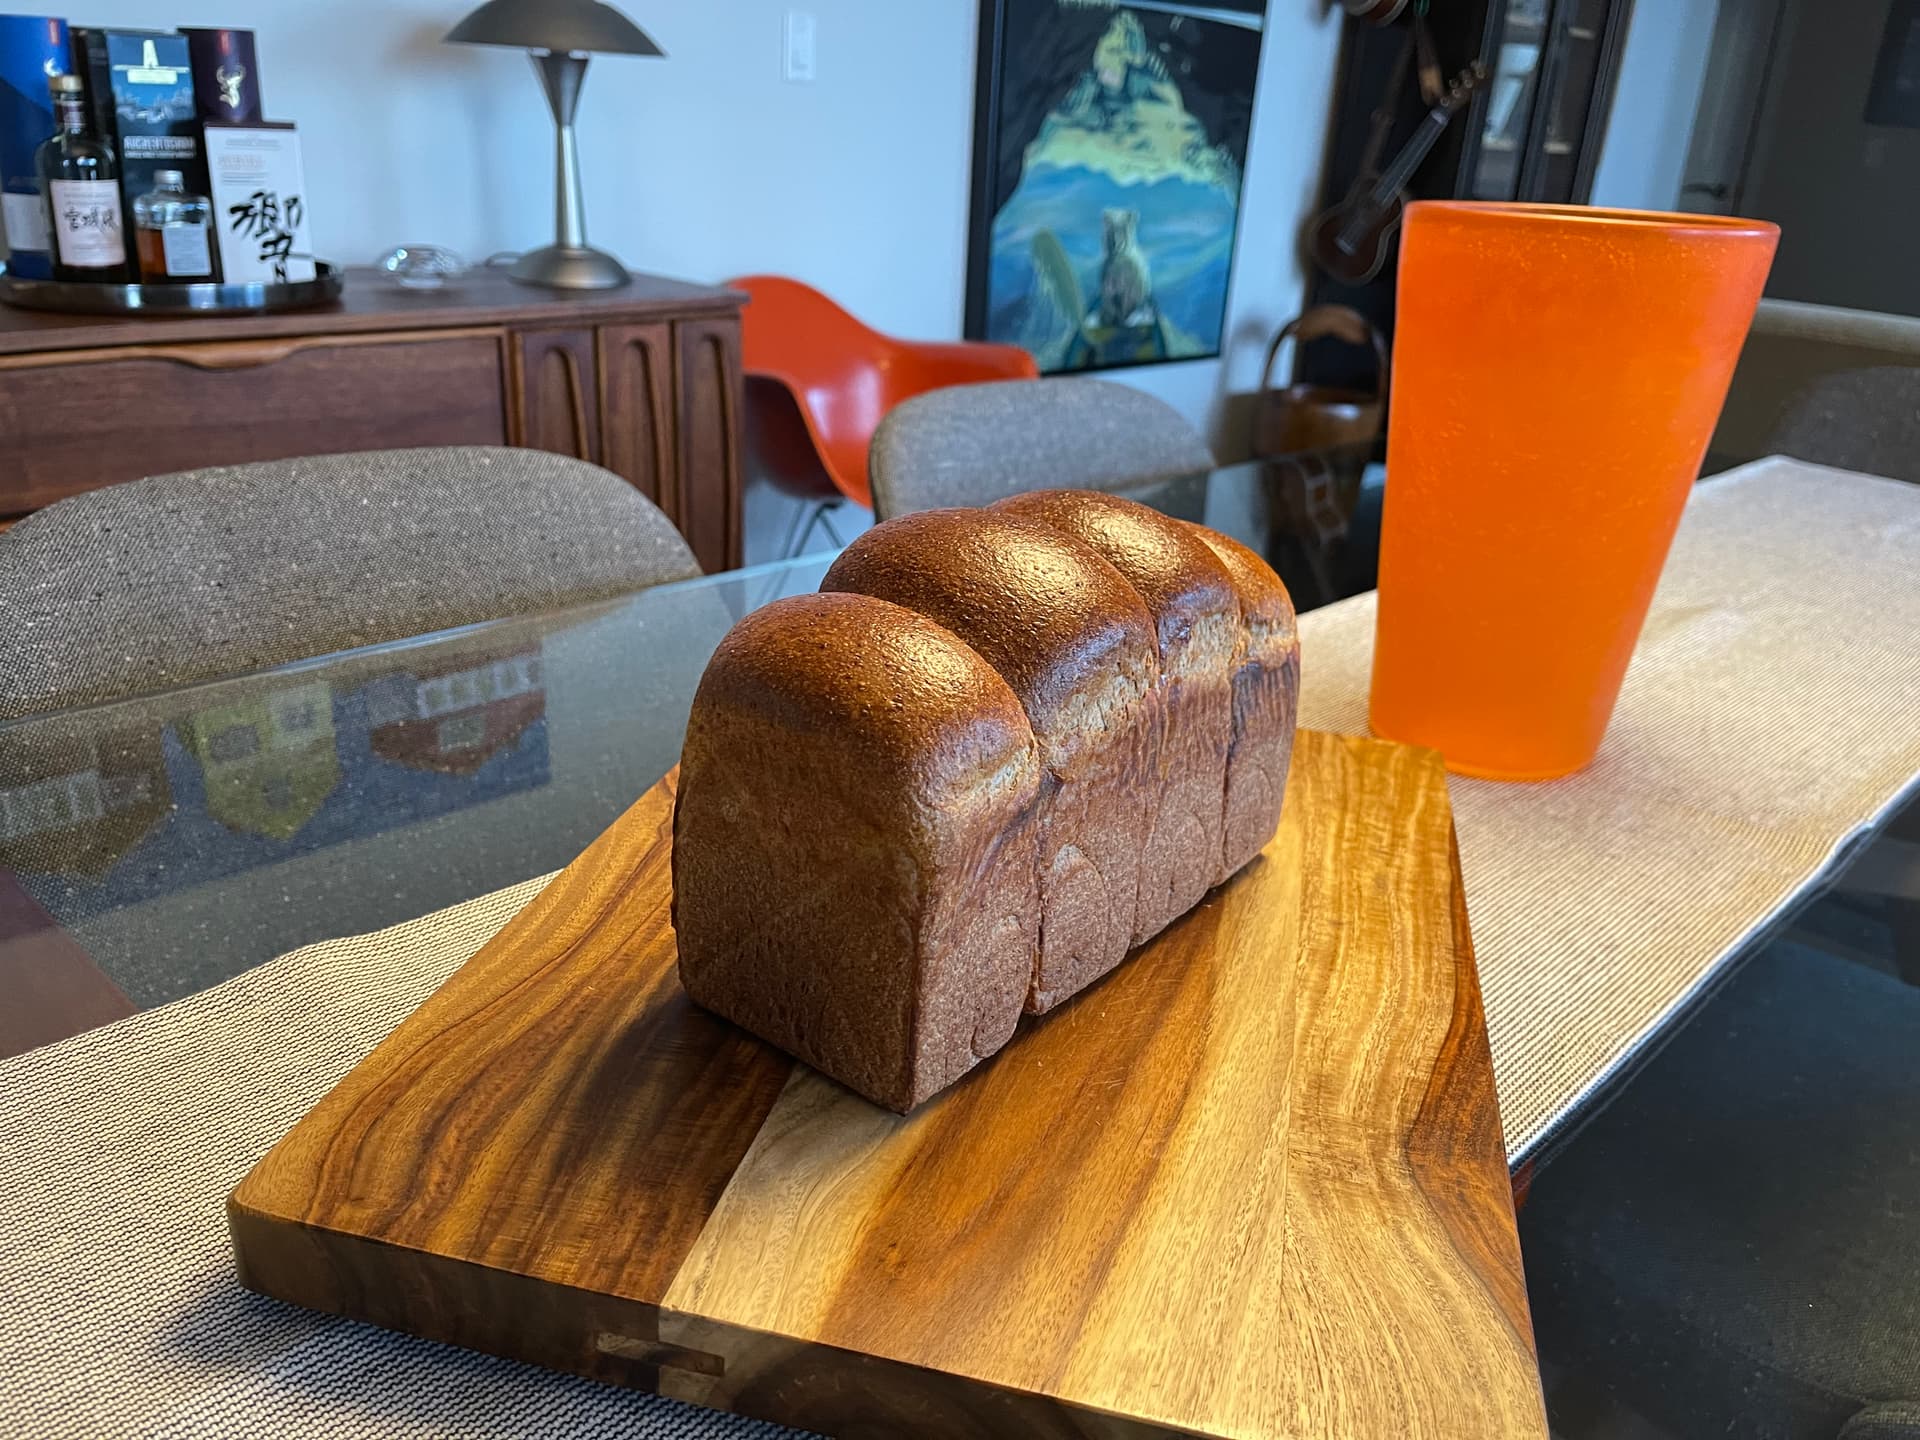
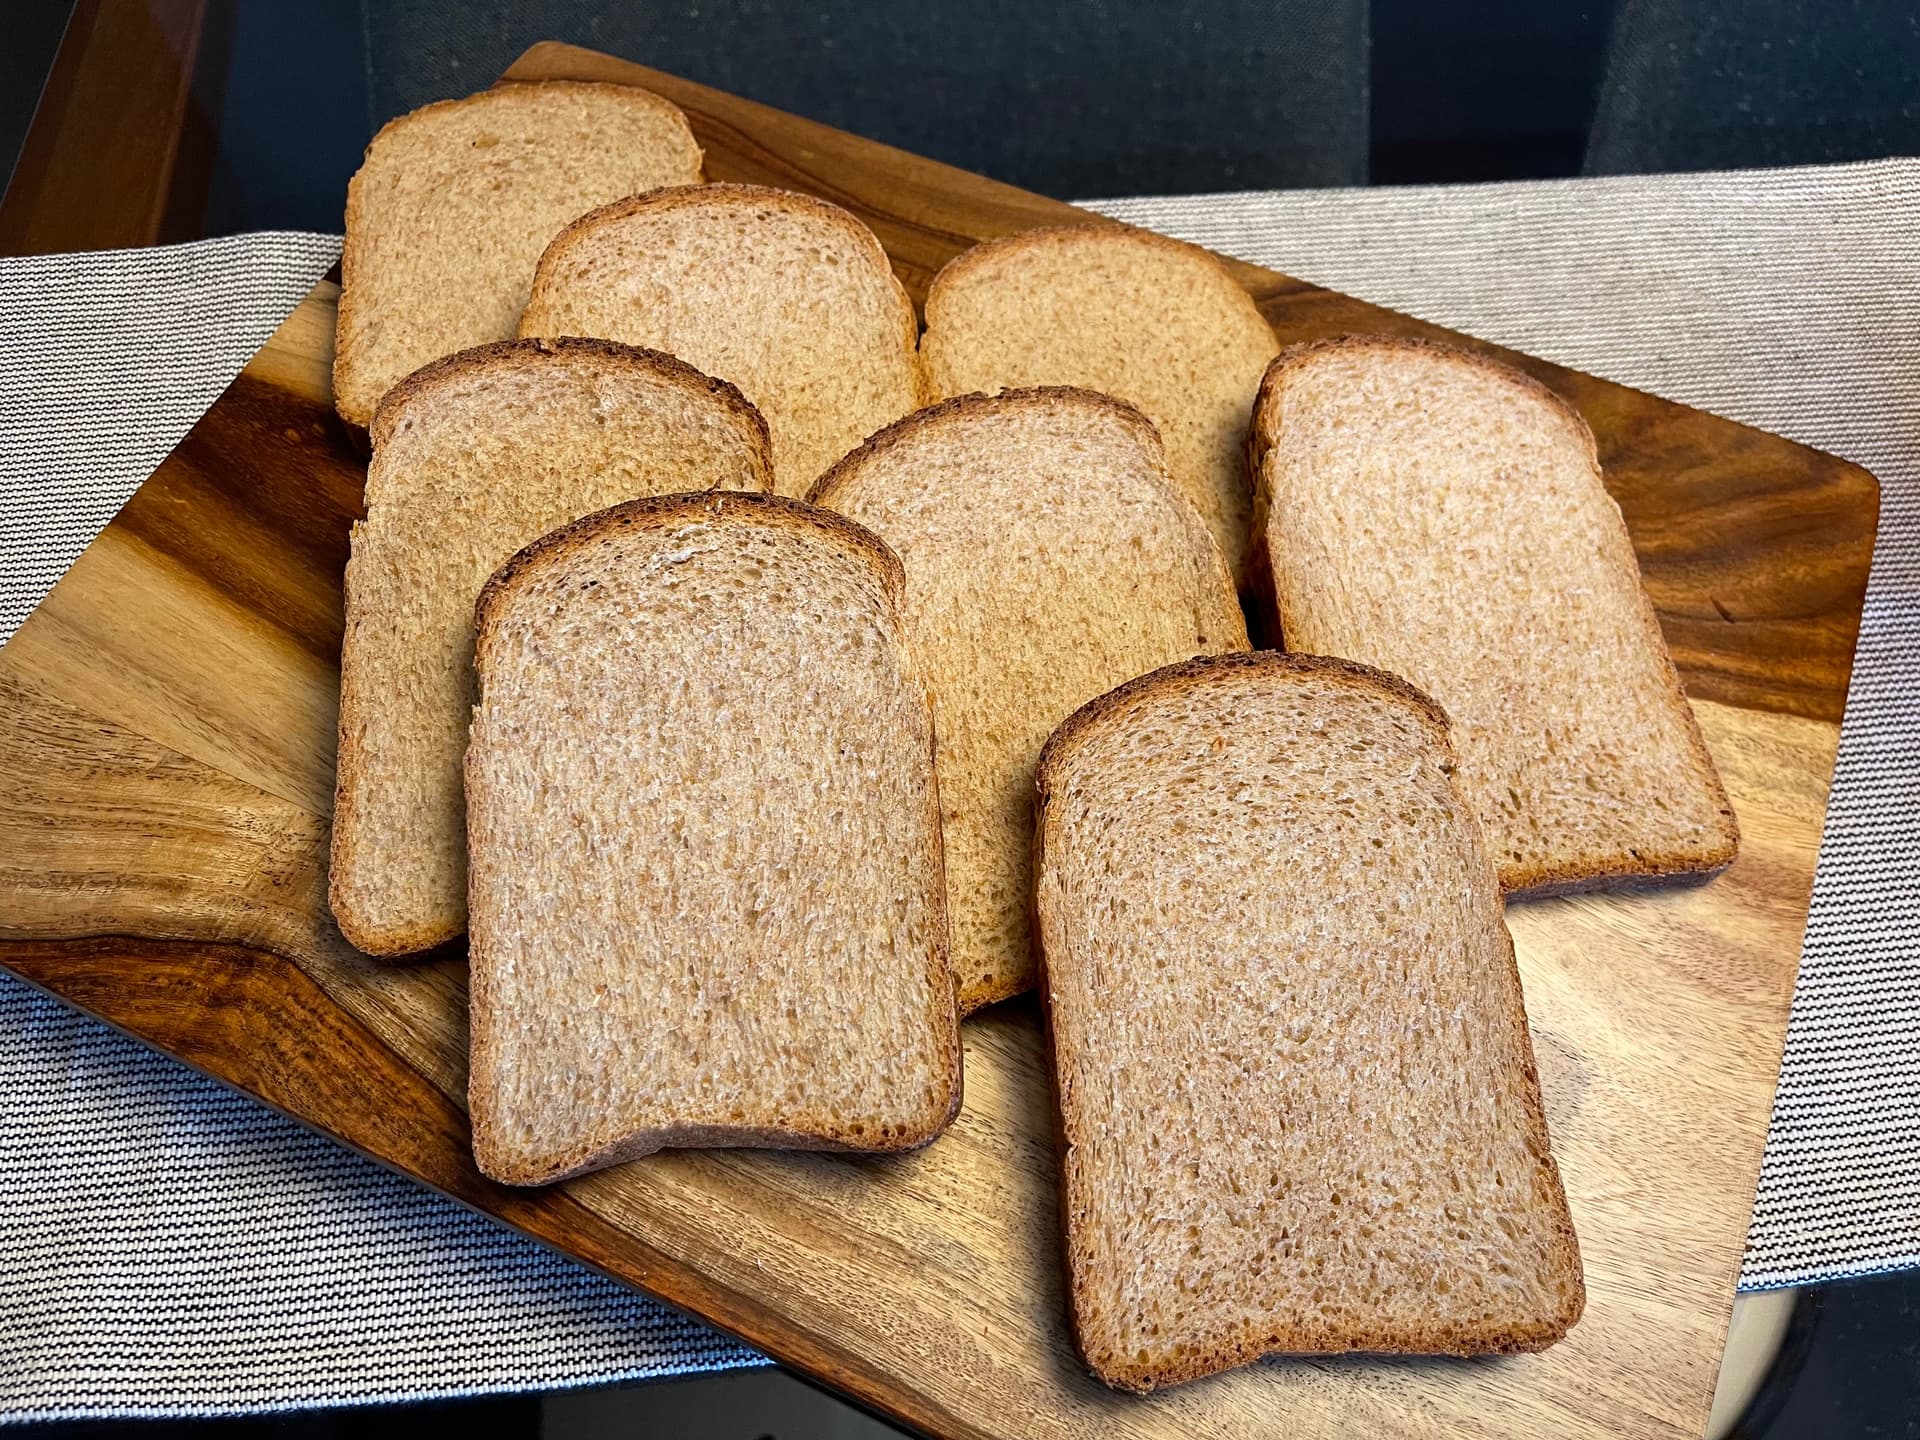
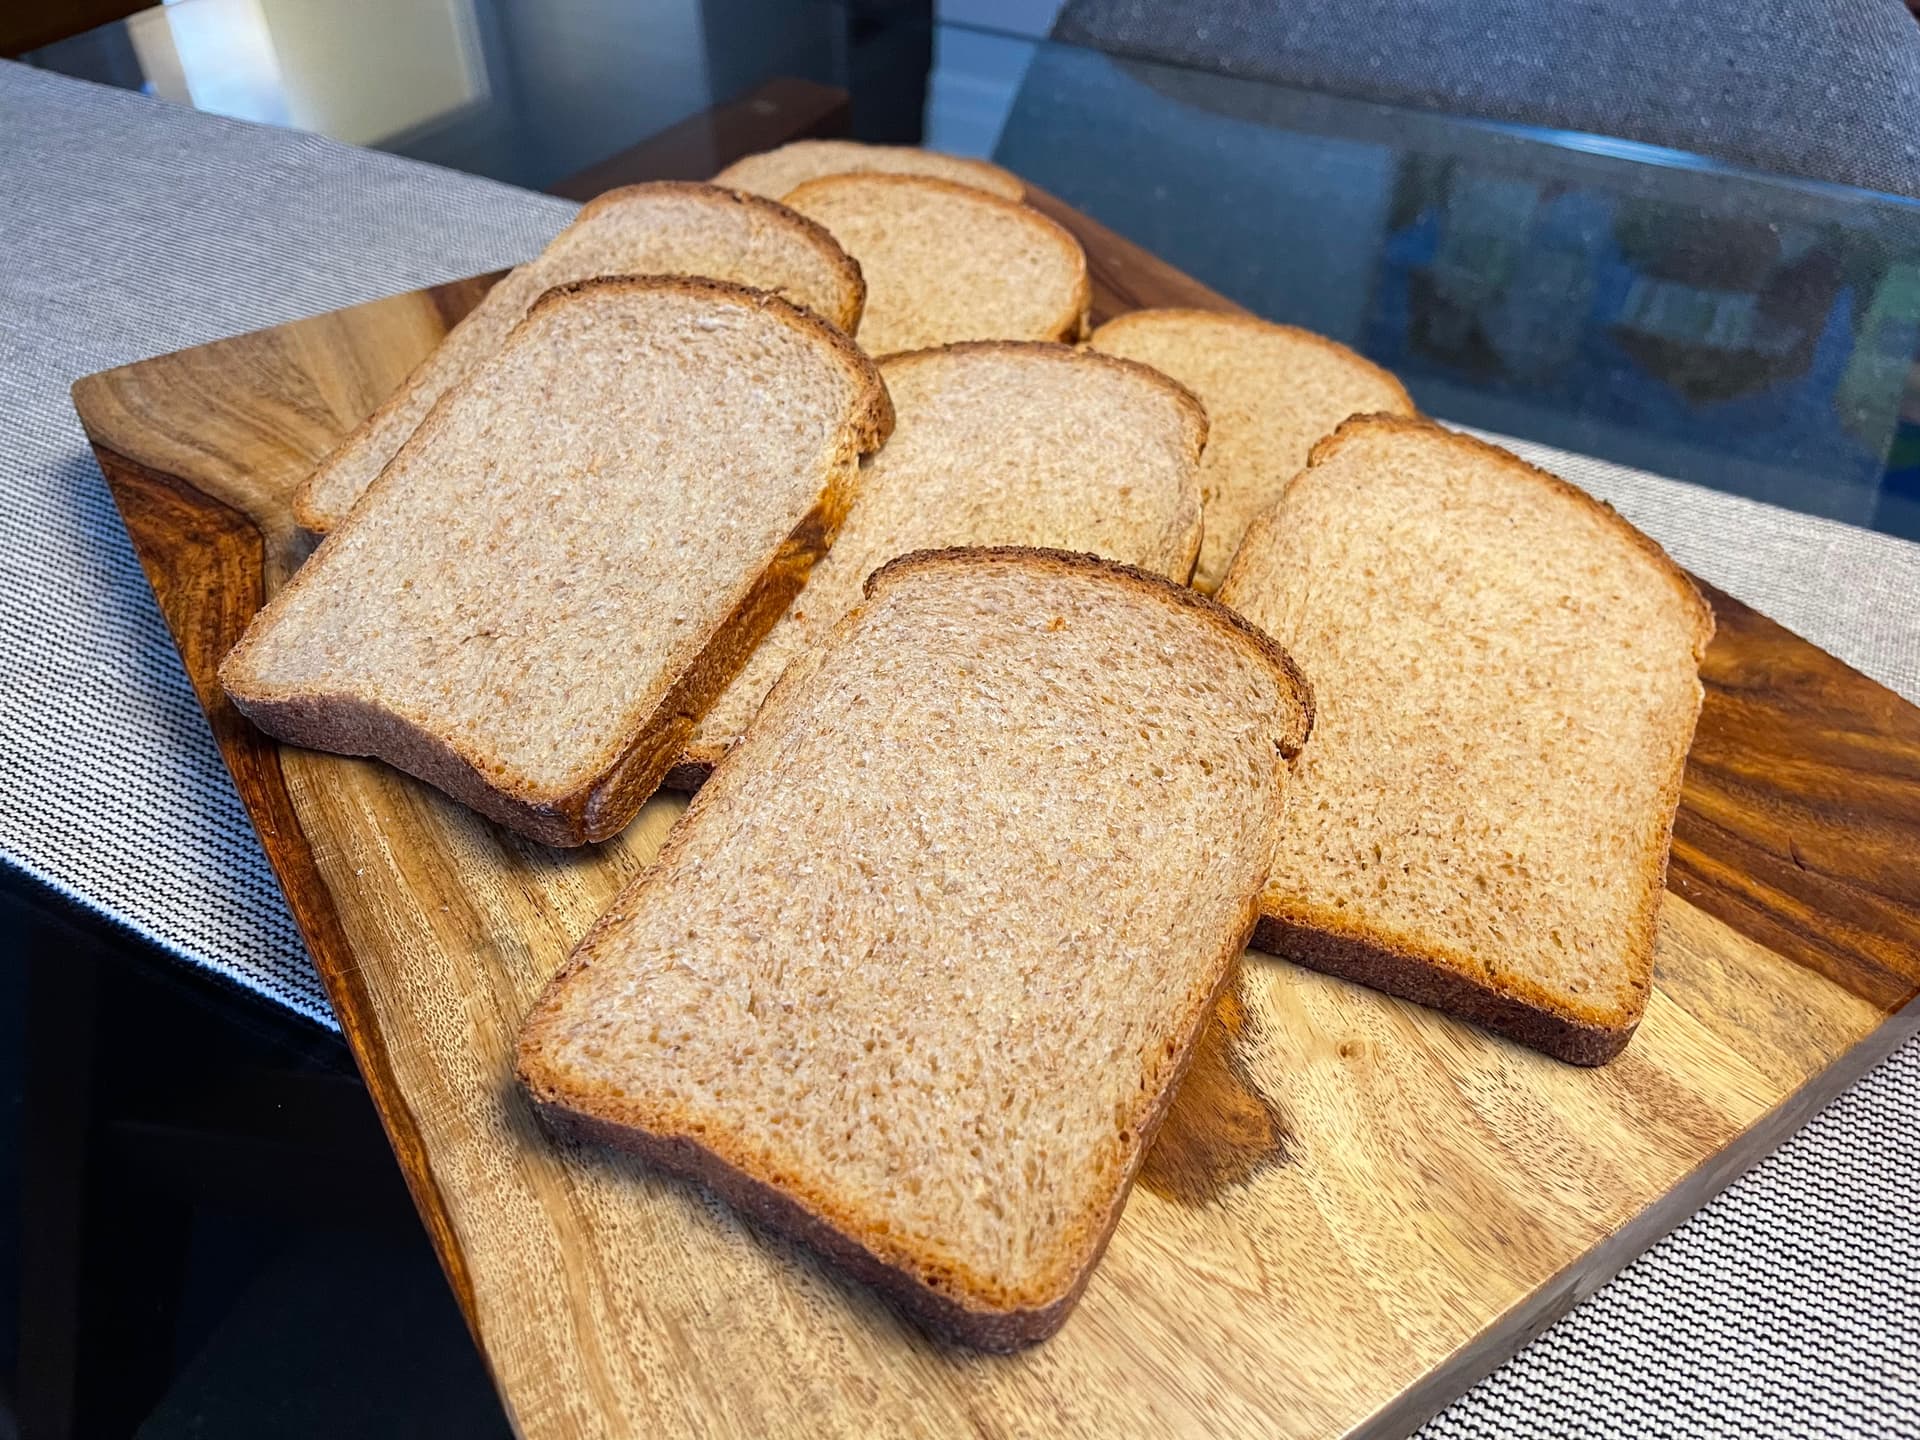
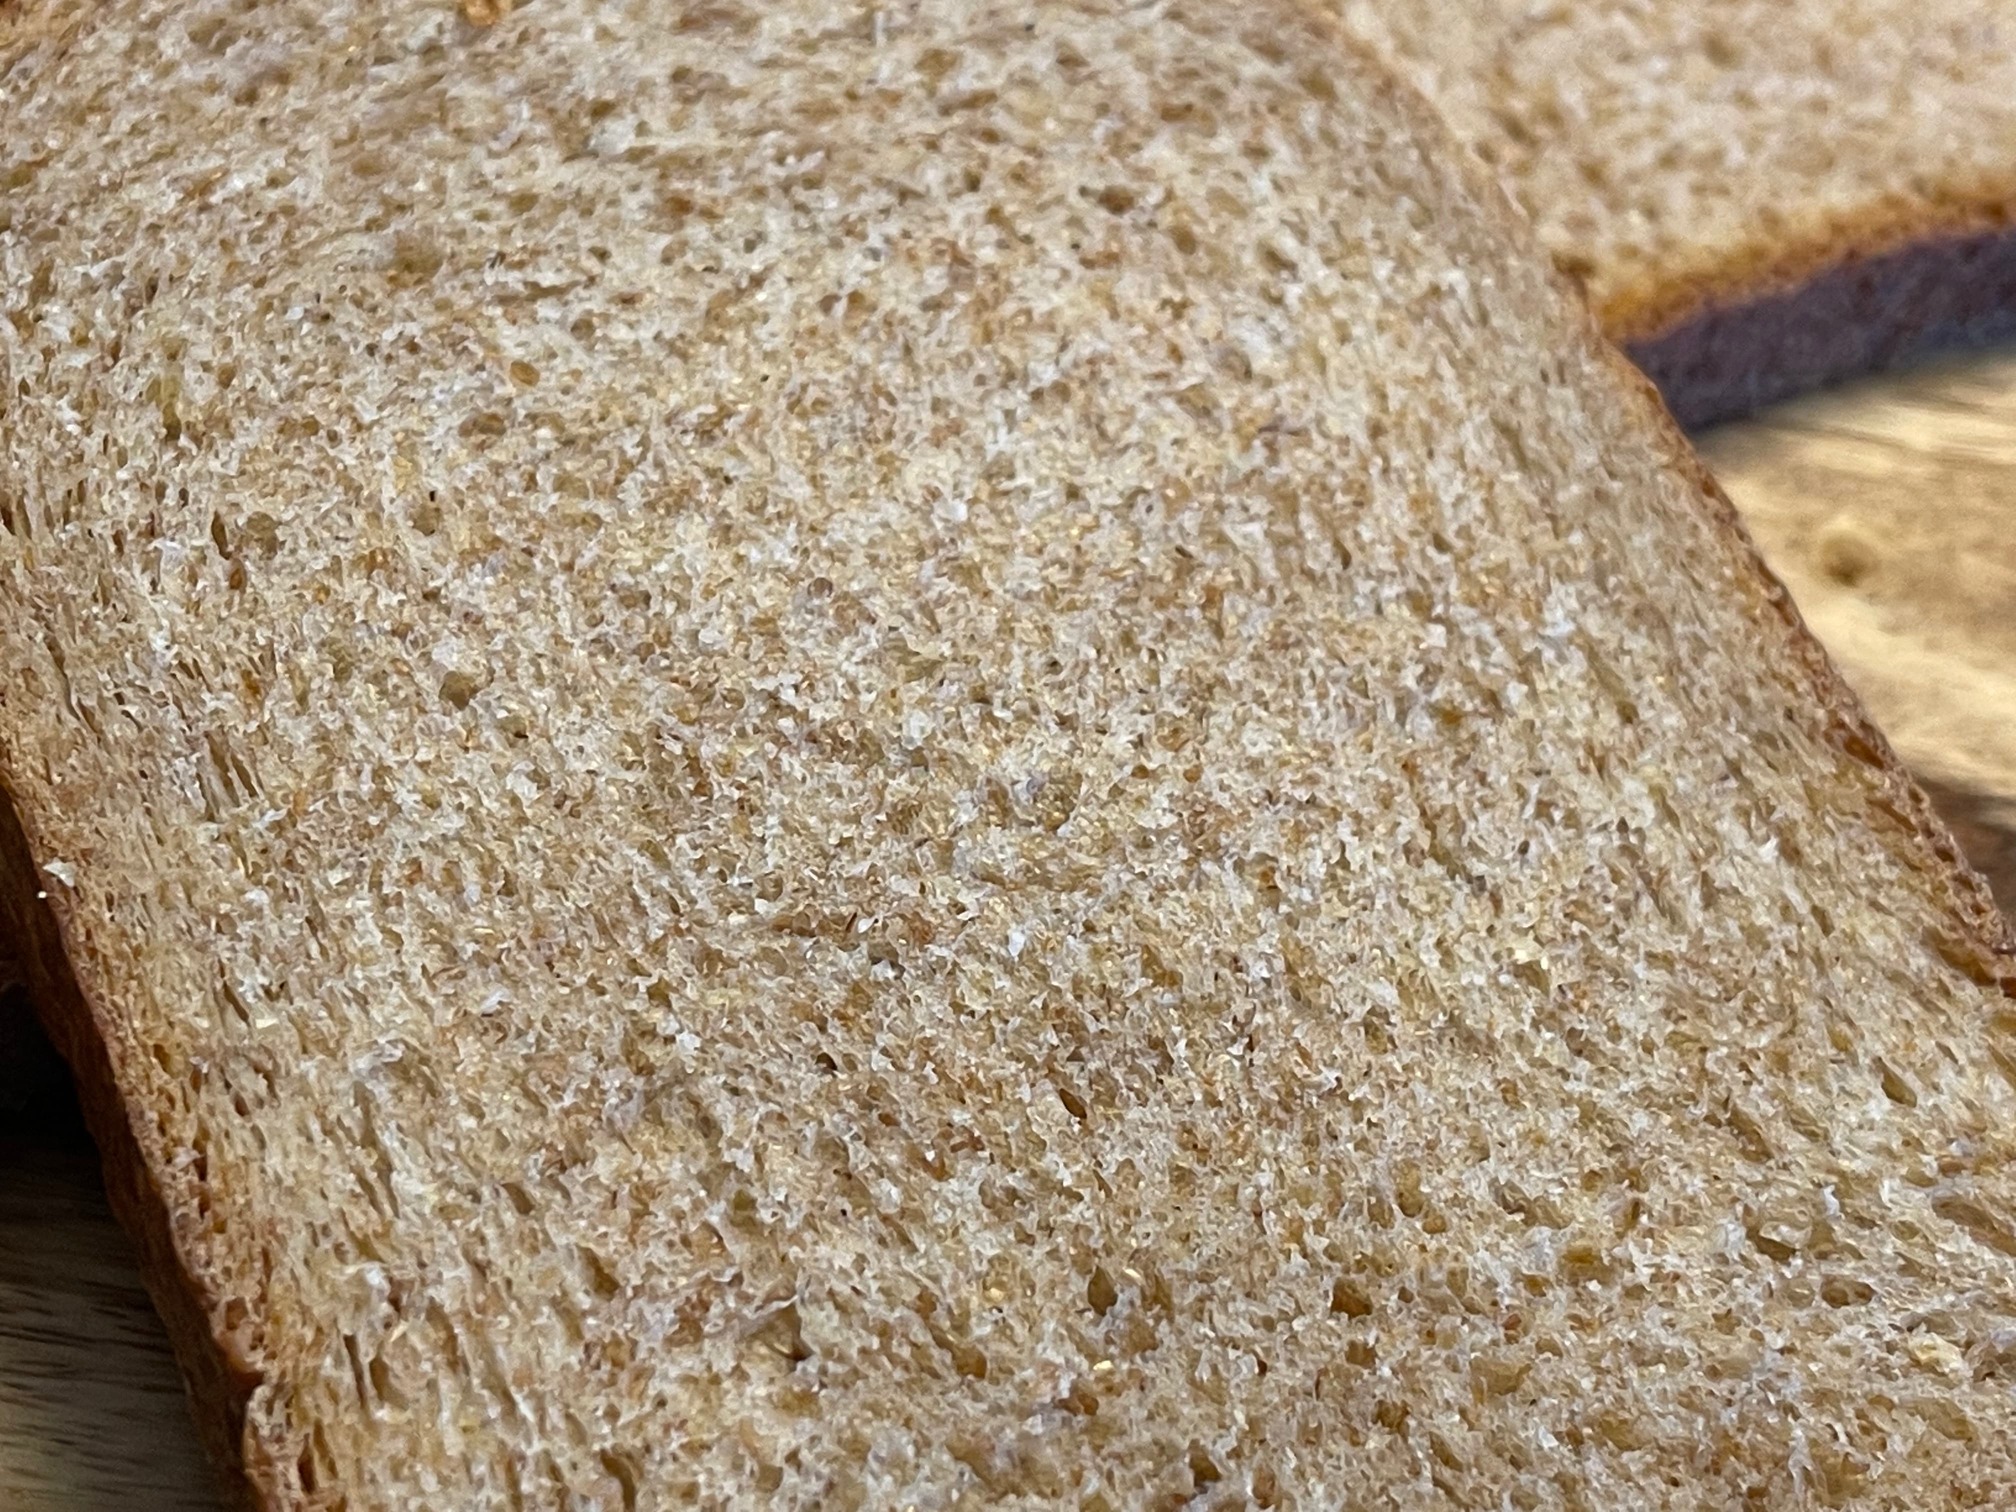
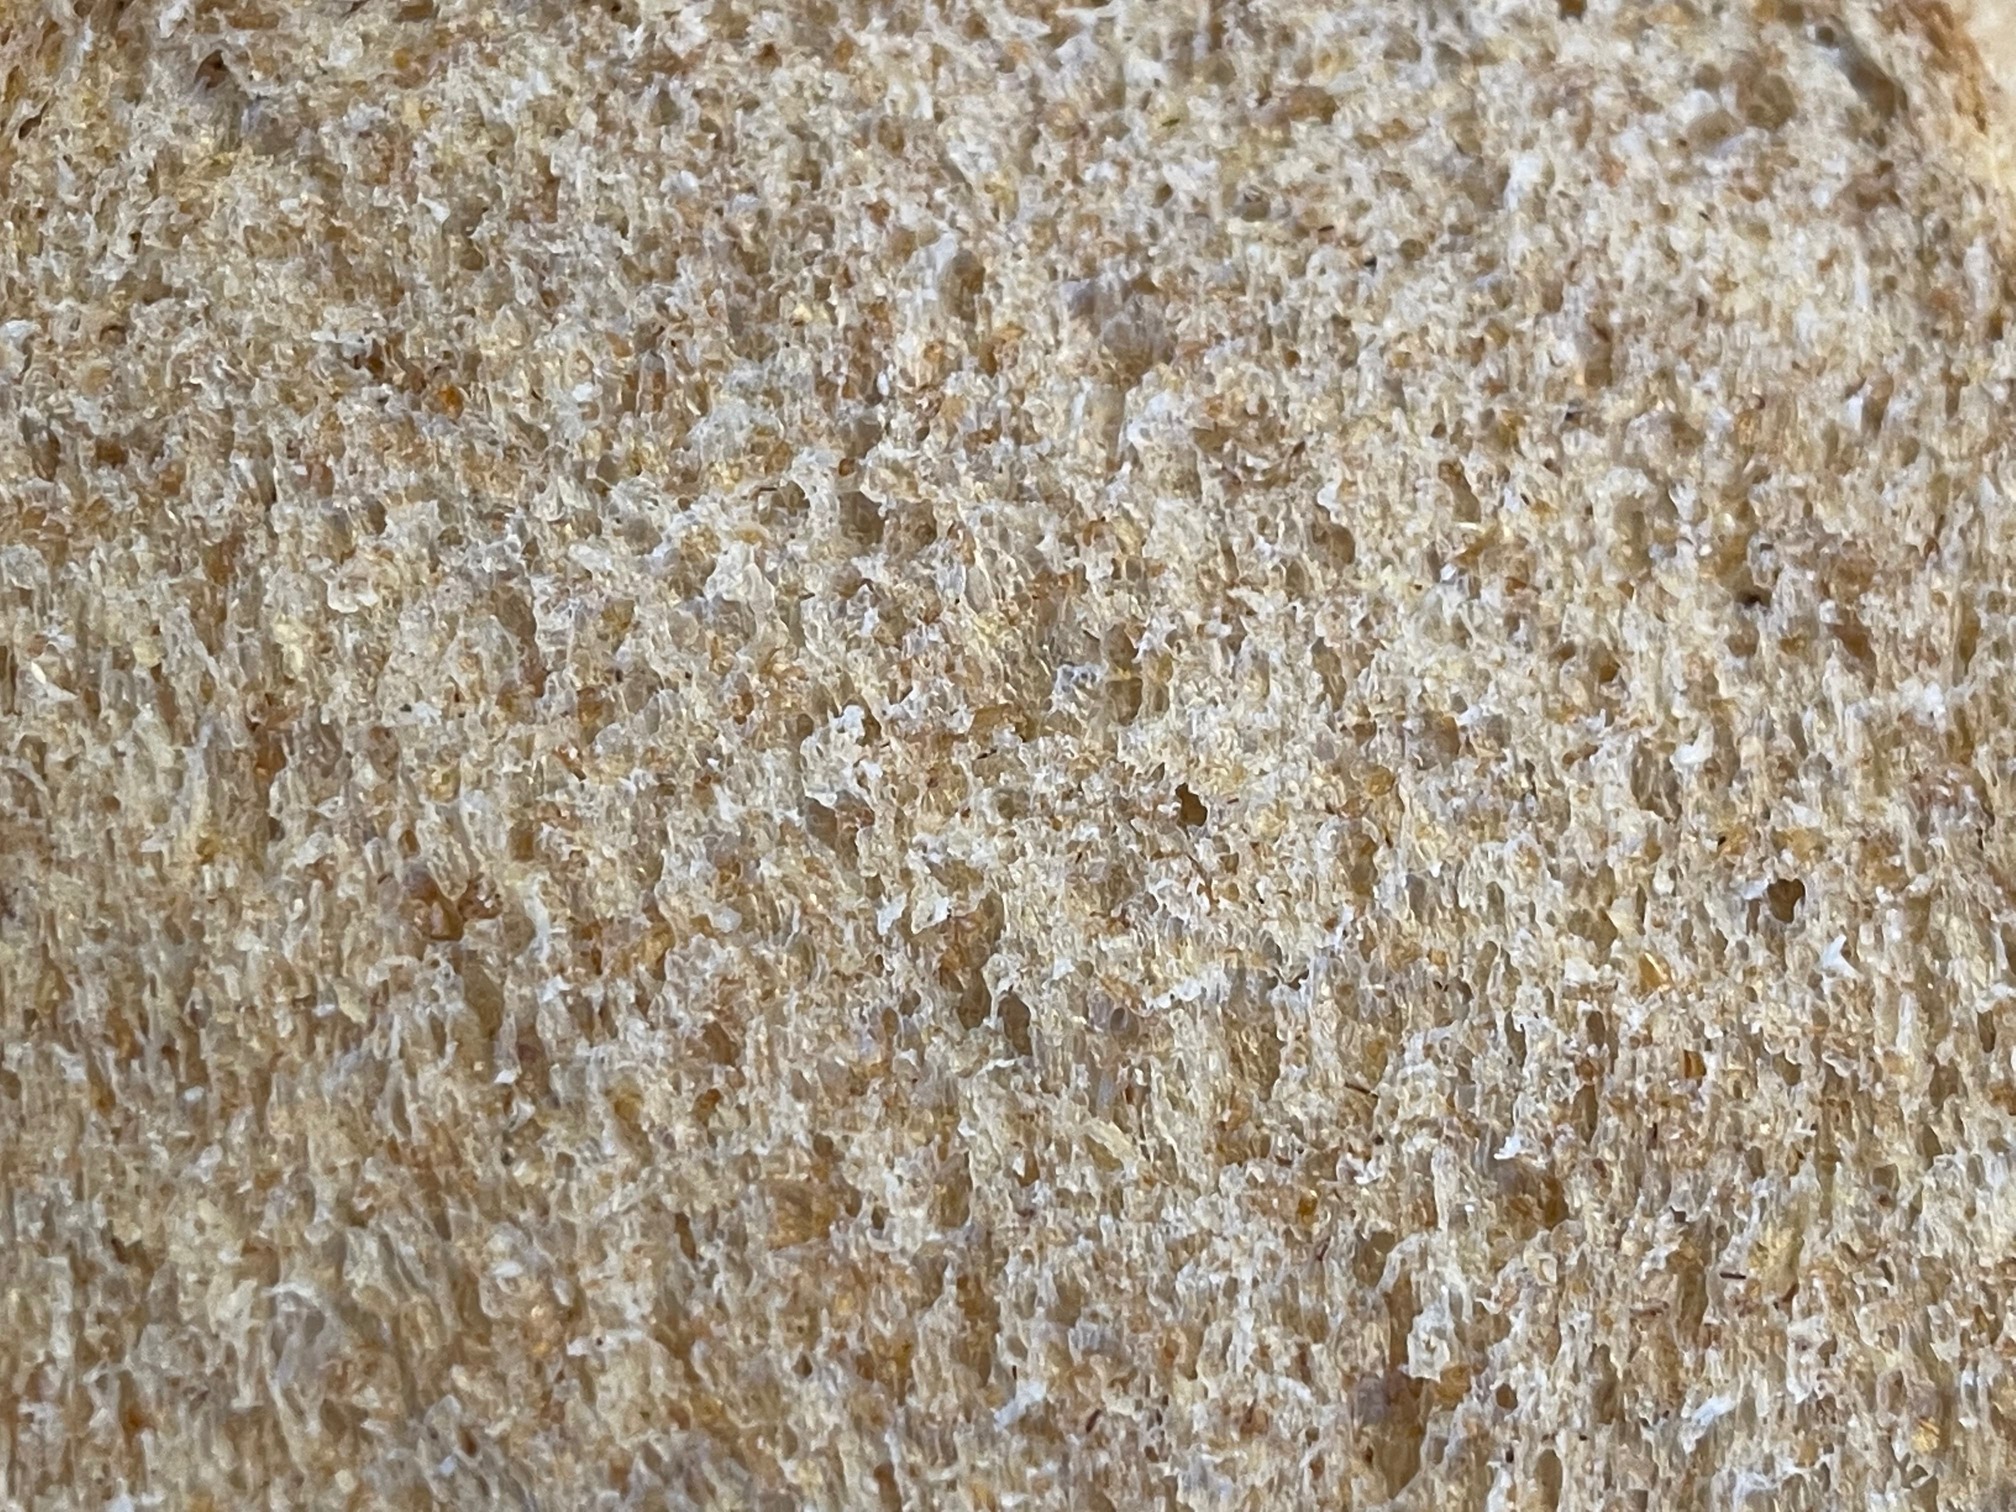
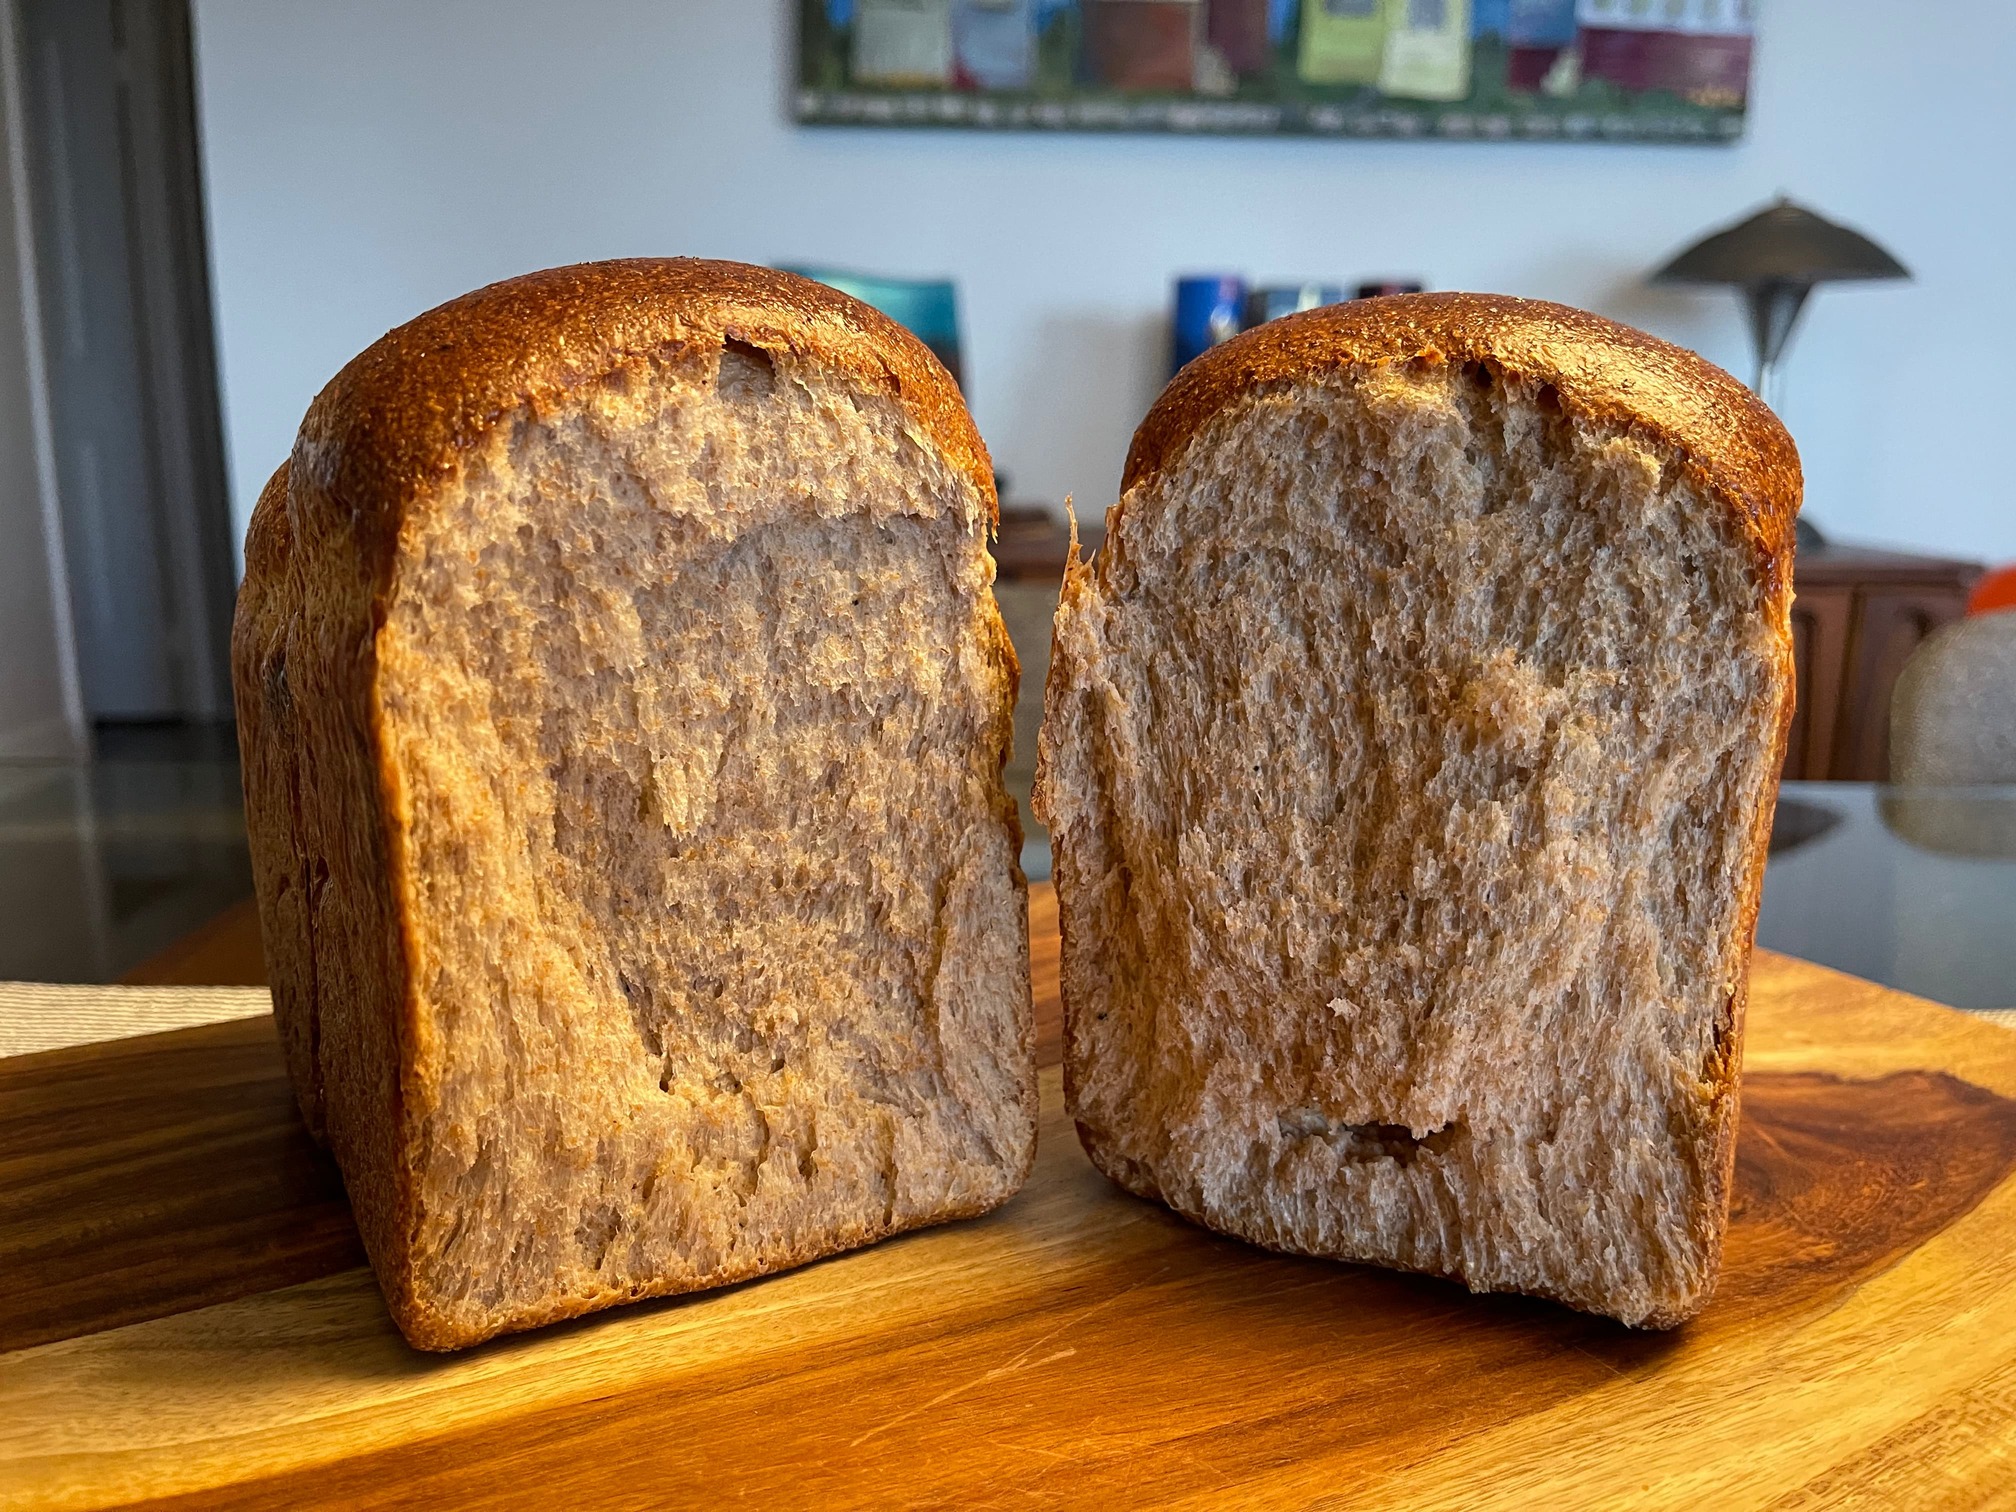
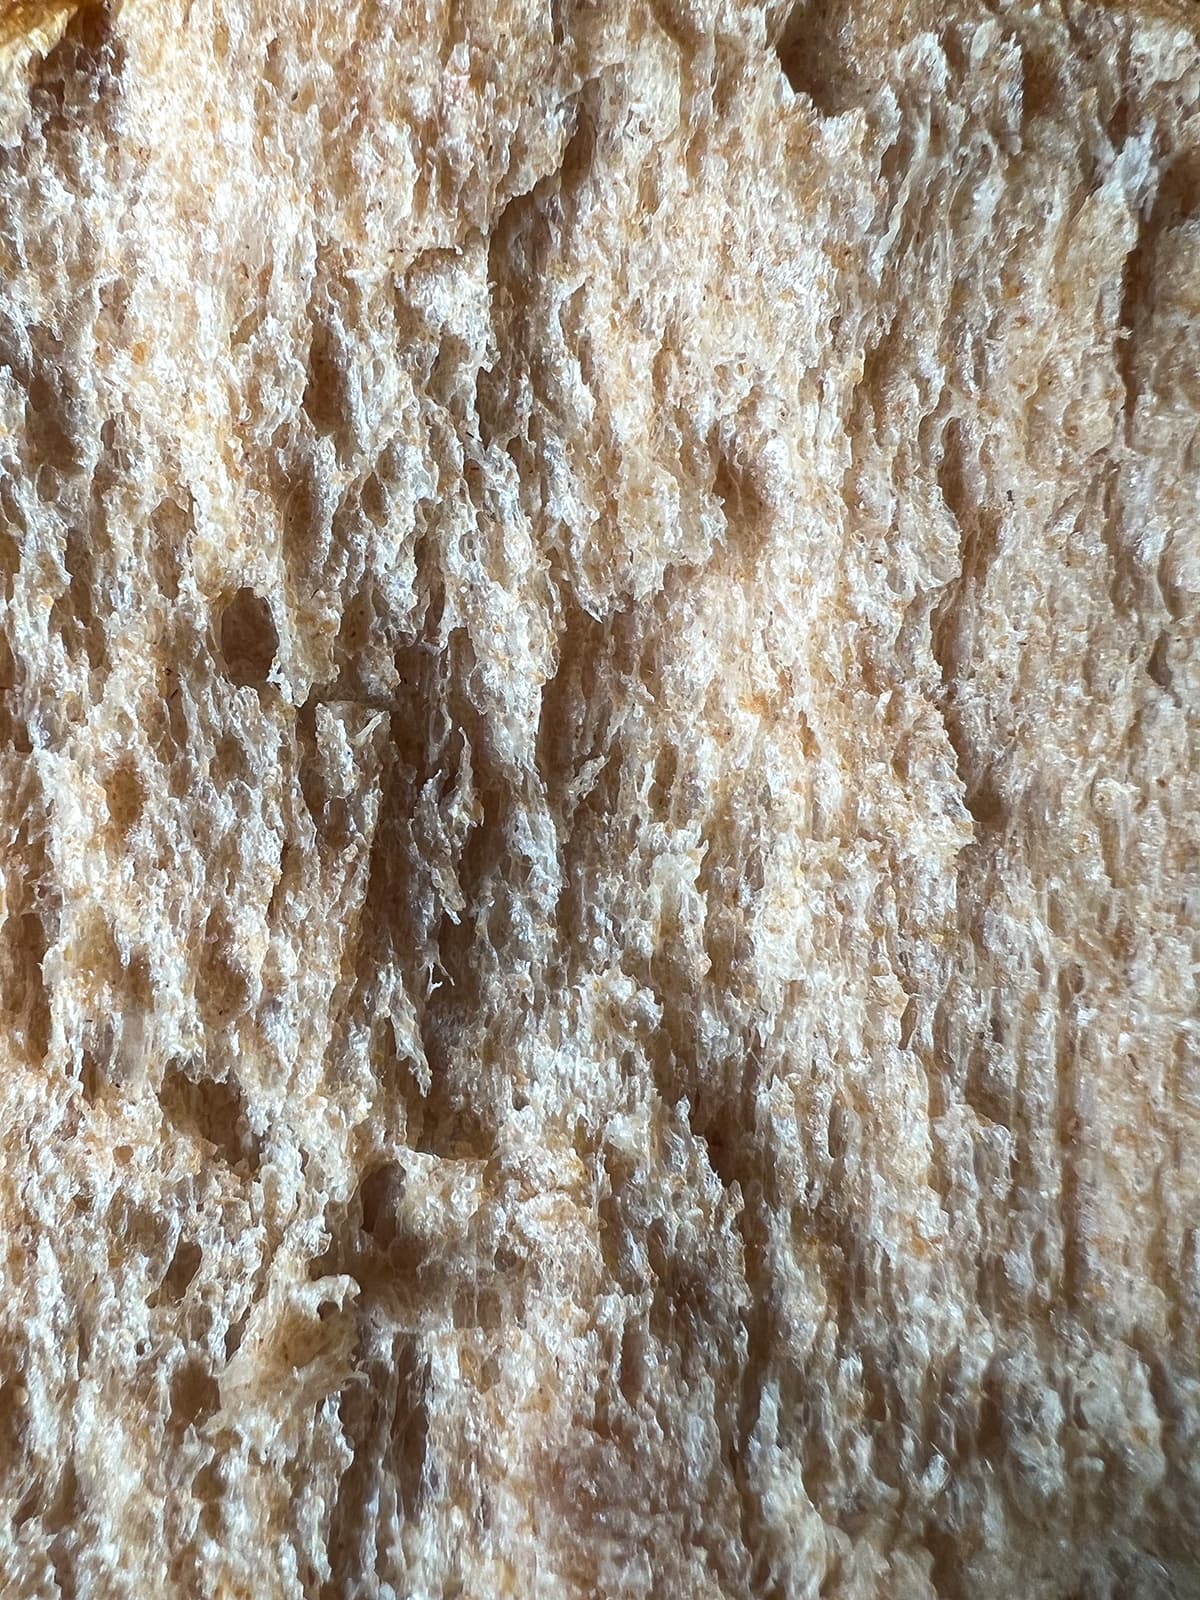
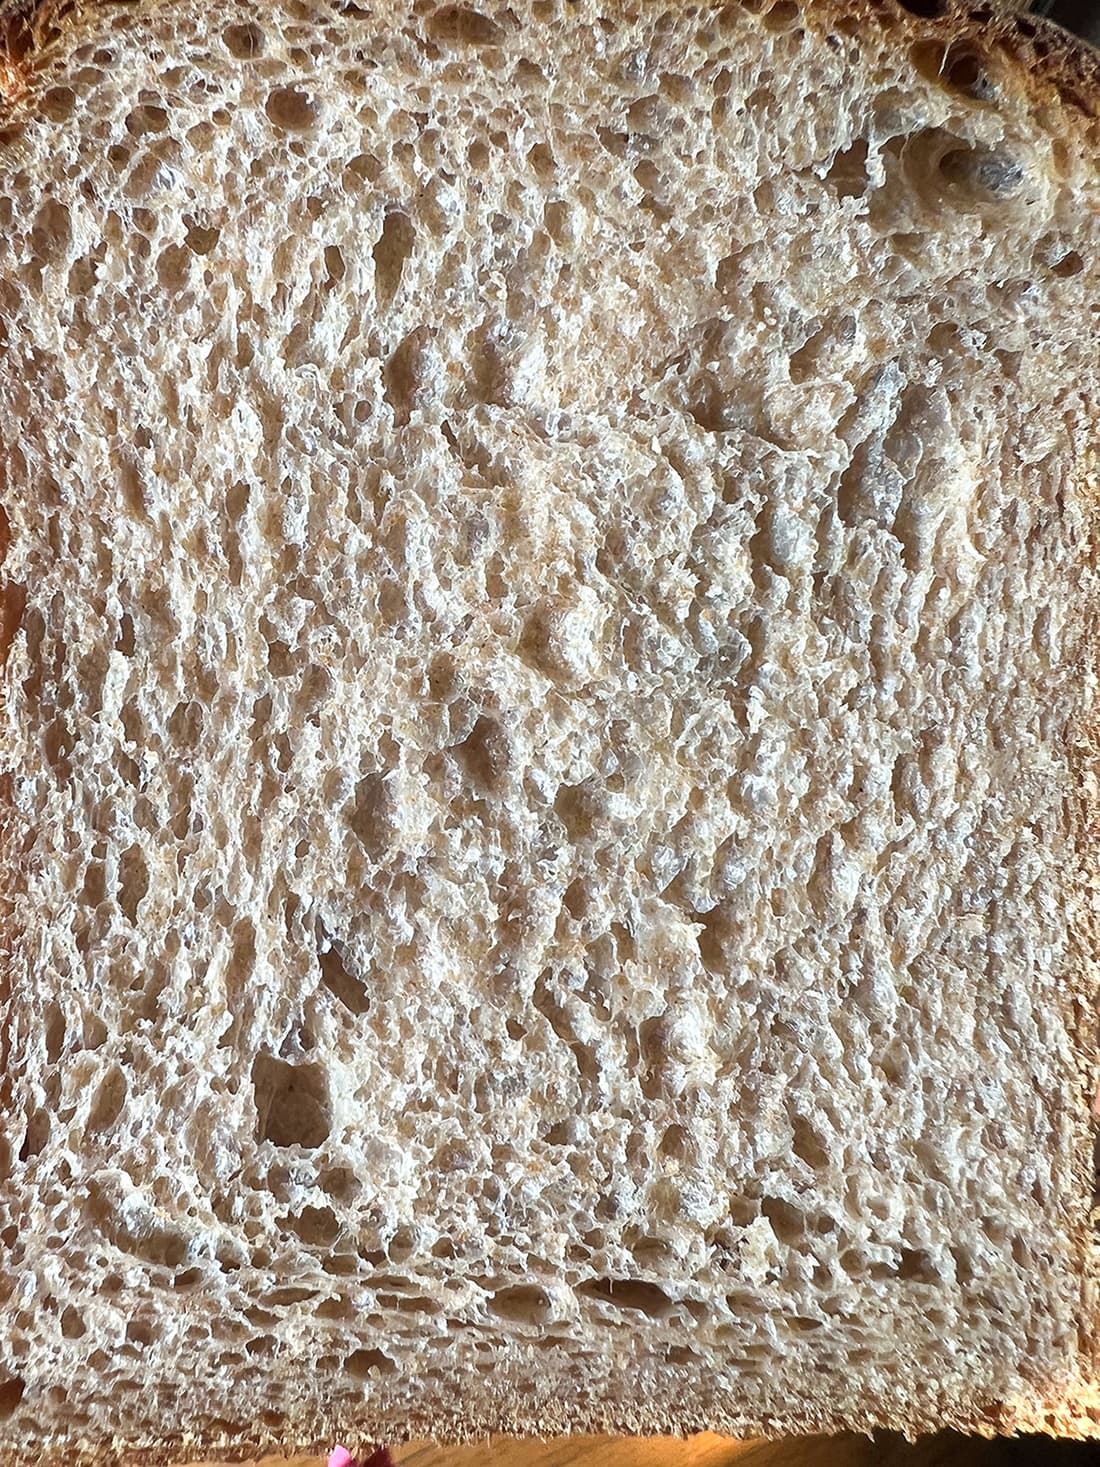
Wonderful flavour, there isn’t any real sour tang and certainly no bitterness that I had always thought was characteristic of 100% whole wheat breads like this that I ate as a child. I’m not sure that the Vital Wheat Gluten was necessary, but I wanted to ensure that I was able to get the shreddable crumb that this type of bread should have.

Benny

Beautiful bread, as always, Benny. The thing with your bakes is the pictures you post always make me hungry. In the video you peeled off those two little pieces of bread and I am thinking, “I would eat those”. It even looks like you raise them up, about to eat them, and I am cheering you on. But, it was not to be, you gracefully sent them down. :slight_smile:

And thanks for a 100% whole wheat version of shokupan. In Japan the bread is bleached-flour tasteless, like Wonder Bread.

1 Like

Thank you for your kind words Otis, they are much appreciated.
I did in fact eat those shredded bits of bread, but didn’t do it on camera. We quite enjoyed this loaf and cannot think of a reason to making this bread 100% white flour now that I’ve made this one.
Benny

This is really impressive. I’m going to try it someday. Thank you for sharing the details. It looks like you got all the ingredients in perfect ratio (incl the amount of vital wheat gluten, which would have been a mystery to me) and the process down too.

1 Like

Thank you Melissa that is very kind of you to say. This was based on your original recipe and I’ve kept the recipe instructions very close to what you wrote.
The next time I bake this I think I’d increase the milk in the final dough by 5-10 g, I think the dough was stiffer than it needed to be because I didn’t quite get the hydration right. The VWG was a bit of a guess, I estimated that I wanted to increase the gluten by 1% and using a calculator and the final flour weight I came to 8g but then 9g fell in so left it as that. I think I’d also decrease the sugar as well which I believe I have been doing each time baking this. It isn’t sweet per say as a dessert bread like babka, but I’d be good with it being less sweet.
Benny

@Benito Wow. I haven’t baked more than a couple of times in about 7 or 8 months for a variety of reasons and have missed it. I’ve kept my starter going and this is the first thing I’m making when I jump back in. Utterly impressive, like all your bakes. Thanks to you and @Fermentada for the inspiration.

1 Like

That is kind of you to say AG. I hope you do give it a try soon and that you get back into baking bread too, glad to hear that you’ve kept your starter healthy during your break.
Benny

1 Like

I finally tried this wonderful formula today. I am embarrassed to say it was a flop - but a delicious one. It’s on me as I was forced to compress the timeframes, simply because it was approaching midnight and I finally had to either bake it or toss it. After 9 hours of bulk, there was not much discernible activity, but it was already 8 p.m. and the dough still required 2-4 more hours of proofing time so I proceeded with shaping. If I didn’t have somewhere to be in the morning, I’d have refrigerated it overnight, but with no opportunity to bake in the morning, it was now or never. So I let it proof for 2 hours and, with still no discernible rise, I put it in the oven. I was not expecting anything from the bake. It did rise a tiny bit in the oven, but the final loaf came nowhere close to filling the pan. Somehow, there was not enough dough for the pullman pan. That’s on me too, because I was having a hard time getting the quantities and percentages to work in my spreadsheet, so I took a guess at it and obviously guessed wrong.

In the meantime, I saw that you updated the formula and directions, The new mixing directions and the overall timing will fit my schedule better. I will most definitely have another go at this despite my failure because something obviously went wrong with my starter. Despite the minimal rise, it was a lovely dough to handle and it smells fabulous. Given its heaviness, I didn’t have any qualms about slicing off a sample piece while it was still hot as I was heading off to bed. It tastes at least as good as it smells. Soft and deliciously malty. I really want to get this one right. Thanks, Benny, for the recipe (and the update!) and the inspiration.
-AG
Edited to add that I ground my own flour. I don’t think that’s the problem though as I watched the dough closely and there was no sign that it over-developed and collapsed.

1 Like

AG I’m so sorry to hear that your loaf didn’t work out. What do you think happened with your starter/levain? I know that our starters are all unique and that some yeast maybe less osmotolerant than others. Have you had success making enriched doughs with your starter before? Did your levain get a good rise? I hope you have success the next time your try it out.
Benny

1 Like

A few things could have gone wrong with the levain. It did not rise well, but it has been cold and the overnight temp in my kitchen has been low. I gave it about 15 hours to rise, which is partly why I was running so late with the final dough last night. I was trying out a new heating mat that is supposed to keep it warm, but it didn’t seem to be up to the job. Despite this, the levain was puffy and at (or close to) the 50% rise called for in the formula before I mixed the dough. I would have let it go until the dome was receding, but with a potential 12 hour bulk ahead of me, I dared not wait longer and used it on the young side.

Also: I haven’t been baking much lately, although I have maintained my starter throughout my hiatus. A Hamelman Vermont sourdough I made over the weekend turned out fine. So the starter has been living in the fridge more than usual and might not be hardy enough to stand up to enrichments and cold temps. This was my first time adding sugar to a levain, so I probably should have taken some measures to really build it up and prepare it for the addition of sugar before proceeding. I’ll look into that.

Another possibility would be to try again without adding sugar to the starter and simply adding it to the final dough instead. I assume there is a reason for adding sugar to the levain and don’t know what affect leaving it out might have on the final product. I’m also wondering how much rise I should expect to see at the end of bulk.

Either way, the flavor and aroma were wonderful. My husband, who is not usually a fan of 100% whole wheat bread, asked what was in the oven because it smelled great.

When I made the spreadsheet for this dough, I included the tangzhong flour in the the total flour amount and it threw off the other percentages. Likewise the milk. (I’m super bad at anything numbers-related, so me winging it in that area was probably a bad idea :rofl:.) That might have contributed to a heavier dough independent of the sluggish levain. I saw on the spreadsheet you included with your updated recipe that you kept the tazgzhong separate so I’ll follow your spreadsheet next time. I will try it again soon, but I must make my poor husband a deli rye first. He’s been asking for weeks!

1 Like

The reason to add the sugar to the levain is to exert the sugar’s osmotic pressure on the microbes. This has a greater effect on the LAB than the yeast. This reduces the acid produce and the LAB population in the levain. This then reduces the acid produced in the main dough when the levain is added since you’re starting off with a reduced LAB population. It is a good way of baking sourdough bread especially enriched ones without as much sour tang.

In the updated instructions, in ensure that the main dough gets a good inoculation of yeast written to allow the levain to peak which for my levain is typically between 3-3.5 times.

I’ll look forward to your bake when you get back around to trying it again.
Benny

1 Like

Of course! Makes perfect sense. I will spend some time optimizing my starter for this purpose before i try again. I know it will make a difference. Thank you for the tips!!

1 Like

I finally got to have another shot at making this impressive bread. I have not had great luck converting my rye starter to anything other than a rye starter, so I made a sweet stiff levain from scratch and have been maintaining it since January in anticipation of making this bread again. While it didn’t have the majestic rise Benny’s bread did, it rose high enough for me and made everybody in my house happy. It’s a gorgeous bread with a wonderful flavor and fragrance. The next time I make it, I may add a touch of IDY to speed up the fermentation and hopefully reduce the remaining traces of acidity, but by tomorrow the sour finish may have mellowed, making IDY unnecessary. We’ll see how it ages.

I recall that Benny spent a long time and many trial bakes perfecting this formula. I’m not even sure I used the final version. Either way, it’s a wonderful bread. Thanks to Benny for all the hard work on this formula and for sharing it with all of us.

2 Likes

You baked a gorgeous loaf there AG. I love how even each of the four lobes are and how tall each stands. I’d say you nailed the fermentation, bravo. Regarding your rye starter and making a stiff sweet levain from it, I was chatting with another baker who was having issues with the stiff sweet levain rising. It turned out that her whole wheat flour was far thirstier than mine and with a bit more water the levain grew to great heights.
So if you try it again, increase the hydration by another 10%, but make sure you keep the sugar:water ratio the same to reduce the sour in the resulting dough.
Regardless you more than did the recipe justice!
Benny

2 Likes

Oh wow, what a beautiful loaf. I love the color and texture of the crust, and the crumb is to die for.
Richard

2 Likes

:heart_eyes: oh my, that second photo :drooling_face:

2 Likes

Thank you @evnpar and @Fermentada. This is a really good formula, all the credit goes to Benny. I’m happy with the bake though. Anyone who likes WW should really give this a try. With the TZ and the sweet sourdough, it’s a little out of the ordinary (at least it was for me) and fun to do. It was kinda cool to develop a WW dough to that extent.

1 Like

Thank you for the kind words and the tip on levain hydration. I will definitely go ahead and do that if it seems to need it. The levain was crumbly to mix but eventually all the flour absorbed enough water to hold together. I’ll probably experiment with a different flour next time, so it might or might not need extra water. Just to make sure I’m on the right track, levain sugar should always be about 75% of the levain water – yes? I don’t want to forget that bc my spreadsheet will automatically calculate the sugar amount based on flour so it will be a manual change.

Thanks again for a great formula!

1 Like

@Fermentada I see that Benny’s formula was based on a formula originally written by you, Melissa, so props to you as well! :smiley:

1 Like

So to be most accurate, we should include the water in the starter which for me is 100% hydration. So I try to keep the sugar concentration at 56%.
But it does sound like your levain was very dry and that your flour is more absorbent so more water would probably be better for you.

1 Like