Just a few comments:
- I did not bake the 16x4x4 pullman loaf yet I just changed the recipe amounts to reflect the larger pan as I bought one of them also. Be my guest to check my math.
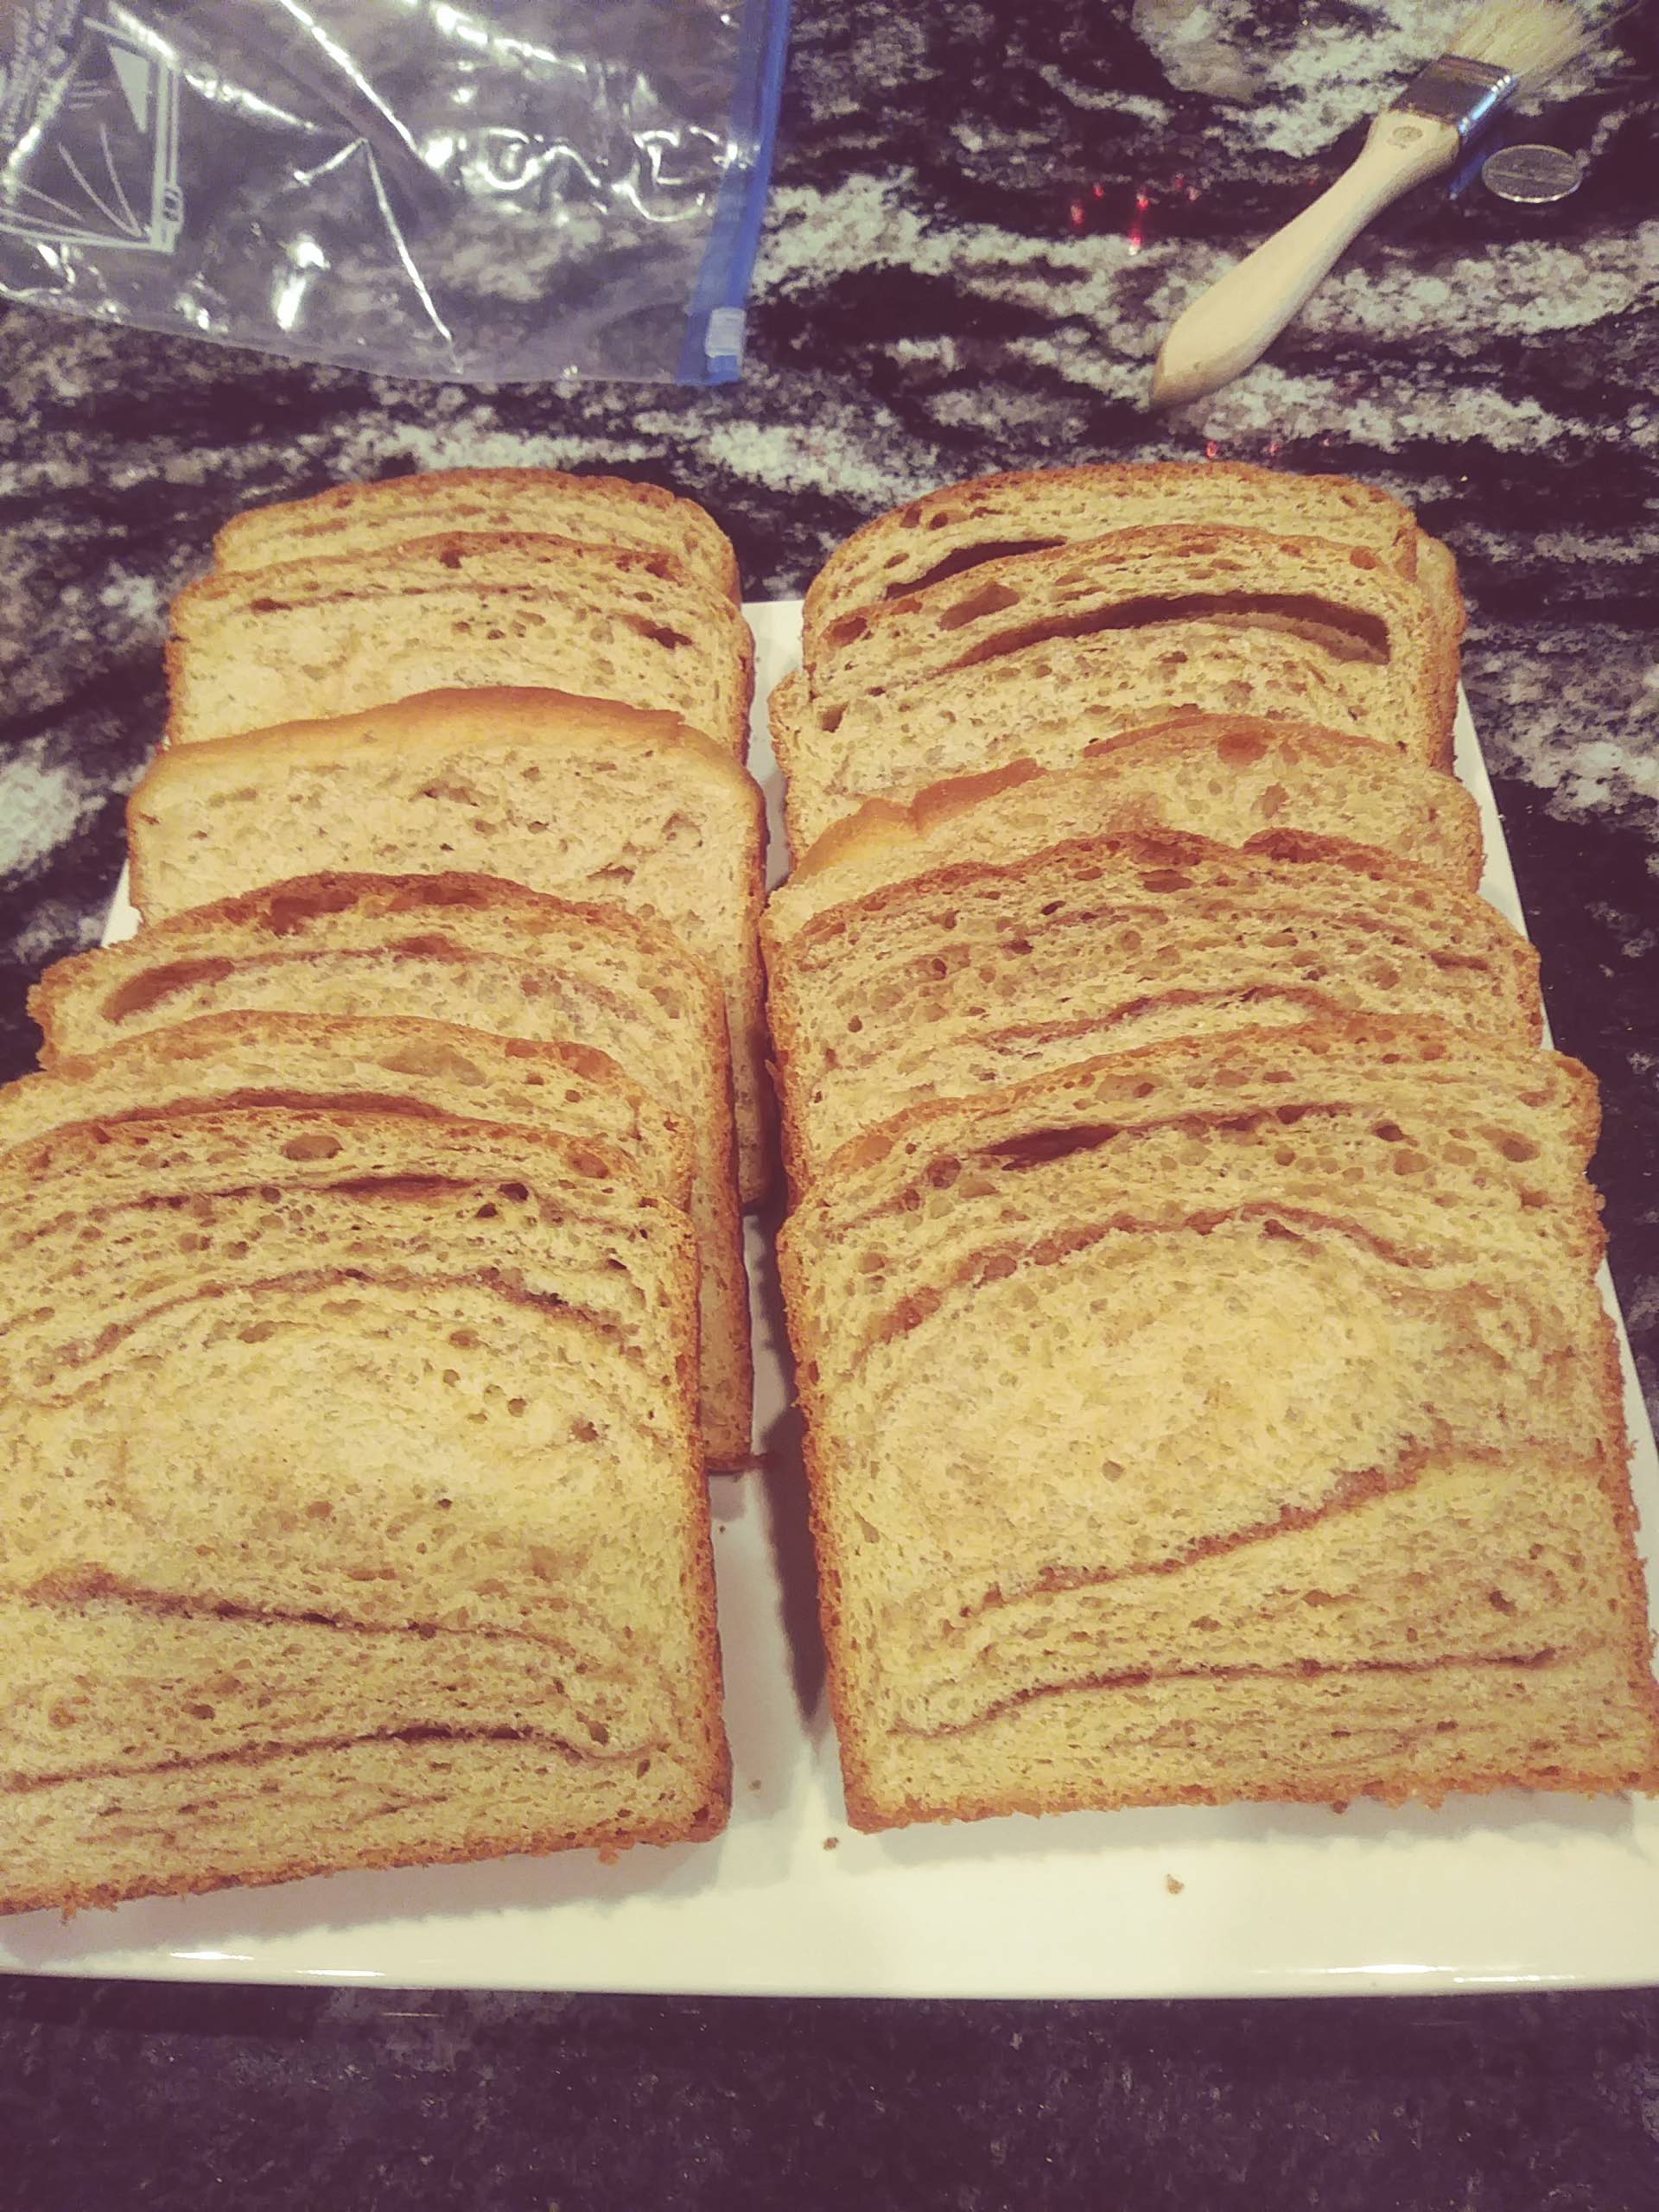
- The crumb on this bread is REALLY good. Hard to explain but to me it seems to be a cross between a pastry and bread. Very light and airy and does it make great pan toasted breakfast bread. Especially in that it is 100% Home milled-Whole grain.
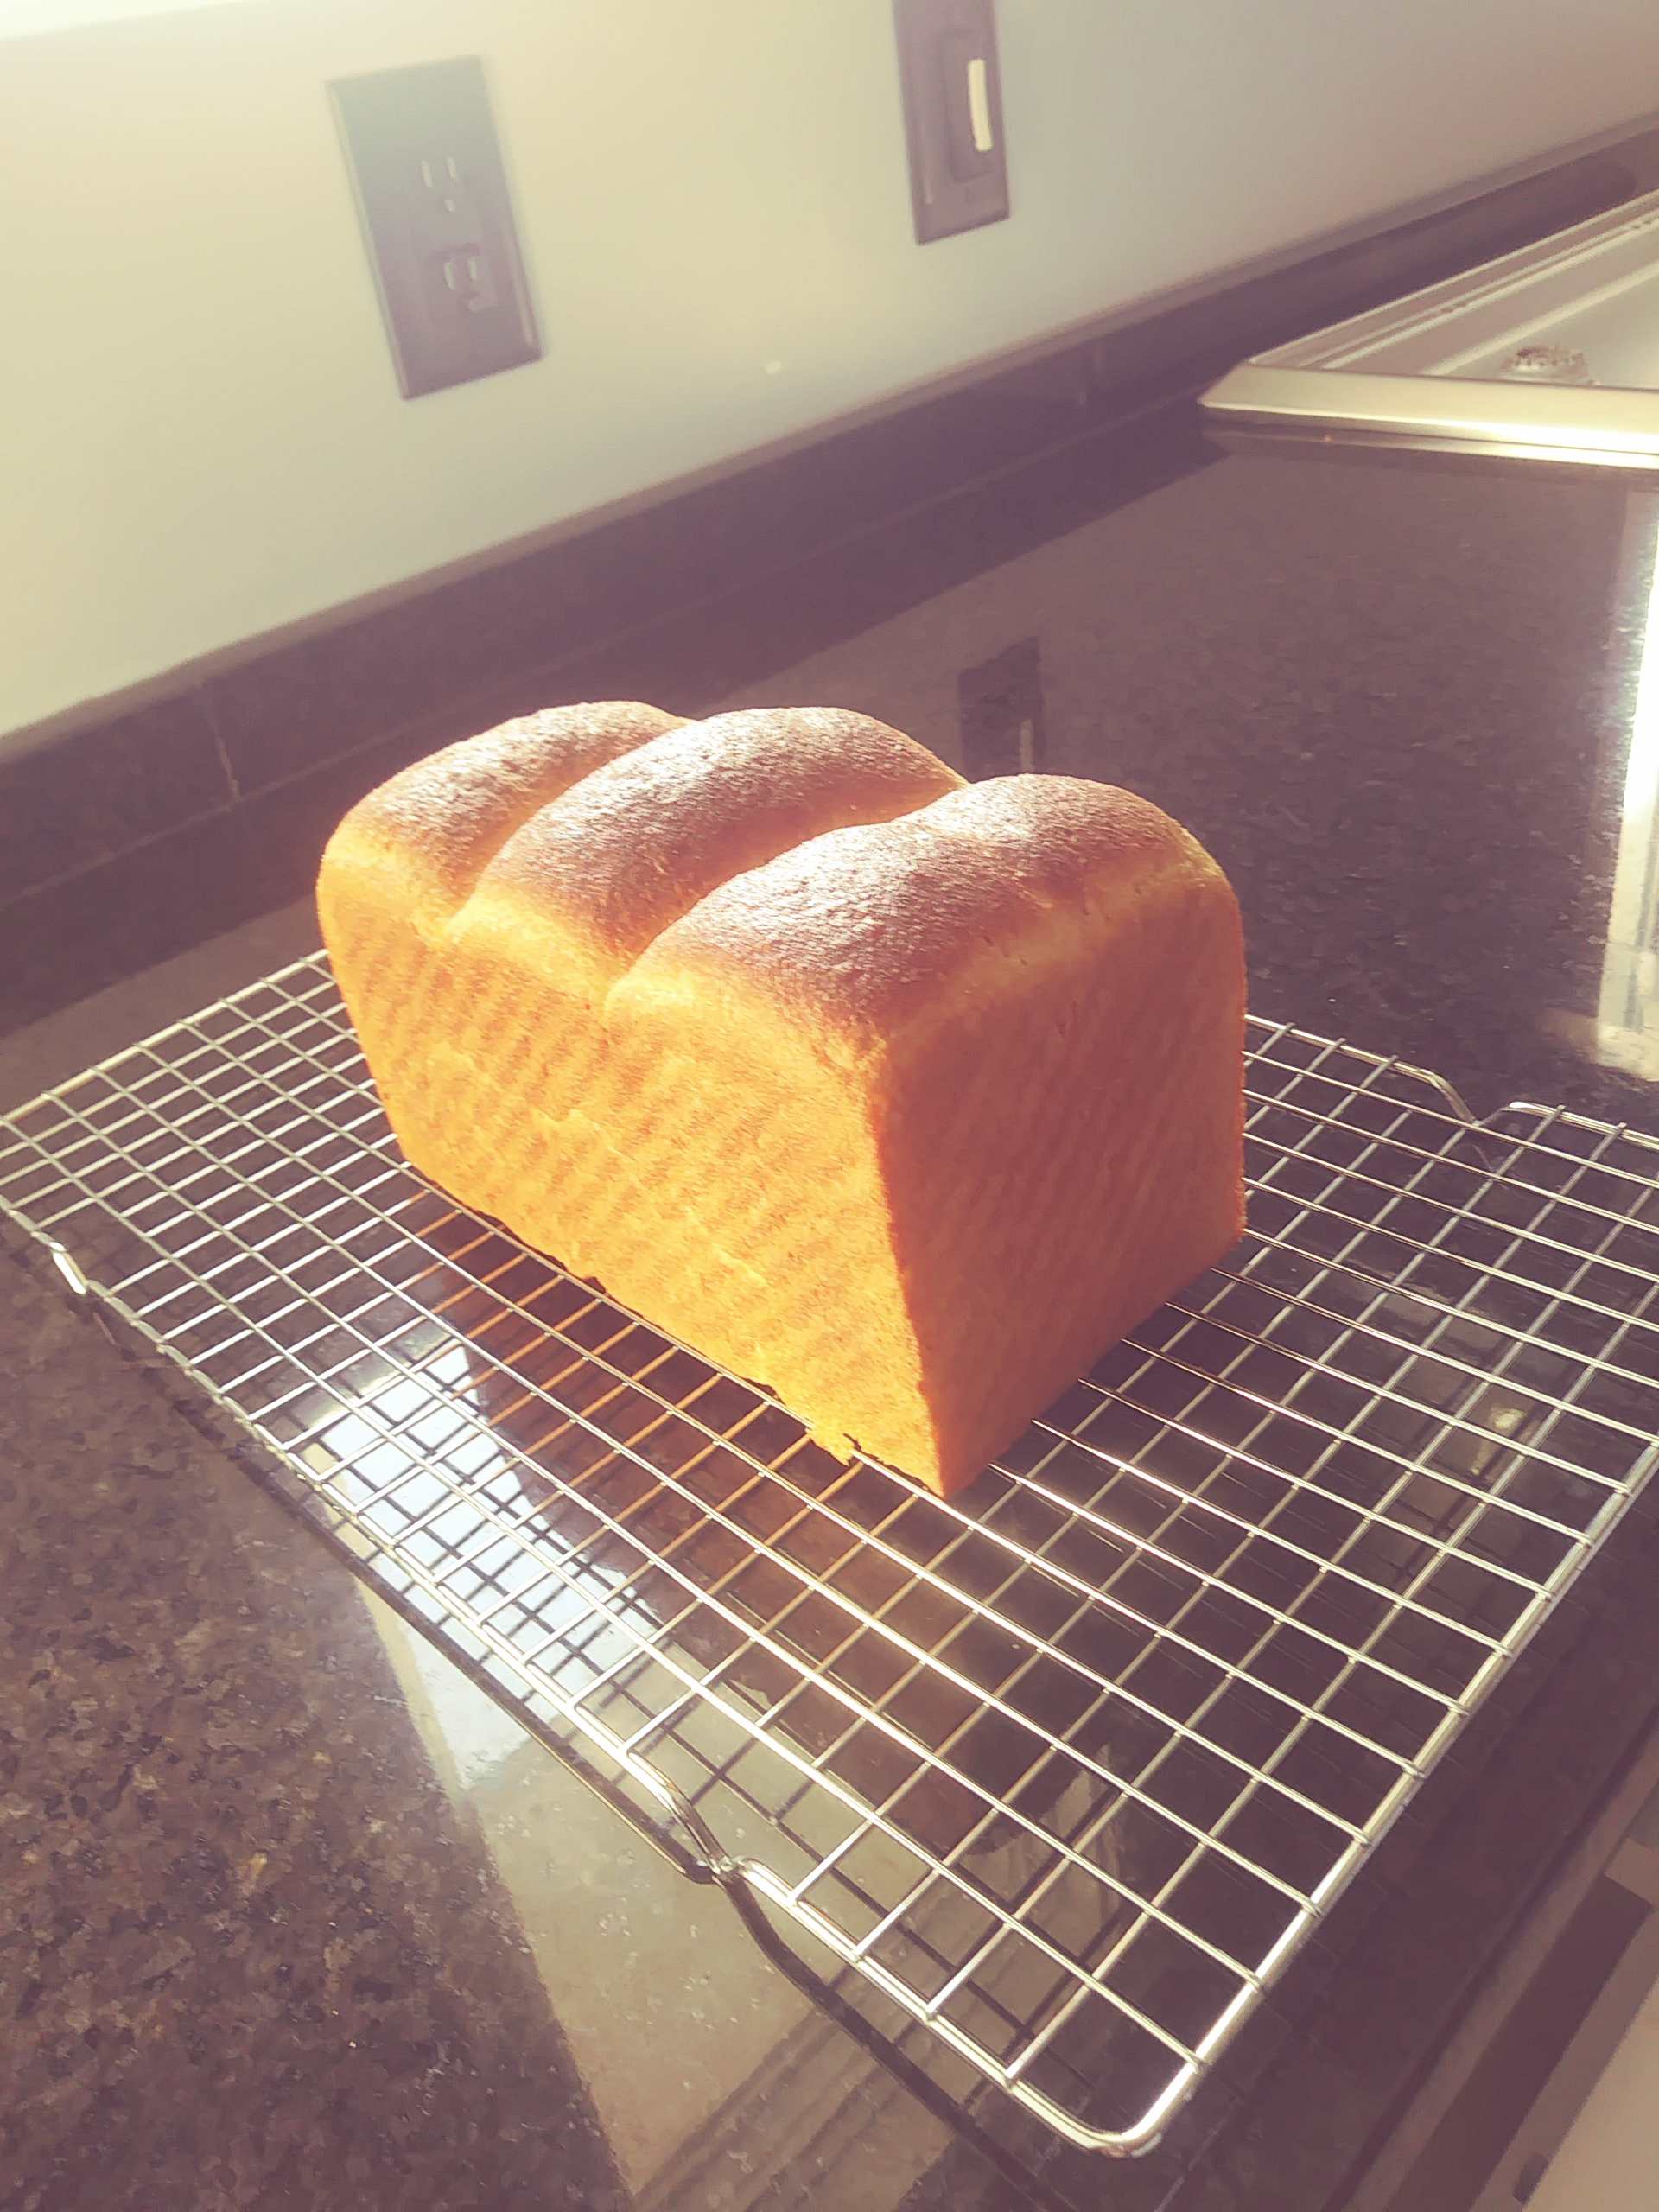
- My first loaf done in the 7 1/2 x4 x4 pullman pan I did without using the cover. I wanted to see just how much of a spring I would get without it. I had my first large holes ever in this bread (although not desirable in this case) ever, was quite surprised. If the cover was used on the pan it would have kept the bread from developing the larger holes.
- It is adaptable for adding fruits, nuts, seeds or whatever. I am very fond of Melissa’s Cranberry and Walnut bread so next round I will use this recipe and add the nuts & fruit in the last fold.
- I used a pullman pan but a 9 x 5 x 2 1/2 loaf pan would work also for the volume.
- You definitely need a mixer for this one as it took 20+ minutes of mixing on low (Wondermix Revolution) for it to clear the sides of the bowl.
Hokkaido Milk Pain de Mie
using home milled whole grain organic white flour
Ingredients: (7 1/2 x4 x4 pullman pan)
- Scalded milk 200g or as a substitute 132g Half & Half and 68g water
- 1 whole large egg 57g
- Fine Ground Organic Whole White Wheat 325g
- Milk Powder 10g
- Powdered sugar 30g
- Table salt 4g
- Salted butter 30g
- Instant yeast 5g
Ingredients: (16x4x4 pullman pan)
- Scalded milk 356g or as a substitute 235g Half & Half and 121g water
- 2 whole large eggs 114g
- Fine Ground Organic Whole White Wheat 579g
- Milk Powder 18g
- Powdered sugar 53g
- Table salt 7.1g
- Salted butter 53.4g
- Instant yeast 9g
Directions:
- Scald milk and cool to <104F.
- Mix all ingredients except butter using a mixer set at low speed until a soft dough forms.
(hand kneading is NOT advised) - Once the dough forms introduce butter incorporating same. Continue mixing on low speed for at least 25 minutes or more or until the dough becomes semi-elastic. It is very important that the dough becomes elastic and stretchy. When ready it should clear the sides of the bowl.
(if dough is not stretchy the outcome of the resultant bread may be less than ideal.) - Empty mixer bowl to the counter turn into a rough ball (you may need to wet hands as the dough will be on the sticky side) and cover dough with plastic wrap to protect from the air and proof the dough in a warm/humid place until it roughly doubles in size (approximately 60 minutes depending on conditions.)
- Divide the dough into 3-222g (5 if making 16” loaf) equal parts and shape into smooth round balls. You may need to wet hands as the dough will be on the sticky side. Allow to rest for five to ten minutes.
- Flour the rolling pin then dust counter and dough balls lightly. Roll into flat long oval shaped pieces measuring about 8” in length.
- Tuck and roll dough into a tootsie roll.
- Using rolling pin flatten dough perpendicular to the rolled up direction then you will be re-rolling in the opposite direction as in step 6.
- Repeat for the other two balls, then place in the butter greased pan with the seams facing down. Gently nudge the surface of the dough to make an even surface.
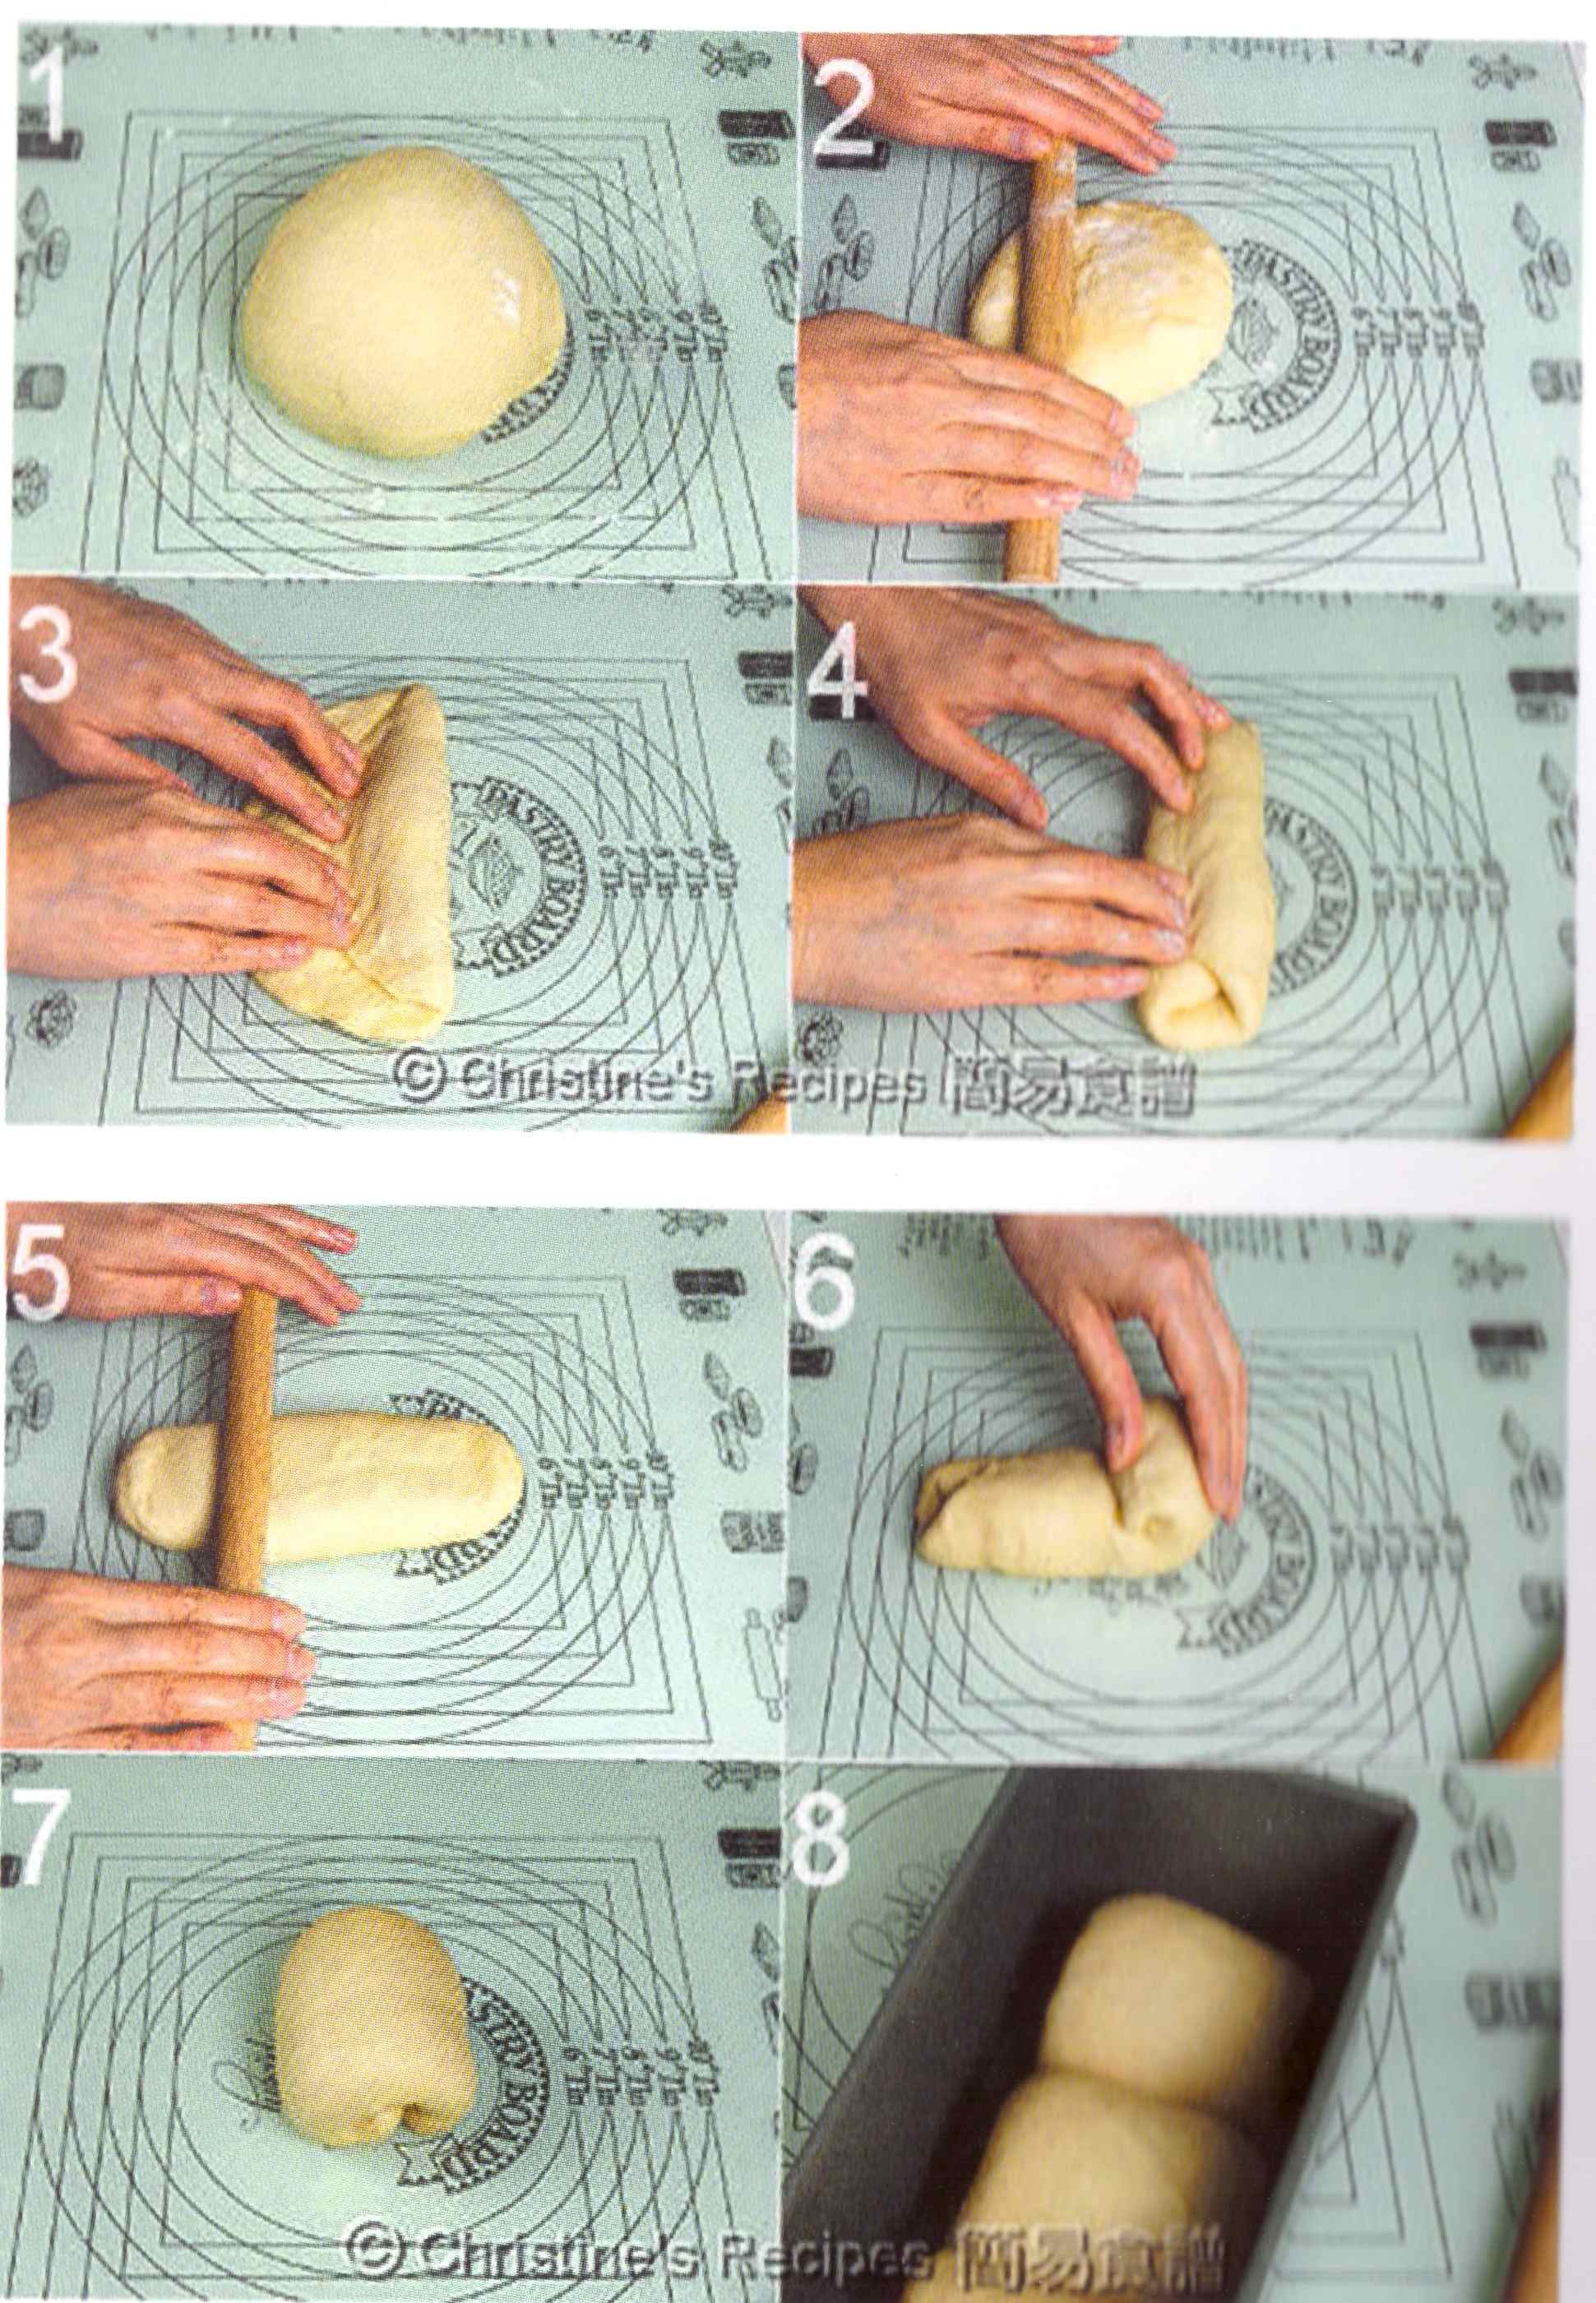
Picture of Dough Folding: Acknowledgement: Christine’s Recipes
- Cover dough with plastic wrap and allow to proof in the pan until it reaches approximately 1” from the top.
- Pre-heat oven to 425F for 30 minutes then place pan in oven. If square loaf is desired slide the lid onto the pullman pan. If a domed style then leave the lid off, spray the top of the dough lightly with water and place in oven. Reduce heat to 355F and bake for 25 minutes until hollow when thumped on bottom.!
 We go through the cranberry bread so fast it is sooooo good!