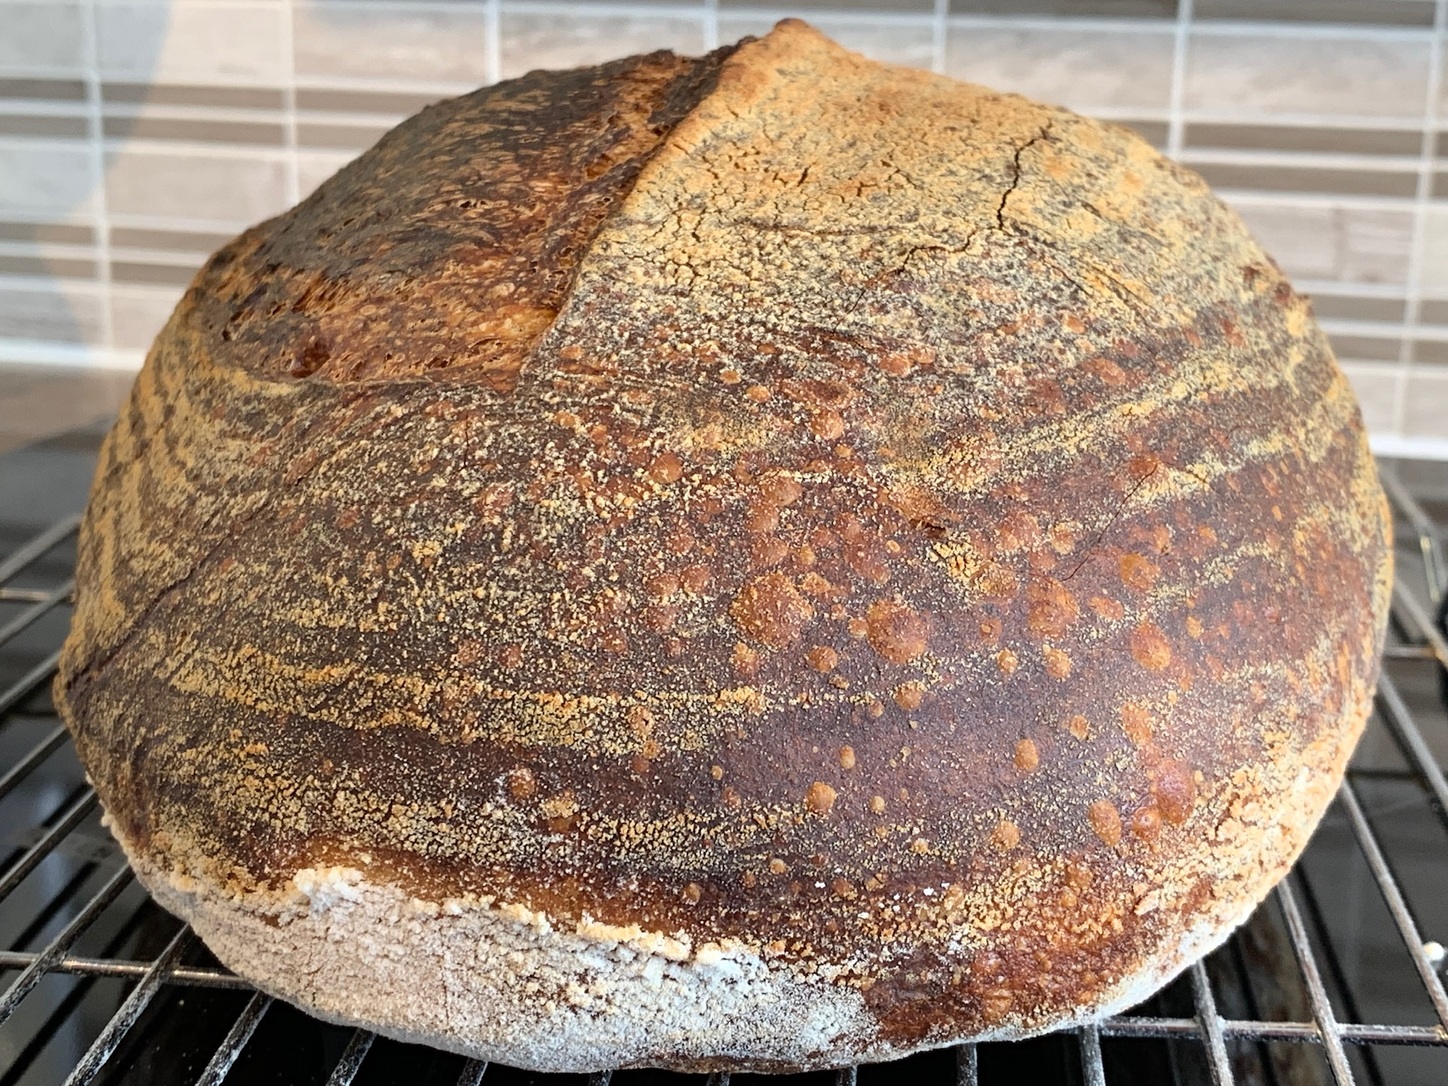
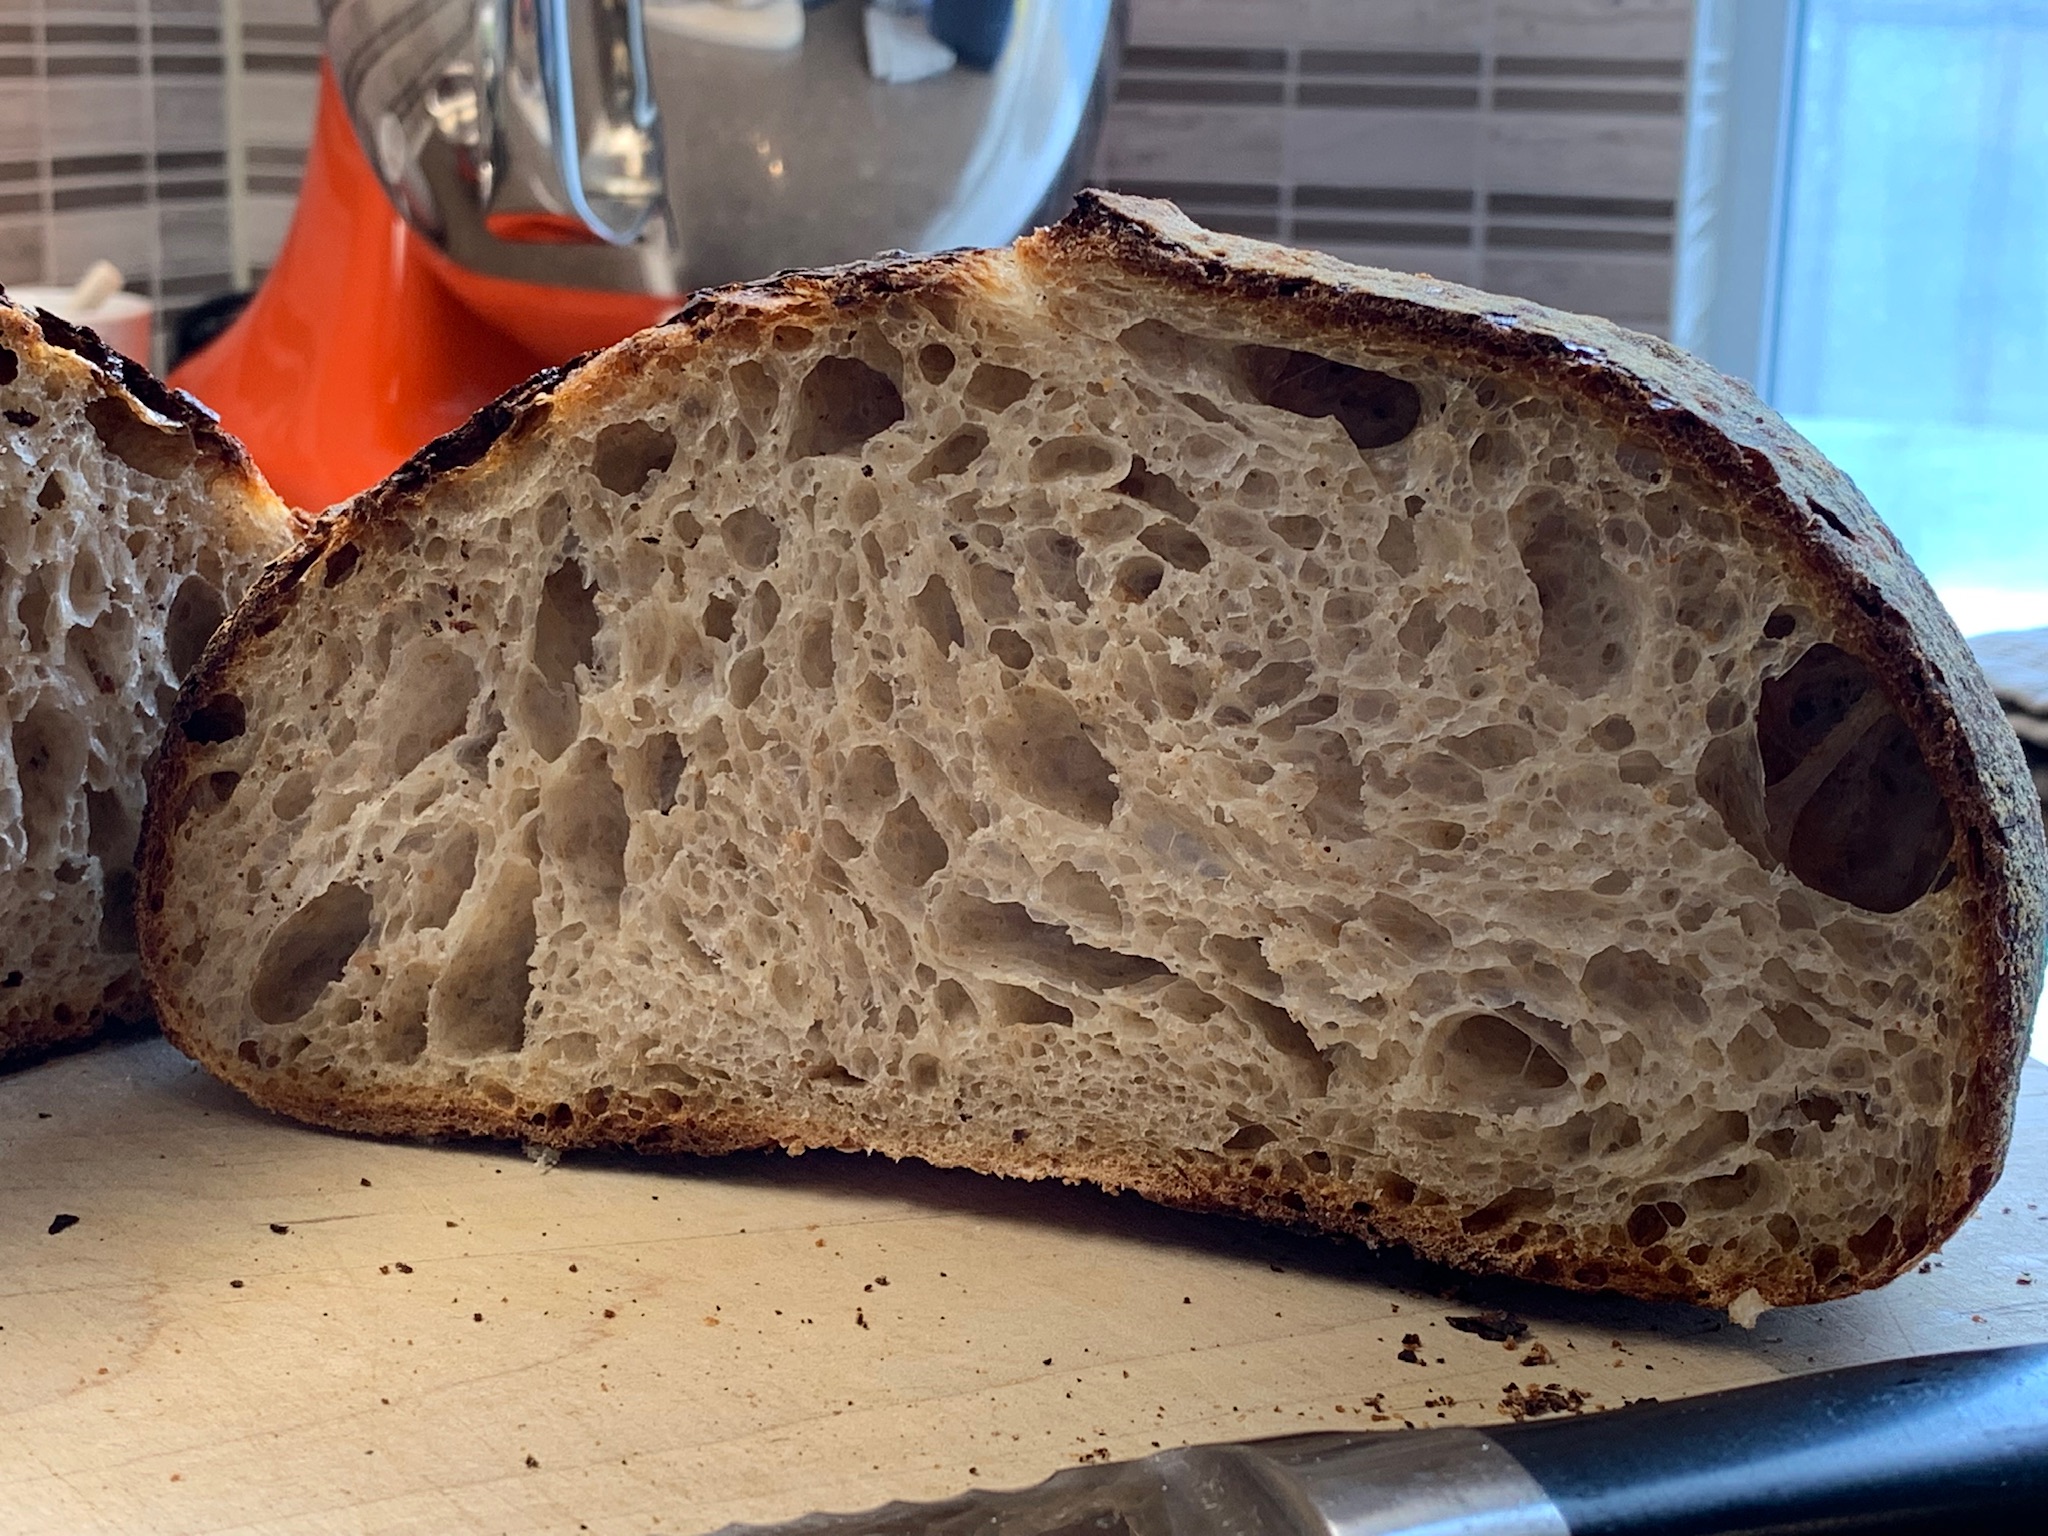
Here are the 2nd and 3rd sourdough loaves I made using my starter, now about 3-4 weeks old.
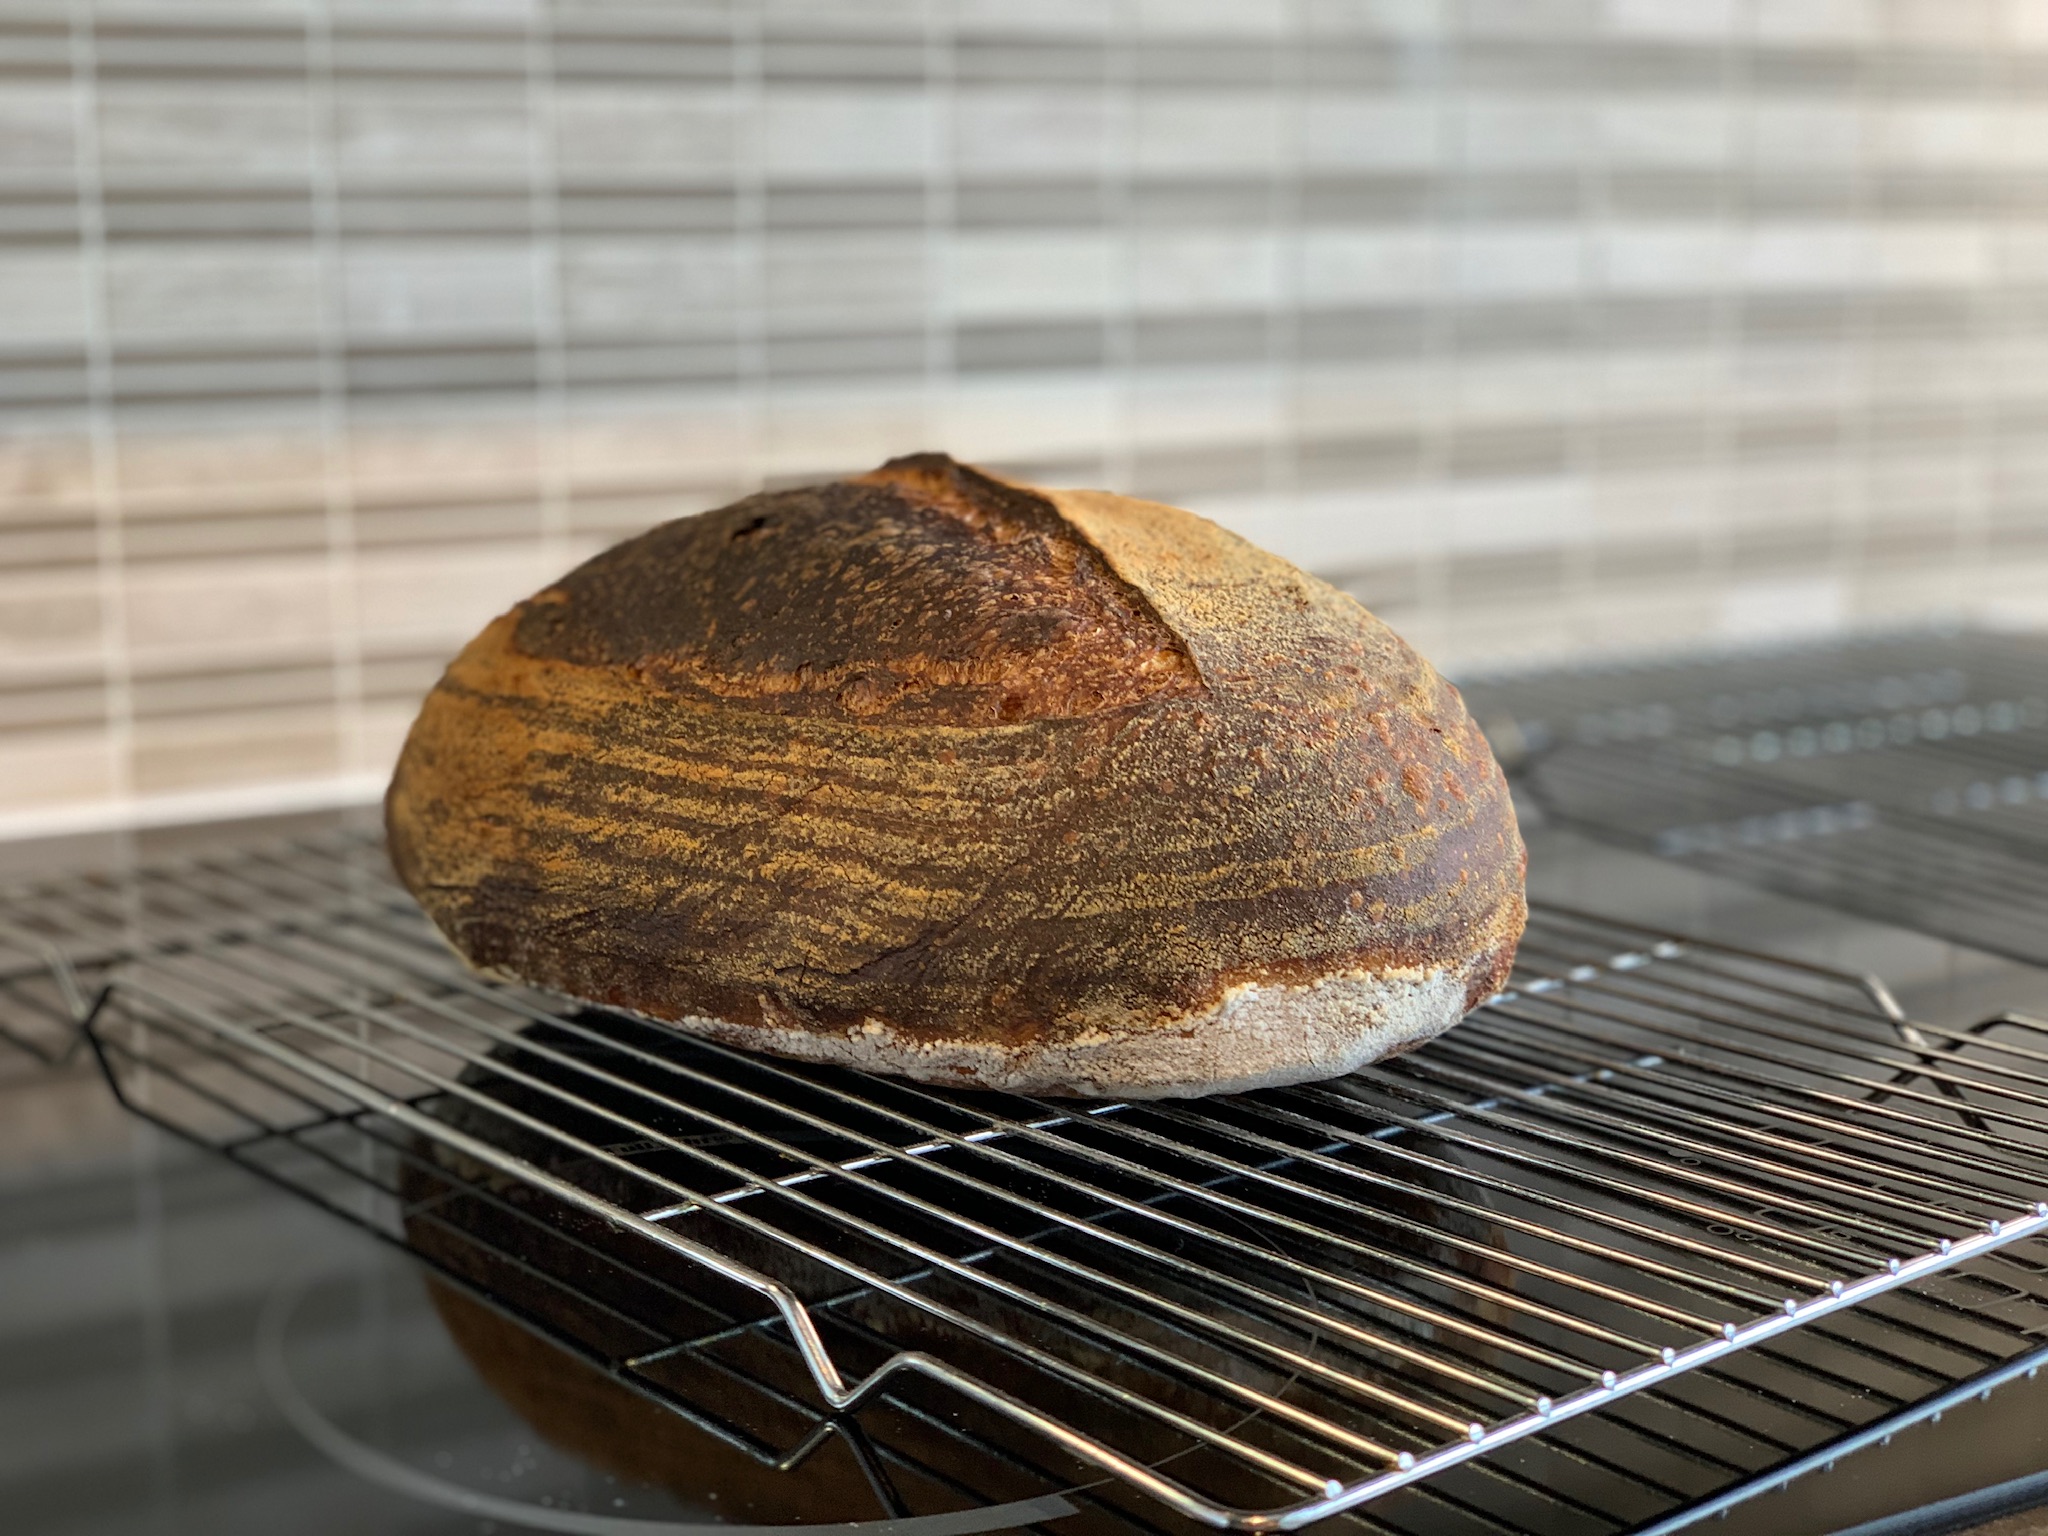
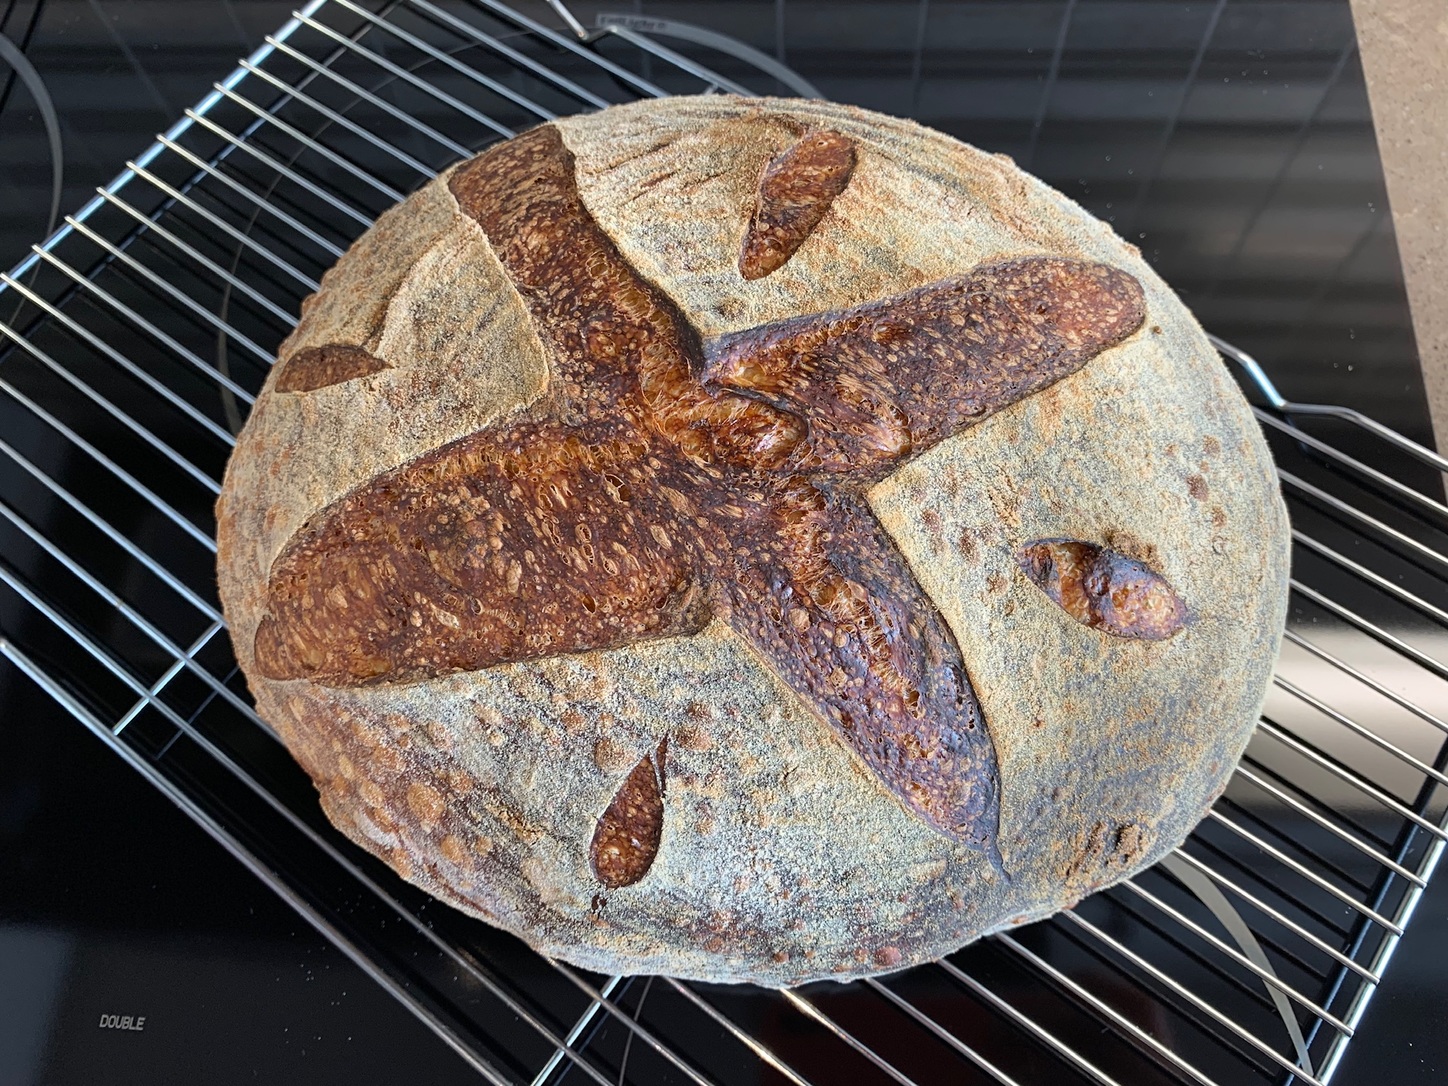
I again used the beginner sourdough recipe from The Perfect Loaf except I added an 8 hours autolyze. Unfortunately I think this had the effect of making the crust brown much more quickly than I expected and my first loaf I just cut today had a slight burnt taste to it, although the crumb was good. The other loaf I reduced the baking time after removing the lid to 25 mins and had the temperature down to 425ºF instead of 450ºF. I didn’t get to taste this loaf but have a photo of it since I gave it to friends.
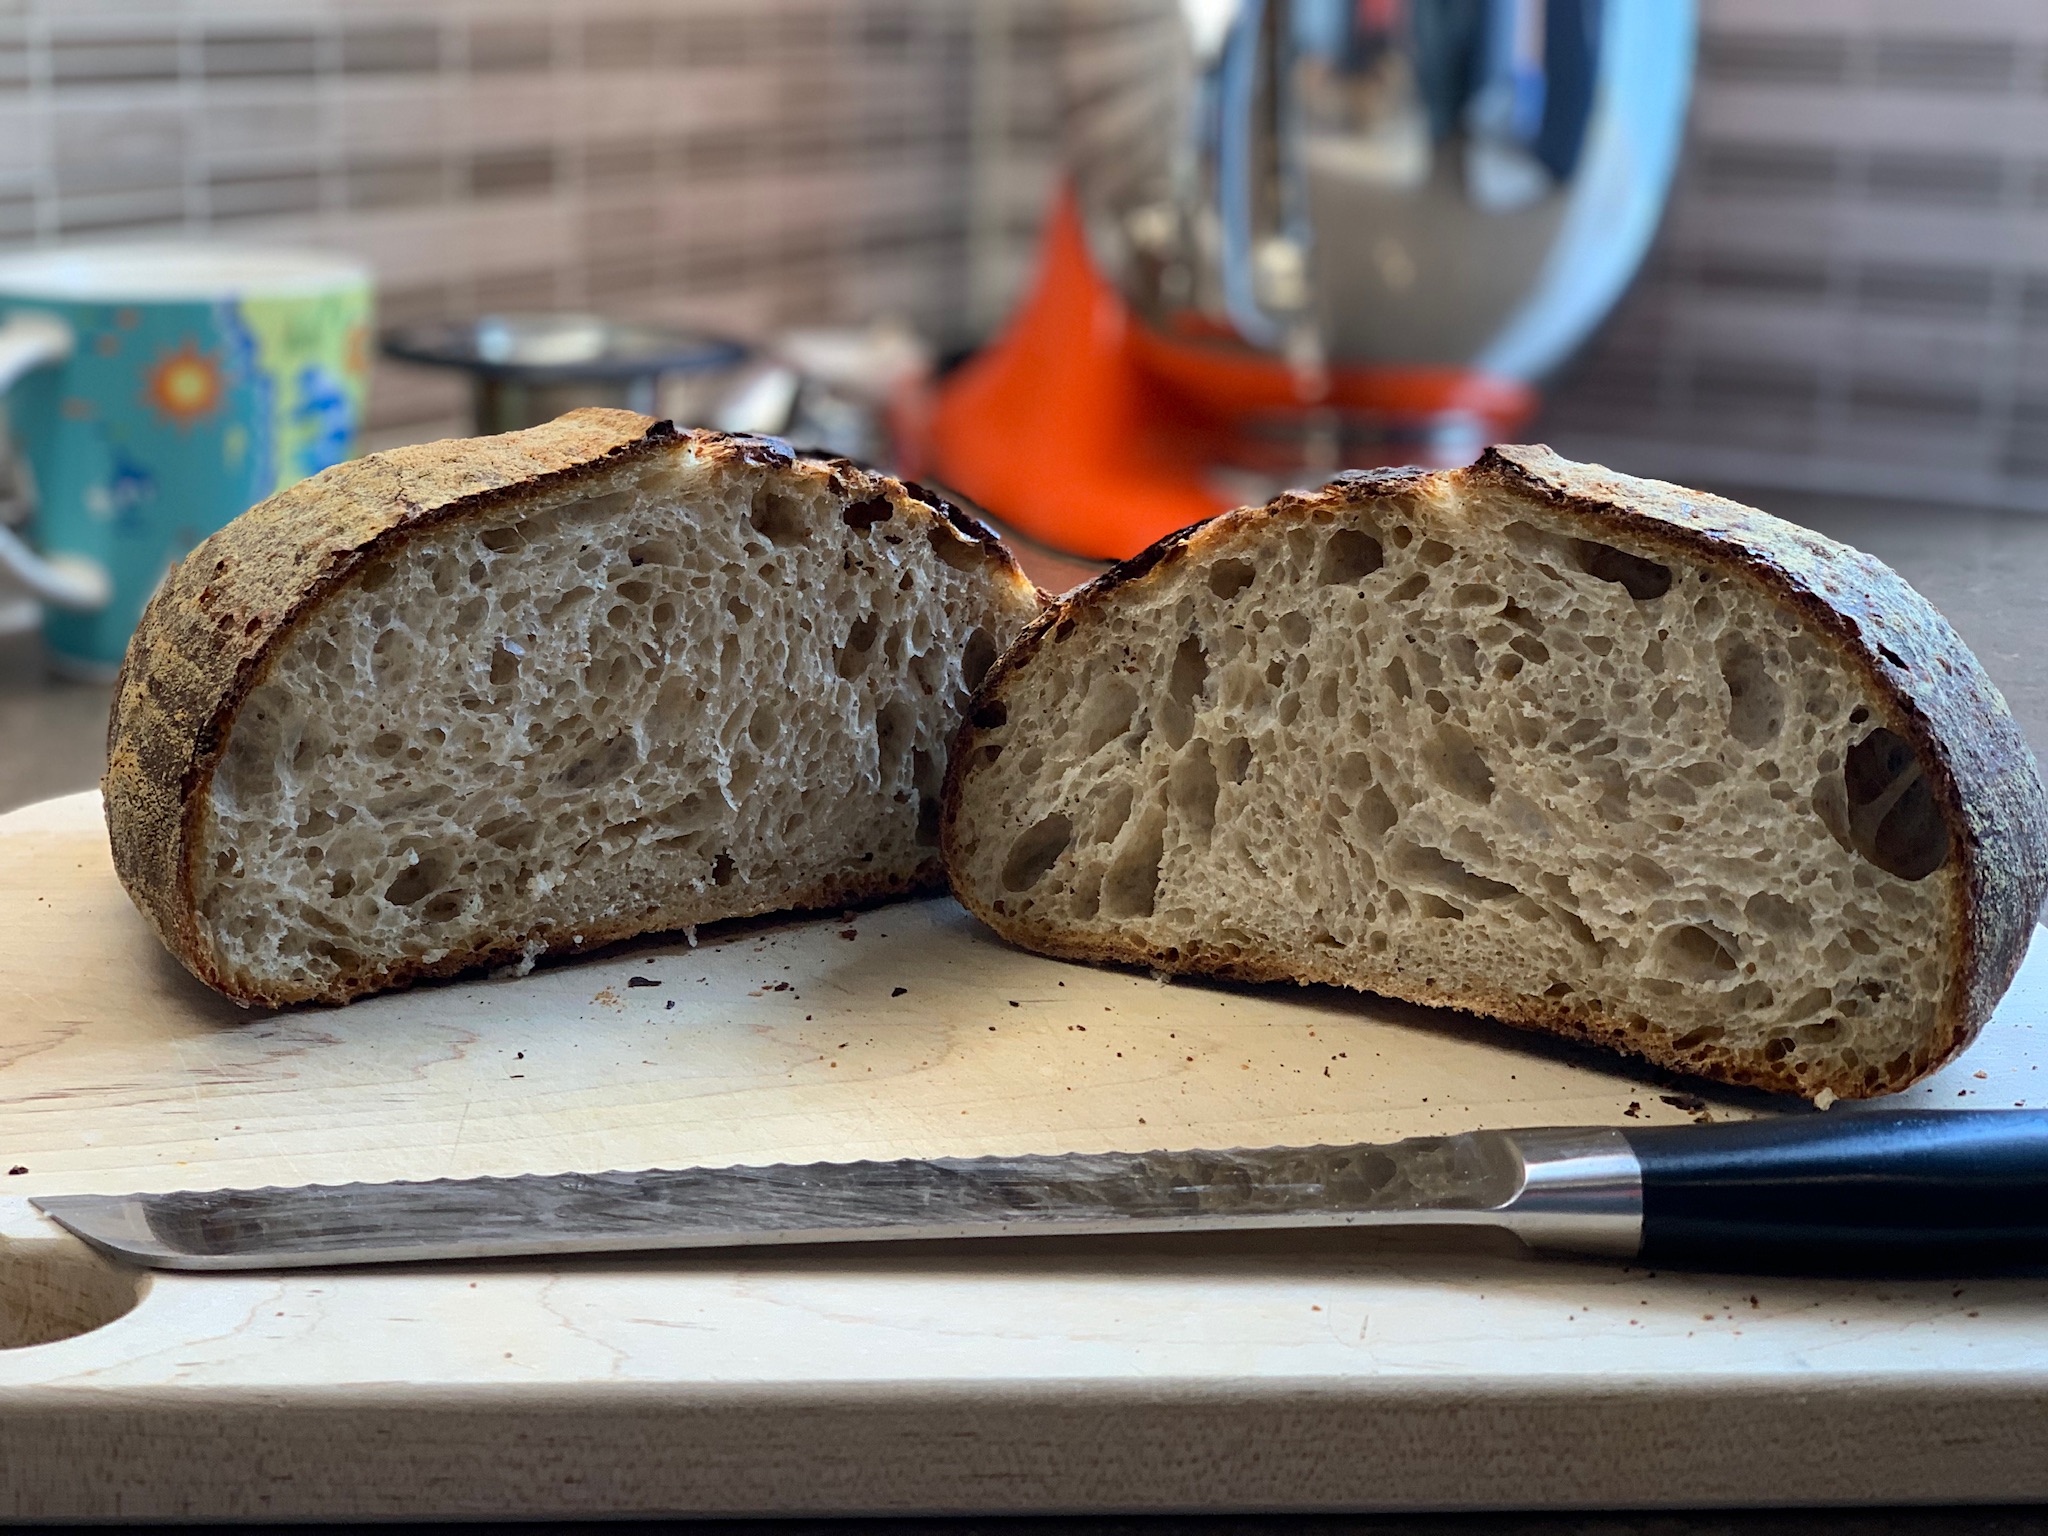
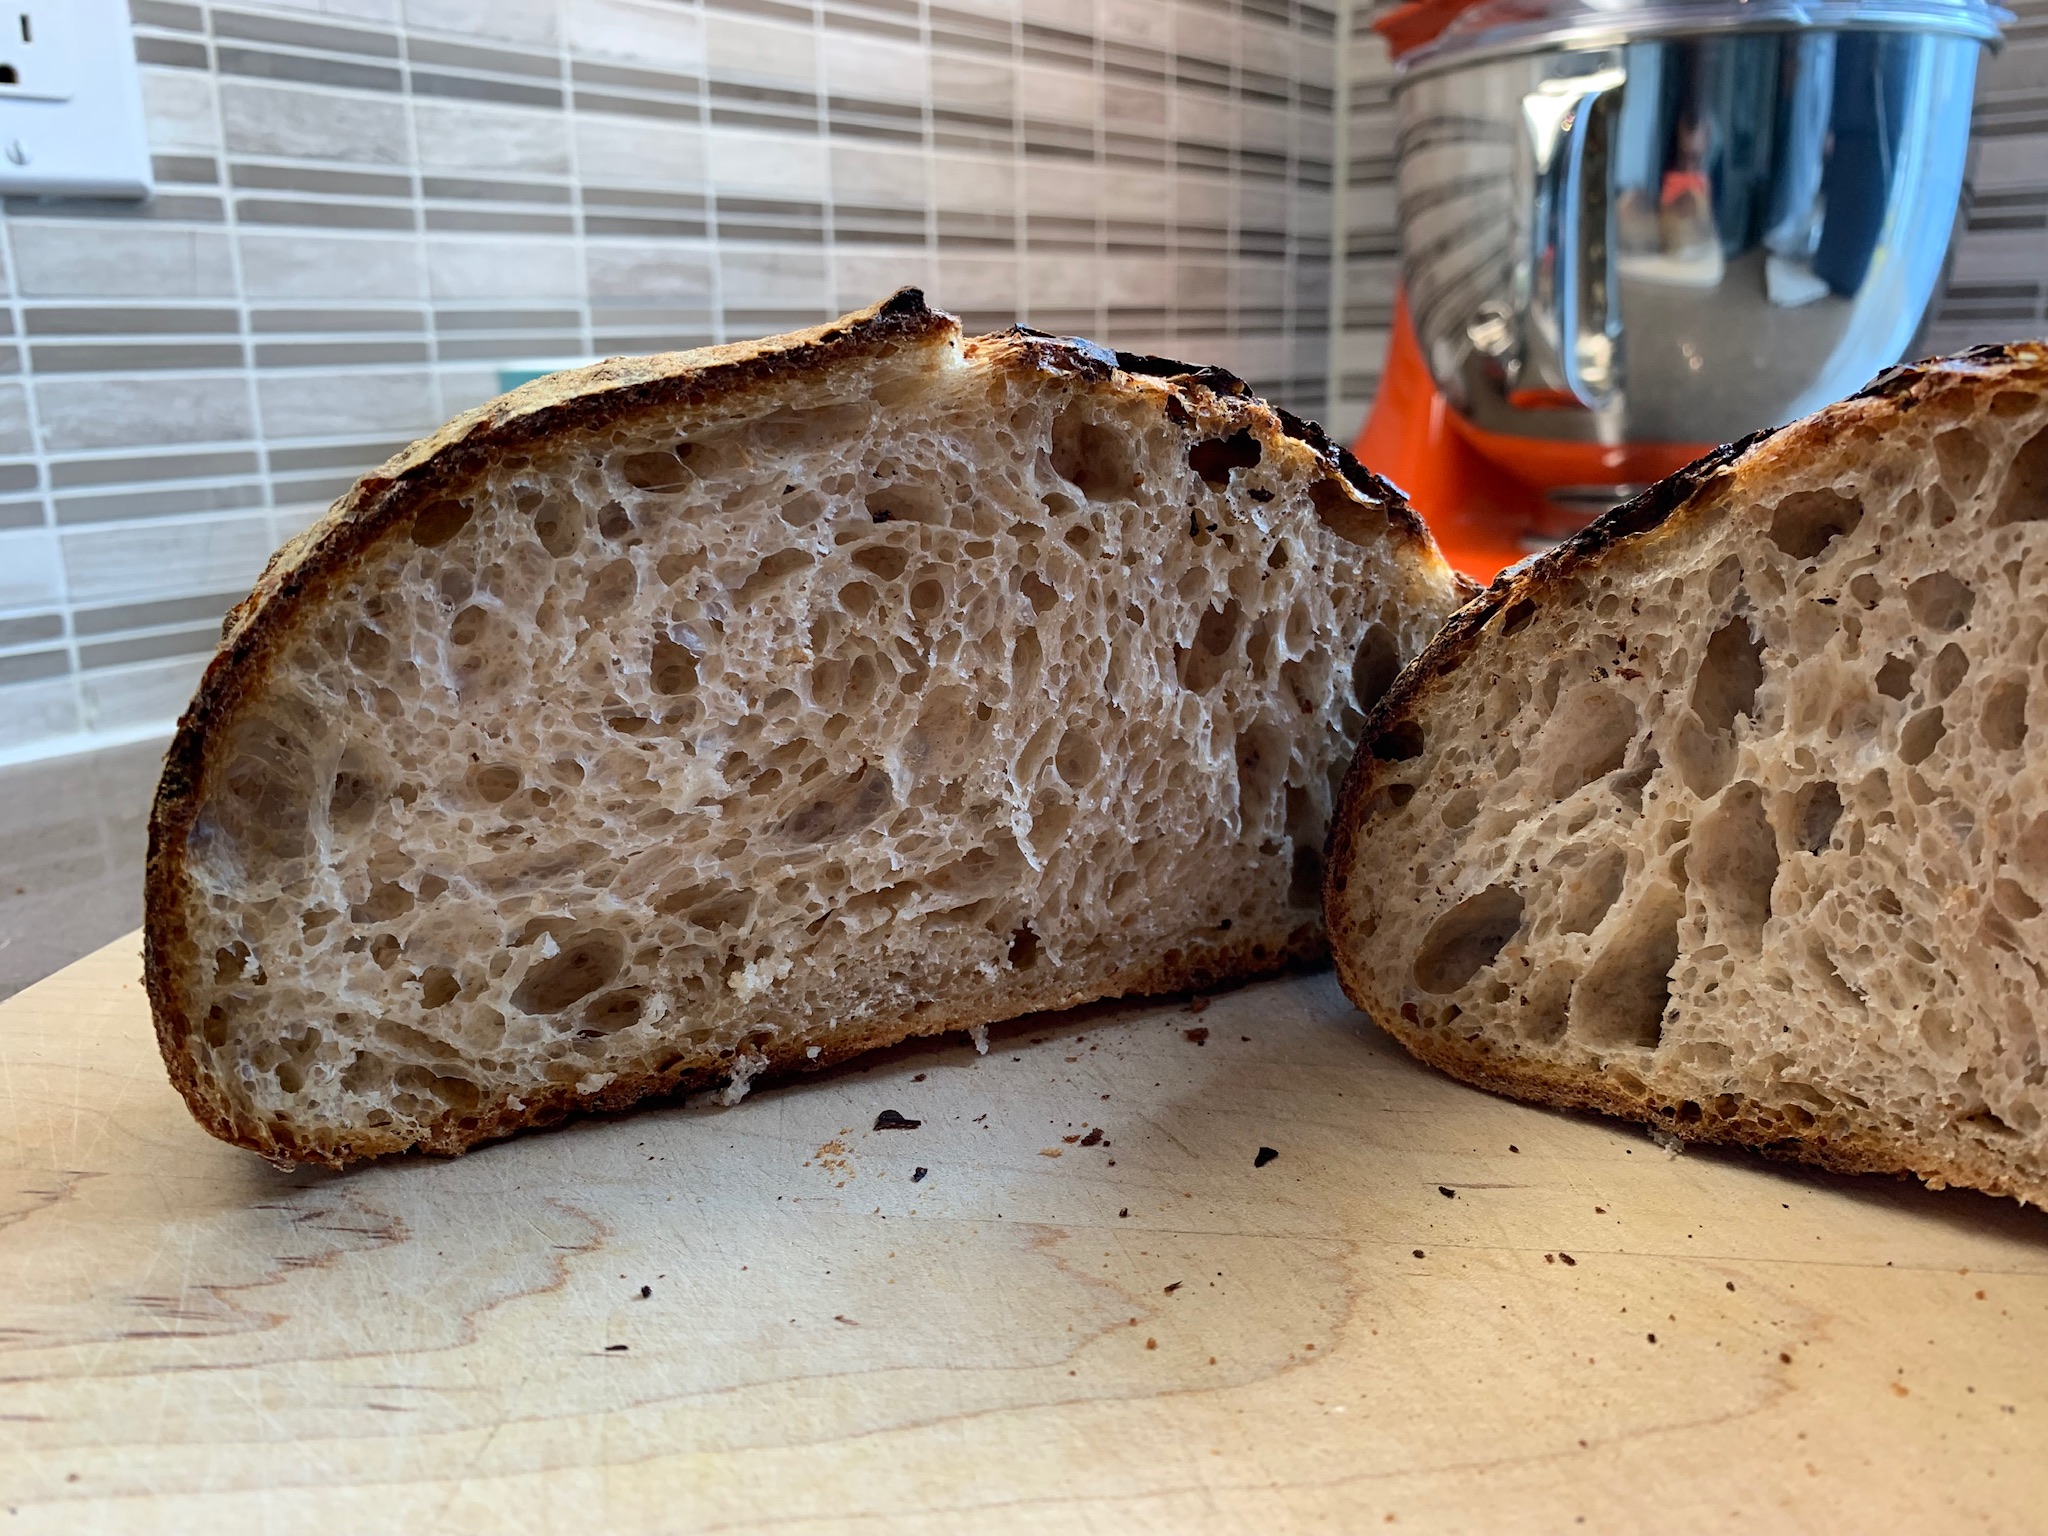
I didn’t get a good ear on either loaf, if anyone has advice on how to do that I’m all ears
I think I need to score more deeply, but I’d be happy to hear any ideas.
Those are very nice loaves. Many (probably most) “artisan” bread folks would not consider your first one over-baked, though what matters is how you like your bread, so if it’s over-baked to you, then it is over-baked. But knowing that that’s not what many people whose recipes you may be using would consider over-baked can help you confidently make the kind of adjustments with oven temperature and baking time you made in the second one. I usually bake at 450 covered and then 375 uncovered (and increase the length of the uncovered time).
Two ear things.
Scoring more deeply will help, but also scoring with the blade at an angle so it is kind of undercutting will help a lot in developing an ear as well.
Also, to get a good ear you need good oven spring. One of the tradeoffs I have found is between length of proofing and amount of oven spring. The short of it is, if you proof the loaf a little less, then it will expand a bit more in the oven. But as in all things bread-baking, finding the right balance is key, because the shorter the proofing time, the less open your crumb is likely to be.
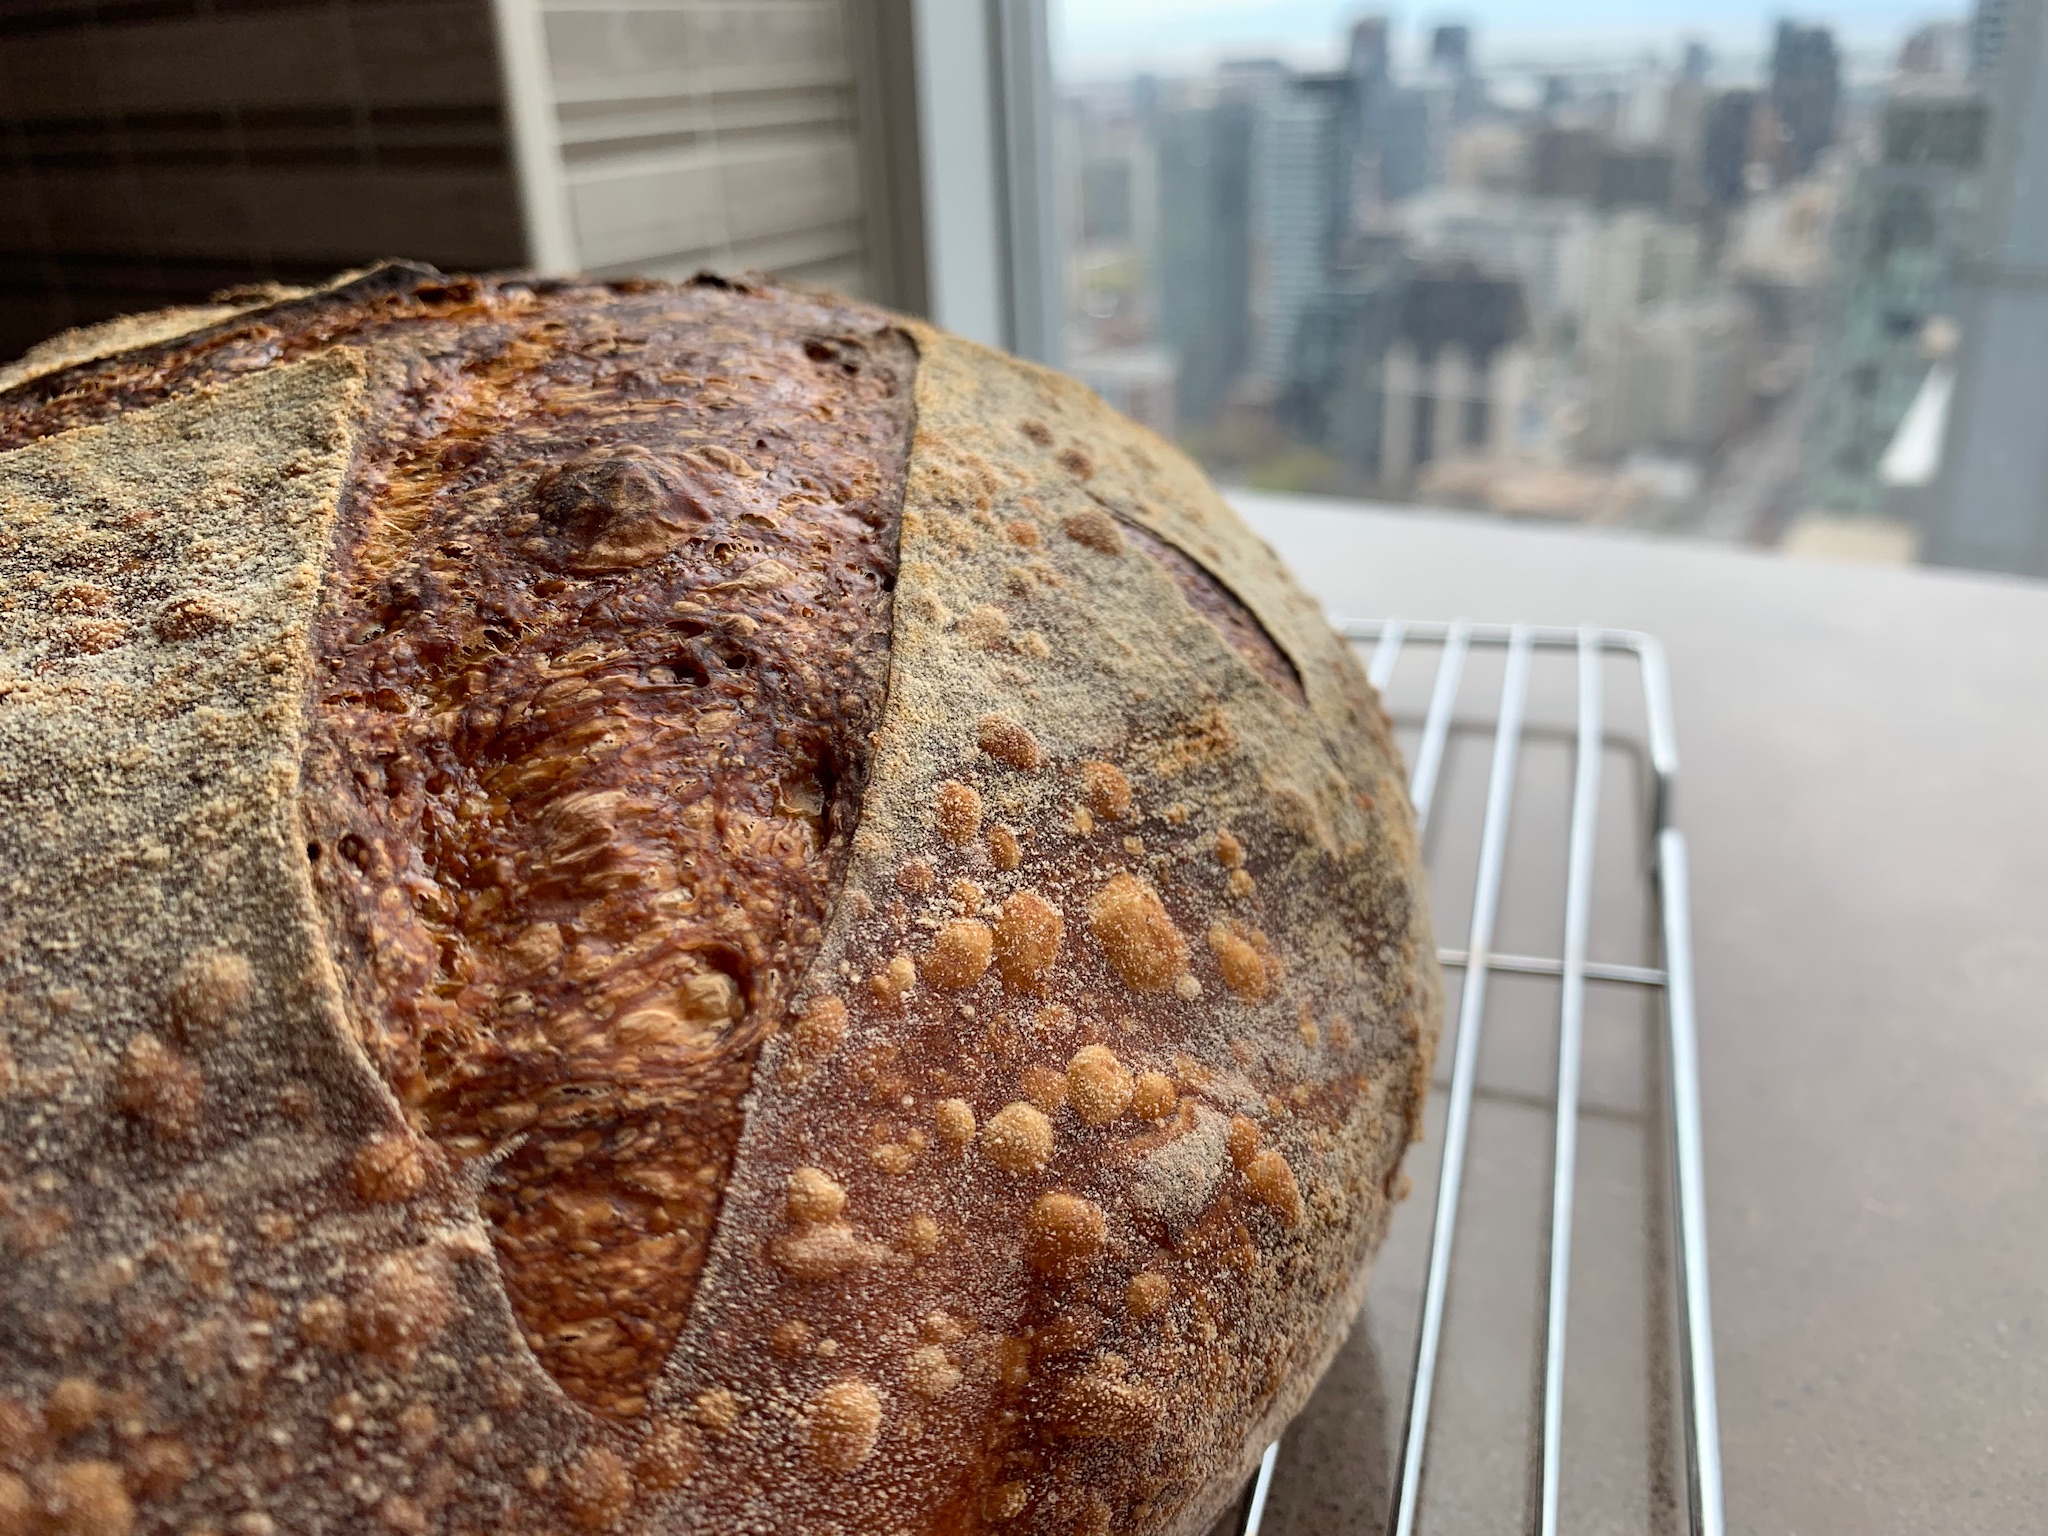
I should have taken photos after scoring the dough, that probably would have helped me get advice as far as depth and angle of my scoring. Once I scored the dough started to open up so I rushed to get it into the oven. Next time I will try to get a photo.
Paul your advice is very helpful, I will definitely try a lower temperature next time. Perhaps I’ll do one loaf at 425 and the other at 400 just to compare and see how they turn out.
Those loaves look fantastic and Paul gave you great advice and info.
The only thing I would add is that when playing around with ice cubes in my cast iron dutch oven or spraying the loaves with extra water, I did learn that sometimes too much moisture all at once can prematurely seal the score, and it’ll look a little bit like the score on your breads. Because you shouldn’t throw ice cubes into a clay baker, and I often bake two loaves at a time: one in cast iron and one in clay, I’ve had side by side testing: one dough with too many ice cubes and one dough with none–the over moistened dough doesn’t rip open. Of course just right moisture makes for tons of crispy crust bubbles and still a wide open score…I’ve only hit on that a few times
Melissa I didn’t mention it but that first loaf I also sprayed it with a bit of water thinking it might get a shinier crust that way. But based on what you said it may have also affected how the score opened up, very interesting and good to know for the future. I suppose the if one is to spray a bit of water it might be better to do before scoring the dough if at all.
It’s really hard to get the blade through if you spray first…so many variables. One strategy I use sometimes is score, then use a pastry brush to put water on the crust around the score
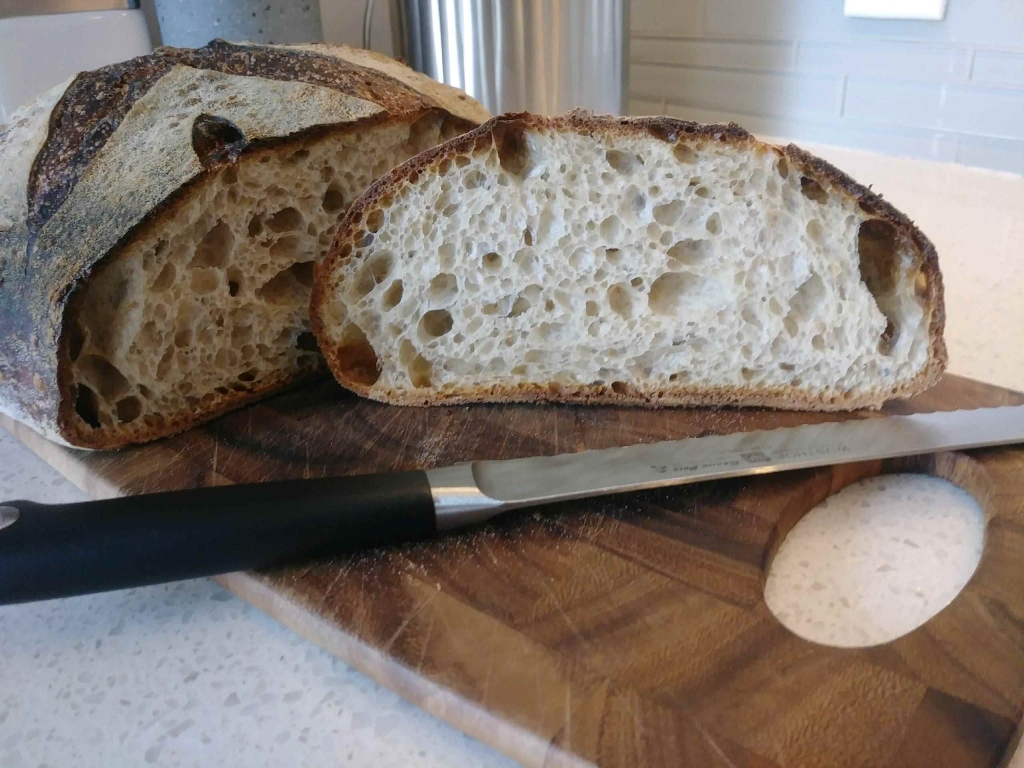
Here is an example of same bake but one dough got 2-3 ice cubes and one got more flour to make for a contrasty score. You can see that there’s no ear on the ice cube one.
My secret (as I have trouble scoring) is to put the seam side down in the Banneton and when I “roll” the proofed dough into the Dutch oven the seam is now on the top and I get beautiful (unpredictable) ears .