I think if was me, I’d go for this “easy bake” dough for hot cross buns… a lighter enriched dough than the brioche.
Gotcha on the orange zest/fruit/butter eyeballing 
In Peter Reinhart’s Bread Baker’s Apprentice, he gives three brioche recipes:
Rich Man’s >80% butter (relative to flour weight)
Middle Class >50%
Poor Man’s >20%
The smitten kitchen dough is about 18%, and the Hokkaido milk buns are 19% ignoring the flour in the starter.
They’re so rich and delicious, it’s hard to imagine 50% let alone 80% but someday I’ll give it a try.
A quick scan of hot cross bun recipes online has them around 10-15% butter.
All of which is to say that there is lots of delicious variation…
…and after looking at those Easy-Bake rolls, hamburger and hotdog buns, seeing how quick they can be made, knowing how much better they would taste than storebought, I will never ever buy them again for backyard cookouts!
1 Like
There seems to be a lot of discussion about howl to retain the “sour” in sour dough. Some say a longer ferment time, a cold ferment, more sour dough starter, less sour dough starter, wetter dough, dryer dough etc etc. I have tried them all and found “one” more suggestion at another website that I thought I should try. And it worked. First let me say I started my our sour dough using breadtopias suggested approach and had sour dough for a loaf or two then it lost all “sour” properties. But still made a great loaf of bread using this “No Knead Method”.
From the other source I found that by taking 1/4 cup of my starter (I cant legitimately call it Sour Dough starter” because it was not sour, and adding 1/2 cup of Water, and 1 cup of AP Flour, mixing and letting is sit on the counter, and feeding it 2x a day for about five days - the sour comes back.
When feeding, take 1/4 cup of the newly started starter, and repeat the above additions And discarded the left over (or use it for something else). Again 2x a day for five days - I actually started feeding the starter on Monday morning and on Thursday Morning then began using the No Knead Method to begin making the bread. Mix and rest for 18 hours, fold the dough and rest for 15 minutes then form the boule and let rise for 2 hours. Bake.
This method has now worked for me a couple of times. Previously I had been making the sour dough NO Knead Method for a couple of years and continually lost the “sour”. This works
hello my name is Bekah,
we live 6800 altitude…
any suggestions, for altering the recipe ?
Hi Bekah! I live at 3300 but my mom lives at 8500. When I bake at her house, she always reminds me to keep an eye on the rise (it goes faster) and maybe a bit more liquid (the air is drier, the flour will absorb more water).
Variances in flour to water happen for all of us depending on type of flour, the day, each kitchen. With a new recipe, I like to add dry to liquid and I can stop adding flour if the dough seems “right”. It is much easier to add more flour to a too wet dough than try to add moisture to a too dry dough.
This is a pretty forgiving recipe but if you are a new baker and/or new to your altitude, watch the video and go for the look and feel in the video even if you add less (or more?) flour. I’d go with the same temps in the recipe but you may have to bake a little longer. Check temp the first time if you have a thermometer.
Also, if you have a scale, weigh flours vs using volume for most accurate measure.
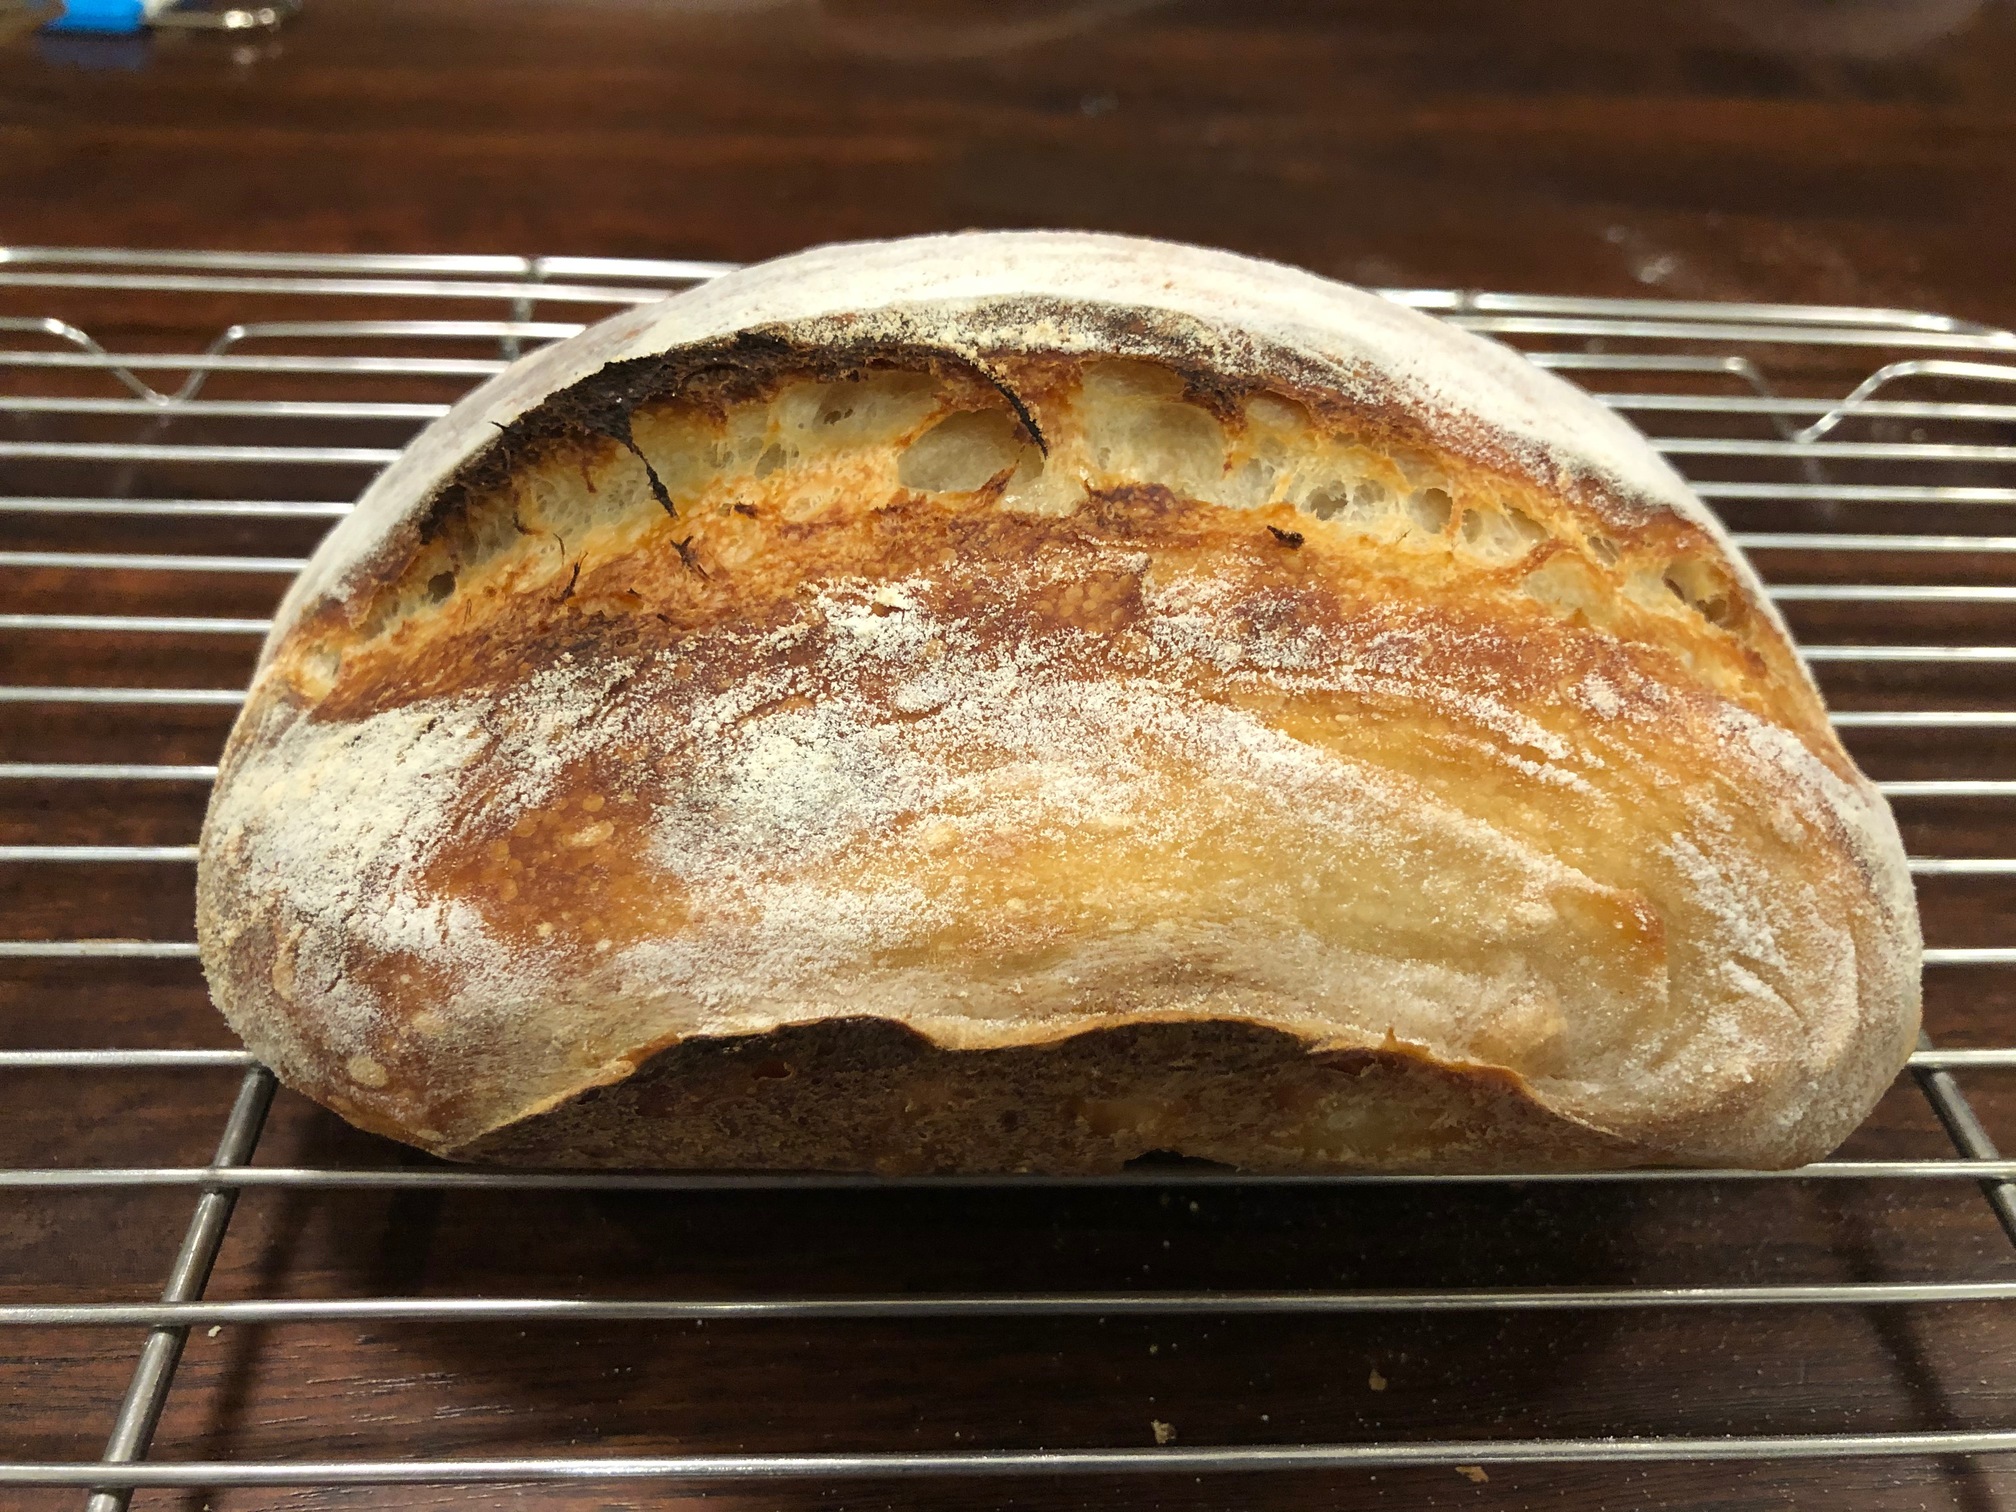
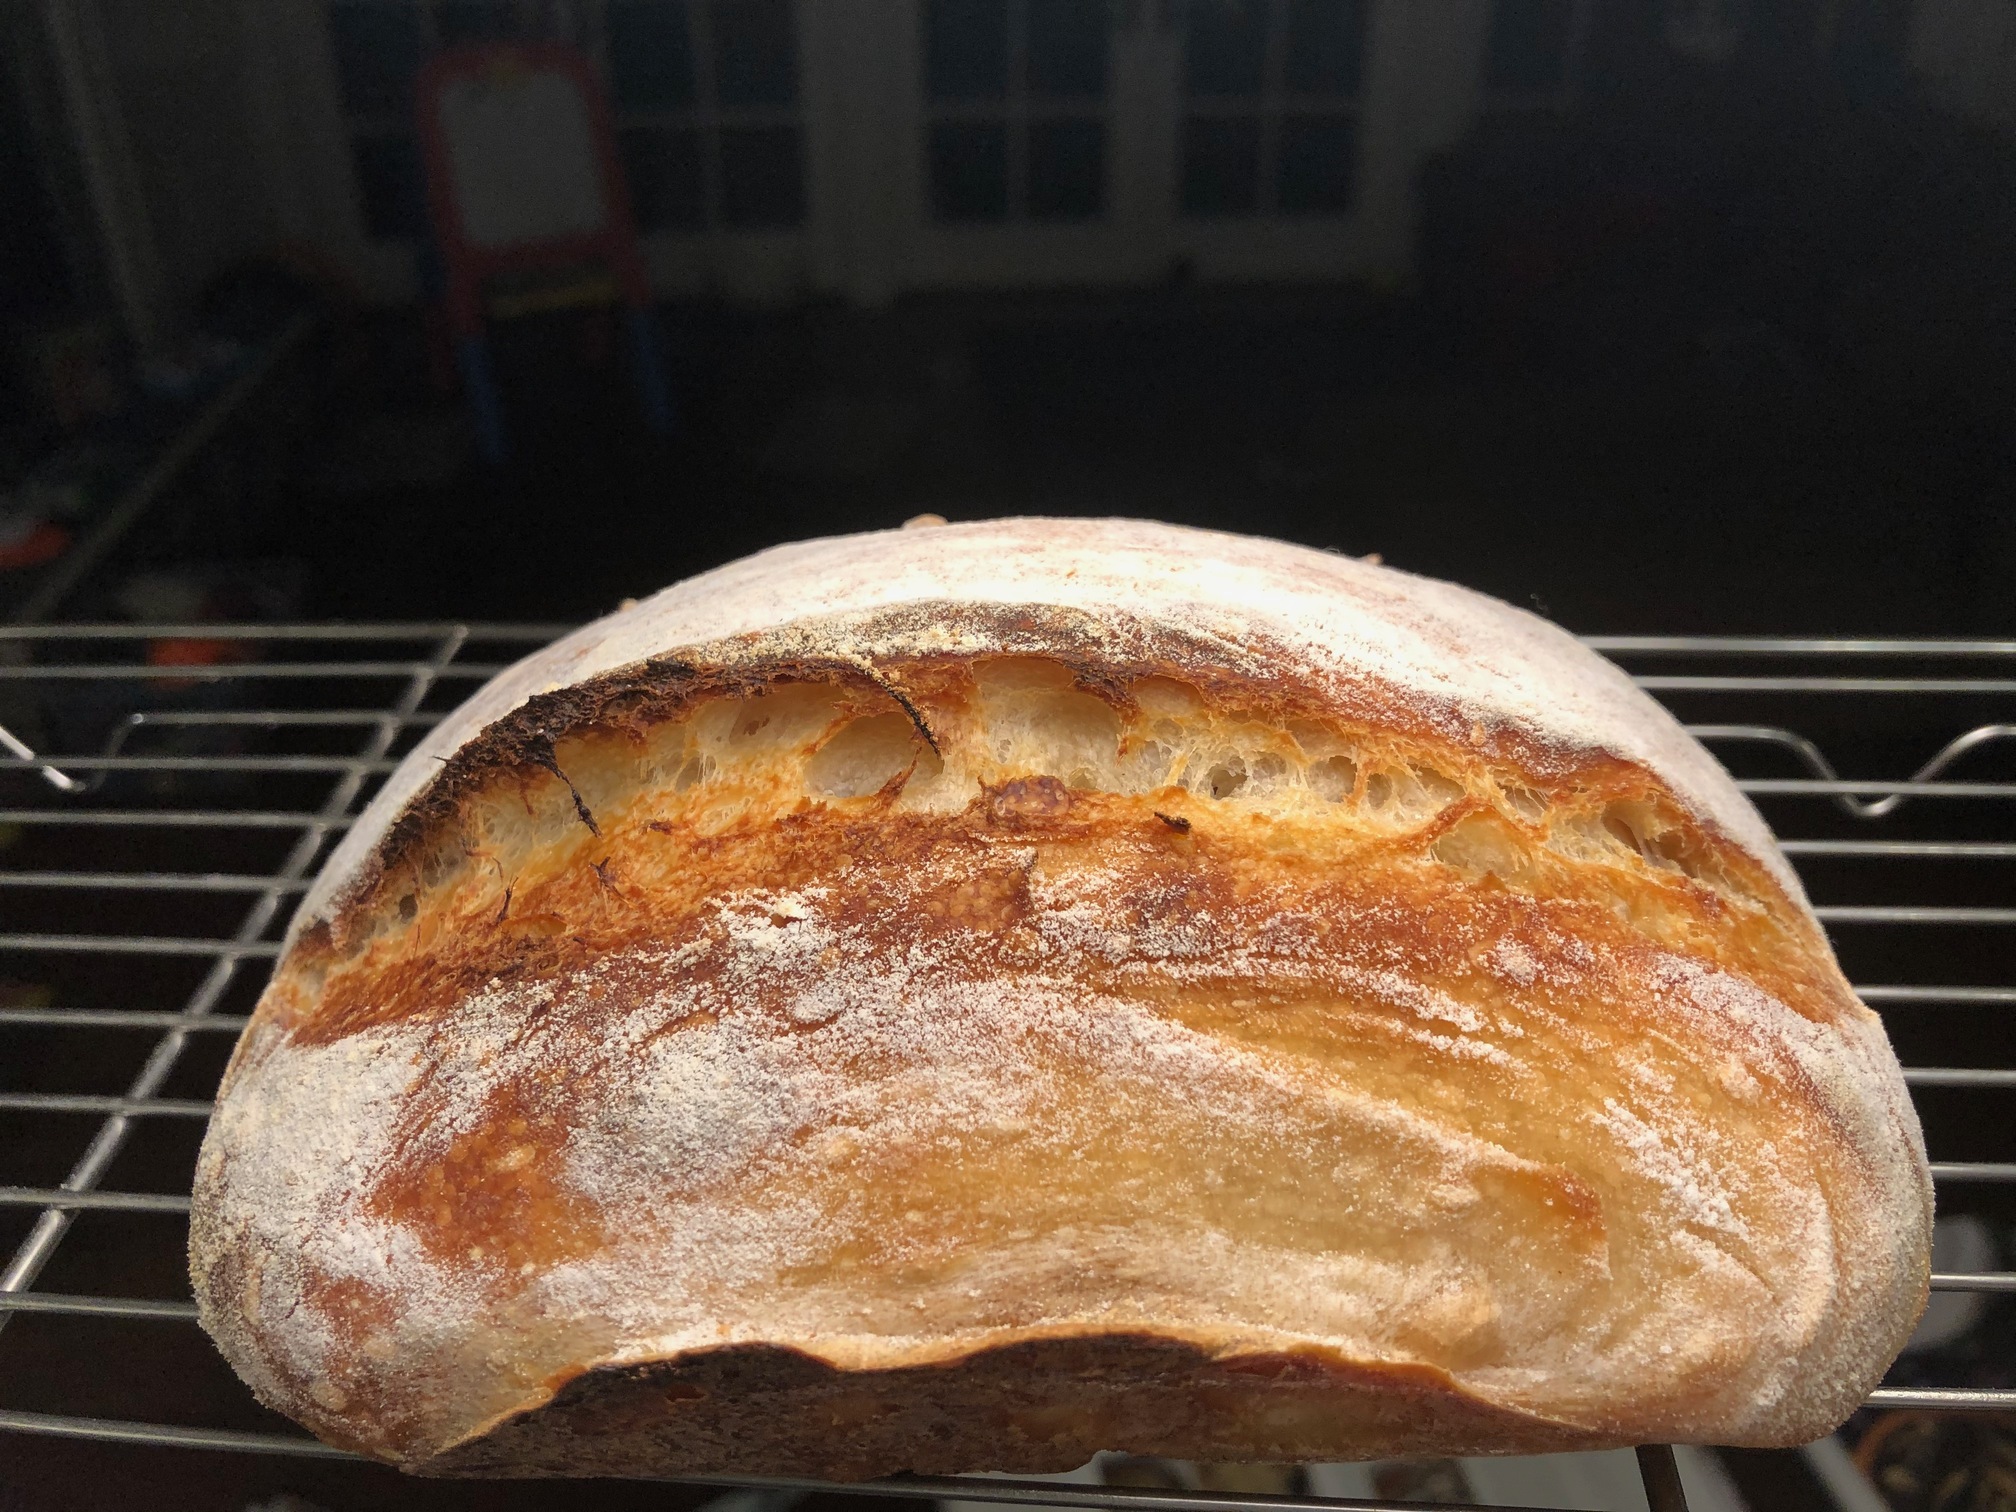
Hello, I tried out this recipe for the first time, with some mods for my climate and flour type (humid tropics). I used about 90% maida (Indian local APF) and 10% of my own home-grown, stone-milled whole wheat. I reduced the water to 400g. I did two s&f, and then left it outside on the balcony overnight, about 8 hours (18-20C). It was beautifully fermented. I tried the coil folds, which were a bit tricky, then proofed for about 90 minutes. Preheated the dutch oven in my toaster oven (no gas oven, alas!) at 250C for 30 mins, then baked at 250 for 20 mins, and with the lid off for another 30.

I am happy with the crust and oven spring, and the crumb is decent. My problem is the internal temperature after 50 mins is 99.8F, but the crumb remains gummy and underdone. This has happened several times with my recent bakes, all in a DO, with 65-75% hydration. Why does that happen? Does the smaller environment of the toaster oven heat up the crust too quickly and not allow the crumb to be done? But then why does the inner temp register “done”? In fact, when I put the digital thermometer in it came out with sticky. After several hours I cut the loaf and it has got drier. But I would appreciate suggestions on how to tinker with OTG/Toaster oven temps with high hydration doughs, to bake the crumb better.
Thanks SO much for all the videos - I have been watching for a long time, but finally got a starter going well.
Your bread looks fantastic. The internal temperature does need to be over 205F though. But maybe you meant to write that the inside is over 99 C (not F as you wrote).
Your crumb certainly looks nicely done. And the inside of the bread needs time to cool down, so pulling out a damp thermometer is not uncommon.
If you don’t have a baking vessel that fits in your toaster oven, maybe wrap the bread in foil part way through the bake so that it doesn’t continue to brown while the inside finishes cooking.
That bread looks beautiful: crust and crumb.
As you noted, the crumb dries out a bit in several hours. I typically bake early evening and don’t cut into a loaf until the next morning, sometimes longer for some flours, rye for example. And as you said you live in the tropics, so maybe a bit more time for the crumb to “finish”.
Even in a DO, your baking vessel is much closer to heat source than in a larger “kitchen oven”. If letting the loaf cool longer does not help, maybe a slightly lower temp for a longer bake time. Another option is a bit of a heat shield between the DO and the heating elements. Maybe the DO on top of a cookie sheet.
Oops, yes, I meant to write 99C. I will edit it now.
Good to know that a damp thermometer is not uncommon! The crumb improved quite a bit over the course of the day too.
I do have a cast iron dutch oven that I use, but inserting it and taking the hot and heavy pan out of the small oven is a bit of a pain. I am looking for a smaller clay baker, but I will use the foil in the meantime.
Thanks for your reply and encouragement!
Thank you!
I did put the DO on a cookie sheet, but I think I need to put it on the middle slot rather than the bottom one of the oven, because the bottom is definitely burnt. I will tinker with reducing the temperature and cooking for longer, with a foil on top to avoid the crust from burning.
I find it quite difficult to get good results in an open oven on a artisan style boule or batard. Steam dries up too soon. Crust overcooks. What I’m getting at is that you probably want to keep the dutch oven in the equation even if it’s a workout to maneuver in the small oven.
Perhaps you’re saying you will use foil in addition to the dutch oven, though, in that case, you might as well keep the lid on longer instead
And perhaps no dutch oven in a very small oven will have good results – worth a try.
I’m sorry if I’ve been confusing!
No, no, it’s not confusing, I’m actually grateful to get concrete suggestions to try out one by one - foil after taking off DO lid; keeping DO lid itself for longer; bake boule on a baking stone with foil and perhaps a small tray of water or ice cubes at the bottom.
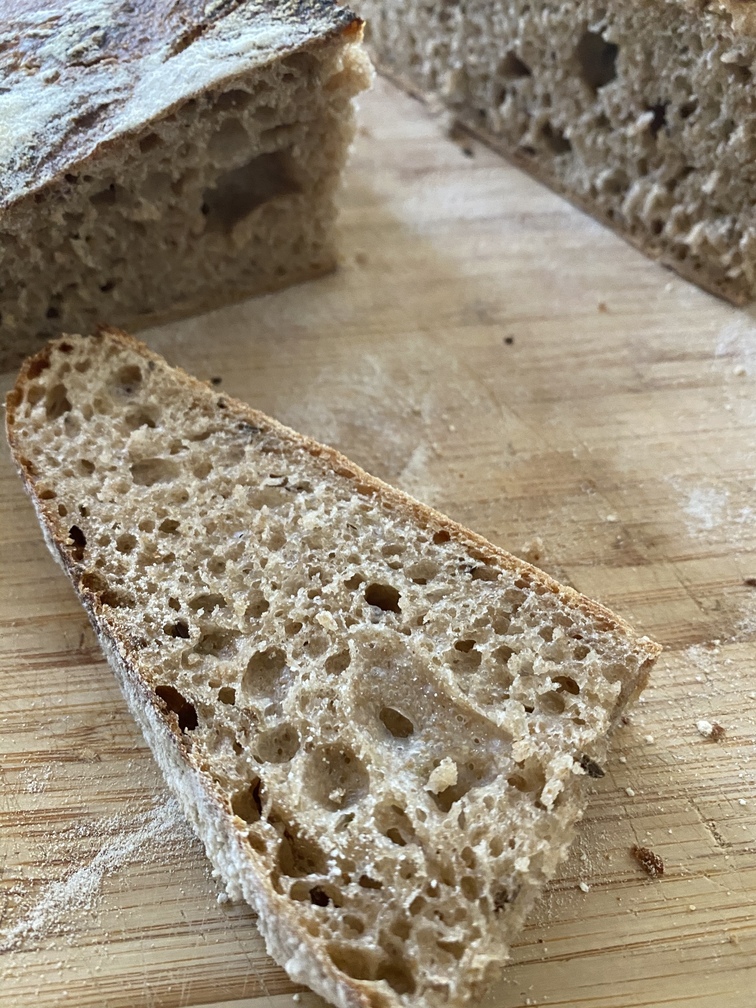
One thing I realised after using this recipe is that I am better off using a lot less starter than I was using before. Using 70g starter for 520 flour was much better than the 120 g for 200 g that I was doing with another recipe, gave me much better fermentation and crumb.
After overnight proofing, my dough appears ready to go but after the second proofing, the dough appears more loose and somewhat runny. Despite following the recipe a couple times now and experimenting with a little extra flour to absorb more water in an attempt to better keep structure, my loaves still turn out rather flat. Using a circular, enameled 6-qt Dutch oven. Suggestions? Thanks!
My hunch is that you should shorten the overnight first rise. For example, if that’s currently 12 hours, bring it down to 8 and see how things turn out only changing that variable.
RE: “sourdough starter” in the ingredient list…can that be discard sd or does it need to be fresh/active/bubbly/ready? In a pinch…in lieu of active/ready sd starter, what are your thoughts about using the discard sd starter + SAF yeast, and how much?
Over the weekend I used some starter that was last fed two weeks ago and it was just 5g starter for 500g flour. Had no issues in leavening the dough. It was a long ferment no knead recipe.
If you’re using SAF yeast as well… even more so. But unless it’s been months in the fridge just go for SD Starter and watch the dough.
Bubbly, mature, fresh, active etc… is the rule we follow when starting out on the sourdough journey. The rule of thumb. And perhaps best for a young starter. But once your starter is strong and predictable these rules become guidelines.
What I will say though is when you use non refreshed starter it’s best when using a small percentage for a long ferment. Reason is the gluten within a well fermented starter will be broken down much more so then a refreshed starter and if you use a high percentage then it will compromise the gluten in the final dough. Also for the flavour.
P.s. Just had a look at the recipe and at 70g starter I’d say if it’s been refreshed within 3-4 days then go ahead and use it. If it’s been longer then perhaps a refreshed starter would be better.
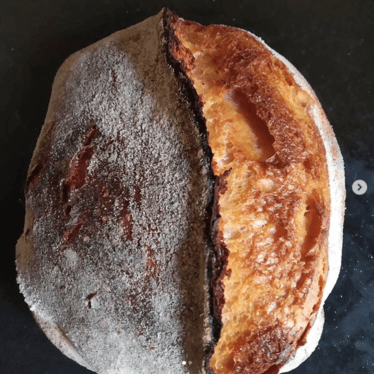
Thanks for this recipe. I used onion powder and caraway and fennel seeds because I like them.
I had roughly 1/3 of the rye called for so I just used regular whole wheat for the remainder. Great crumb!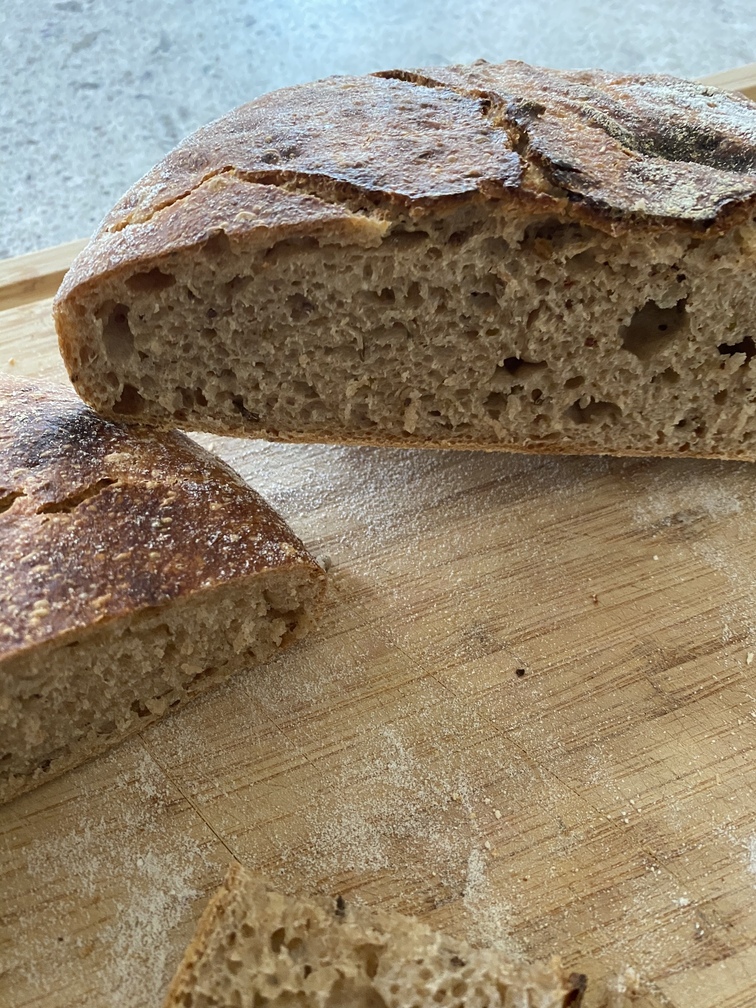
I tried making sourdough bread in the past and I was largely unsuccessful. Following many recipes ending up with flat bread with no crust. I figured I would give it one more shot now that I had plenty of spare time. I bought a clay baker and this in my opinion is the game changer and pretty much required for great consistent results. I did not believe the no knead recipe would work but to my surprise it has worked terrifically. I used the breadtopia high protein bread flour and modified the recipe to around 70% hydration, 415grams water to 580grams flour. One thing that wasn’t clear was when to use the starter and I think feeding the starter and then waiting for it to double, then starting the recipe is the way to go.
1 Like
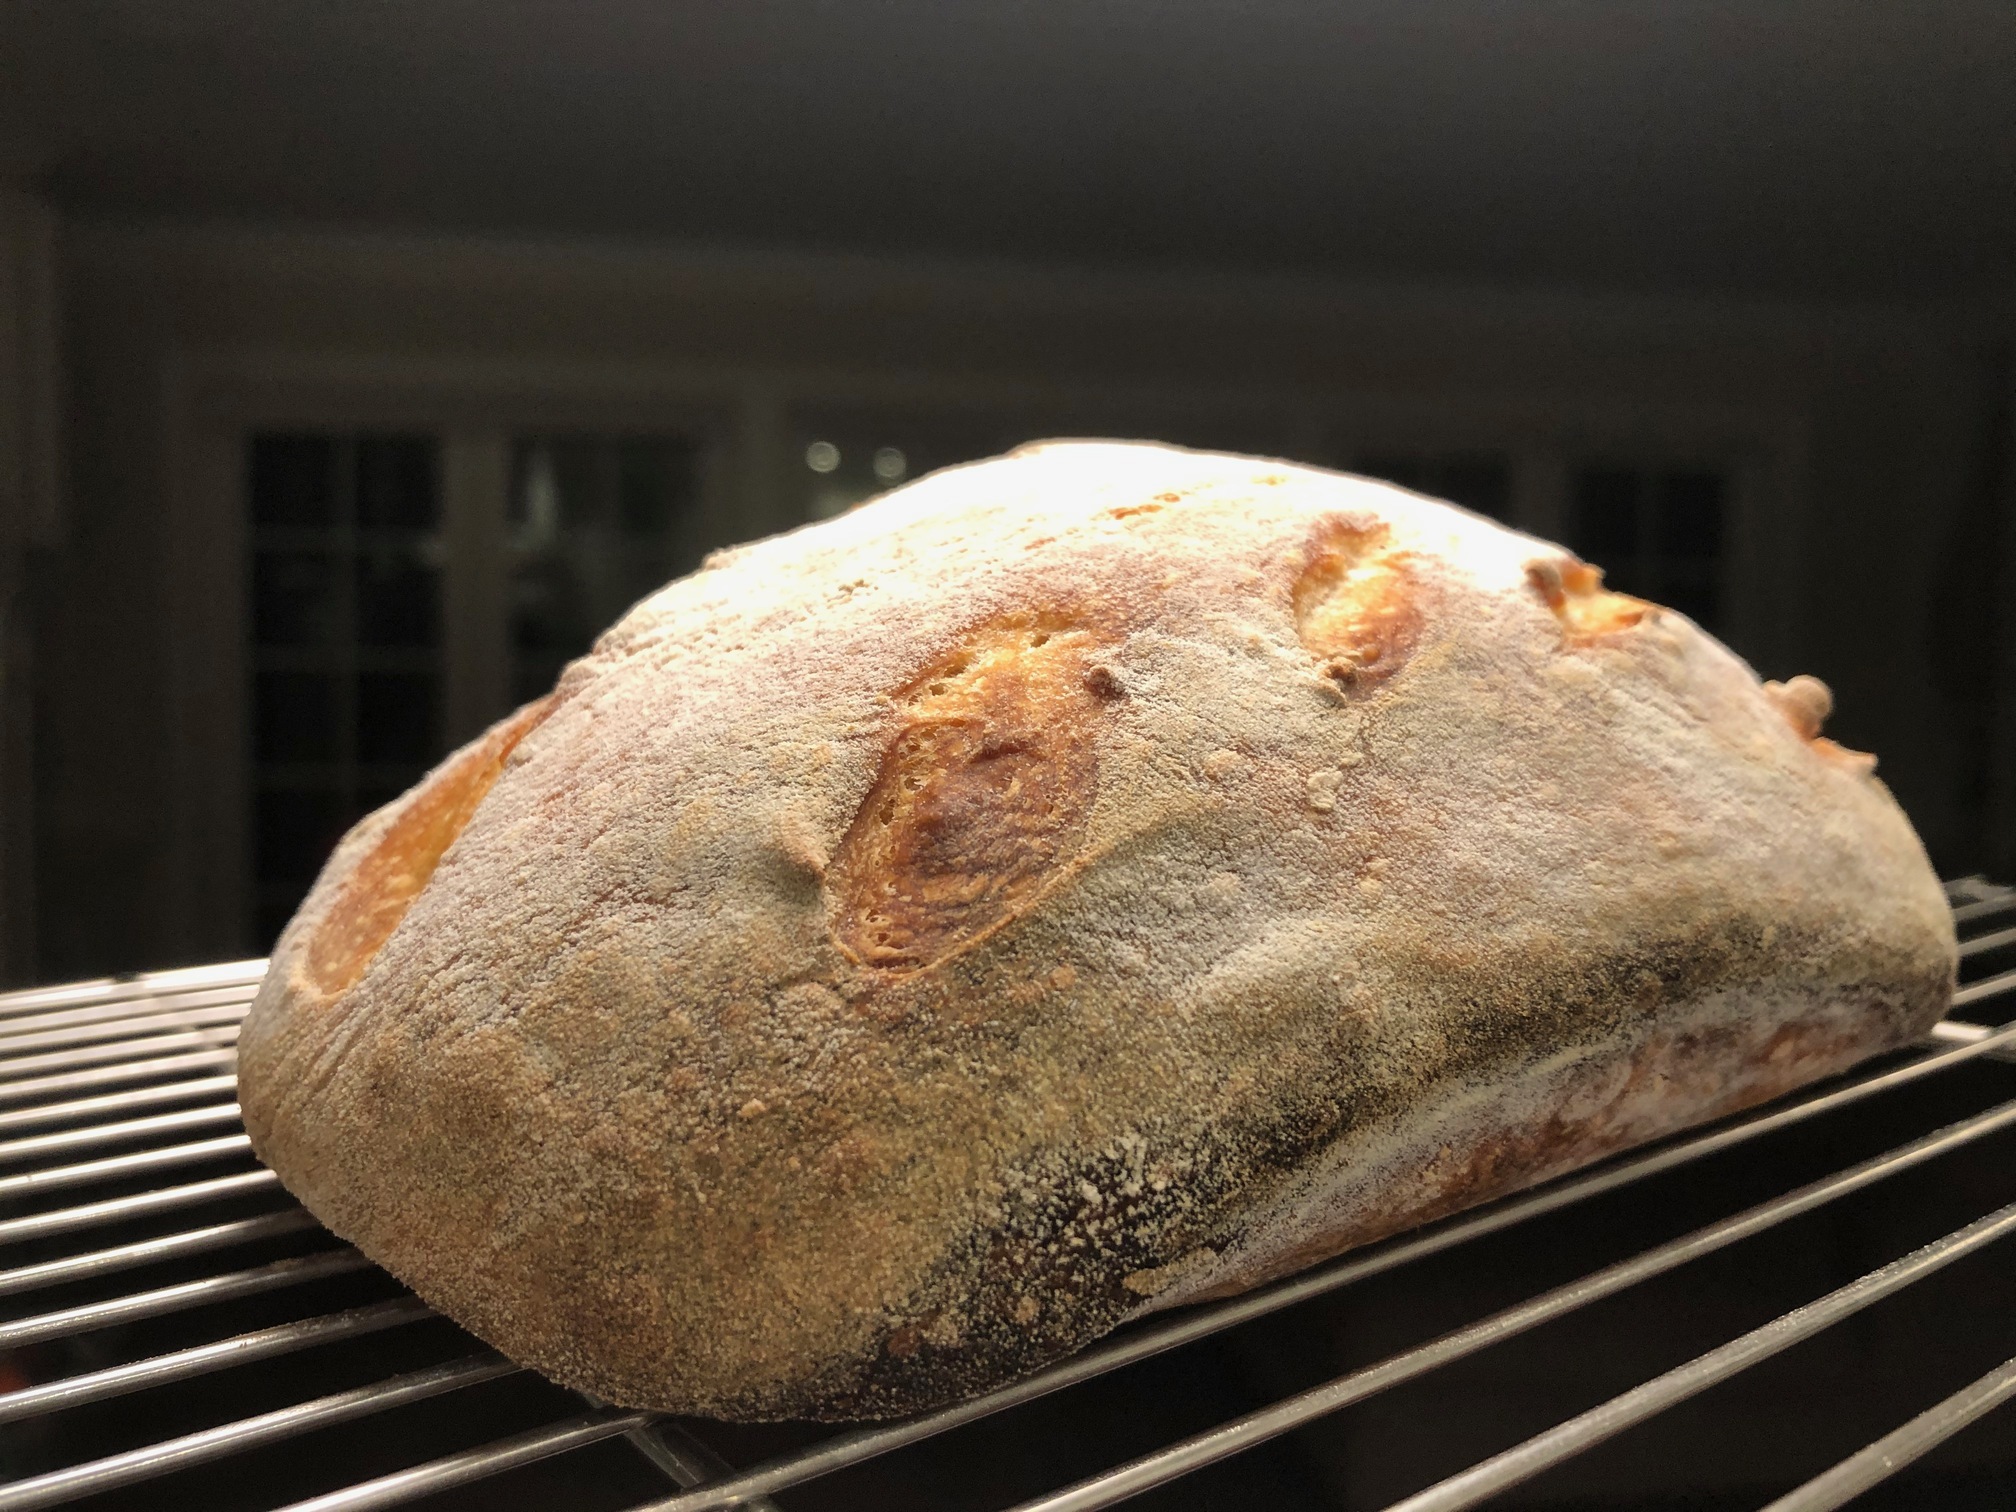
Mini-sourdough loaf after 6-day Breadtopia sourdough starter flakes. Two stretch and folds 15 mins apart, 12 hour rest at room temp. Baked in an Emile Henry 345503 bread baker until 205 degrees. Delizioso!!
1 Like
Congratulations on getting your starter up and running and on your lovely loaf of bread!