I have prepared the whole spelt sourdough bread this morning, it is resting in the fridge, I will take it out the fridge tonight before bed and bake it tomorrow morning (following your cool tip).
I love your website. I have been making your no knead sourdough bread with great success using the 10 hour rule for the first rise. Tomorrow I am going to make the Parmesan olive bread. Can I assume I can use the same 10 hour rise procedure in lieu of the 18 hours as stated in the recipe?
Hi,
I am new to sourdough bread making and to this forum. This is the second time I have made your Steel Cut Oats recipe, and both times it has not risen as much as I thought it would. The bulk ferment rising seemed to be ok, but when turning the dough out onto a cutting board for the folding, it was so wet that part of it oozed off the board. It seemed to be quite a bit wetter than in the video of this bread. It did not really rise that much in the proofing stage. I am not sure what to modify in the recipe to get it to rise more in the proofing stage. Could the problem be that the dough is just too wet? If so, should I reduce the amount of water or increase the flour? If so, by what percentage? If I increase the flour, do I need to increase the amount of starter used?
Looking forward to your feedback.
Thanks,
James Holroyd
You can either increase the amount of flour (if you want a bigger loaf) or decrease the amount of water (if you want the same size loaf) to make your dough dryer. Hard to say what percentage without actually seeing what you mean by too wet, but try it in 10% steps and see how that works. You can use the same amount of starter.
Be aware also that if you overproof your dough (bulk ferment for too long) that can also result in a dough that is kind of flaccid and prone to spreading out and not holding its shape… which might seem like dough that is too wet, but actually it’s just overproofed. This is the kind of thing (among many in sourdough bread baking) that you learn by experience over baking many loaves. There are a lot interdependent variables in sourdough bread baking and your learning is served by changing one thing at a time and noting the result. So, another thing you could try besides making your dough dryer (AKA “lowering your hydration”) is reducing the bulk fermentation time.
HI Paul,
Thank you for your suggestions. I will follow your guidance to only change one variable at at time, starting with lessening the bulk fermentation time.
Re: your comment that it is not necessary to increase the amount of starter used if one increases the amount of flour - i have noticed some variation in how much starter is recommended in different bread recipes; how is the amount of starter to be used determined? What kinds of problems can result from using too much starter?
cheers,
james
In my opinion, people have a lot of misconceptions about what starter actually is, and how it works in sourdough bread baking.
Here’s how I think of it: starter is bread dough that has been inoculated with a beneficial population of microbes that includes certain yeasts and certain bacteria. That also exactly describes your bread dough after you mix your starter into it. What happens to your dough after you mix your starter in is that the microbes, suddenly having access to a huge new food supply, start to rapidly reproduce and spread throughout your dough. As they do so, they eat and eat and one of the side effects of all that eating is that they produce carbon dioxide as an end product of their metabolism. That carbon dioxide is a gas that is forming inside your dough and if it is extensible and elastic (thank you gluten!), then the C02 will form many small and large bubbles in the dough. That process of bubble formation is otherwise known as “rising”. That’s all that is happening - microbes eat and produce C02 which makes bubbles in your dough and fluffs it up.
So my first advice with respect to all sourdough bread baking is rather than taking a recipe as some kind of formula for getting a very specific result, is to instead treat it as a general guideline that has to be modified for your own conditions. A lot of variables will affect how a sourdough loaf develops, and you have to develop a sense of which ones affect what and how and also how they interact with each other.
In reality there is a lot more nuance than this, but in simple terms, the amount (percent really, relative to the amount of flour you are using to build your dough) of starter you use is mostly going to affect how long your bulk proofing period should last. Because the bulk proof is the time during which the microbes are spreading through your dough, the more starter you mix in (i.e. the more microbes you are putting in at the beginning), the faster they are going to spread through the dough and the shorter your bulk proof should be (in order to not end up over-proofing which roughly corresponds with the microbes running out of food and slowing down their metabolism and not producing enough C02 to keep lifting the dough). The less starter you put in, the longer the bulk proof needs to be.
Again, there is a lot more going on than that, but if you look at the amount of starter used in isolation from everything else (which is never the case in reality), it’s generally just a way of affecting how long your bulk proof is going to take and you may want to change that for reasons like your schedule, or for the sake of developing certain flavor profiles in your dough that are more time dependent.
I personally favor very long, slow proofing so I use small amounts of starter as I wrote about here:
Thank you Paul for taking the time to explain this process. I am glad to begin to understand what actually is happening at the various stages of bread making. Would you happen to have any recommendations for reading further on this subject? The amount and diversity of writing on sourdough is quite overwhelming, and I would welcome some suggestions.
James
I agree it is overwhelming and I’m afraid I don’t really have many specific recommendations for reading about it. In my own baking “journey” I’ve found the video tutorials here at breadtopia very helpful as a basic starting point. Eric has a very no-nonsense style of presentation which strips away a lot of what I called “hocus pocus” in the thread I linked to above. There is a series of four tutorials on this site called “Eric’s Easy Bake Series” that I thought was really great:
I think the best way to start is actually not to fill your head with too much information but just make yourself comfortable with a fairly basic process like the one in episode 1 there, or maybe like this one (which is where I started):
…and then just do it over and over and really pay attention to what is happening with the dough and how what you observe correlates with the end result you get after you bake.
I am a reader and I read a lot while I was a beginner with sourdough baking. But honestly, what I learned from all that reading was a lot less than what I learned from just baking bread over and over, and I think it actually retarded my progress in many ways. One of the mistakes I made was reading a lot of pretty advanced techniques early on and trying to use them before I really had an experiential (non-theoretical) understanding of what I was doing.
Once you get past the very beginning stages and you are consistently able to produce great bread with a simple basic method like the ones linked above, then there is certainly a lot of intermediate and advanced stuff you can find. I have found value in writings and videos by Chad Robertson (google: tartine), Trevor J. Wilson, Maurizio Leo, Josey Baker, Melissa Johnson’s recipes here at Breadtopia.
I also published a recipe / methodology here at Breadtopia for the basic whole grain bread that I like to bake:
Hi Paul,
Thanks for the suggestions. Will check out Eric’s videos again and hold the links in reserve until I have more experience. I appreciate your assistance.
James
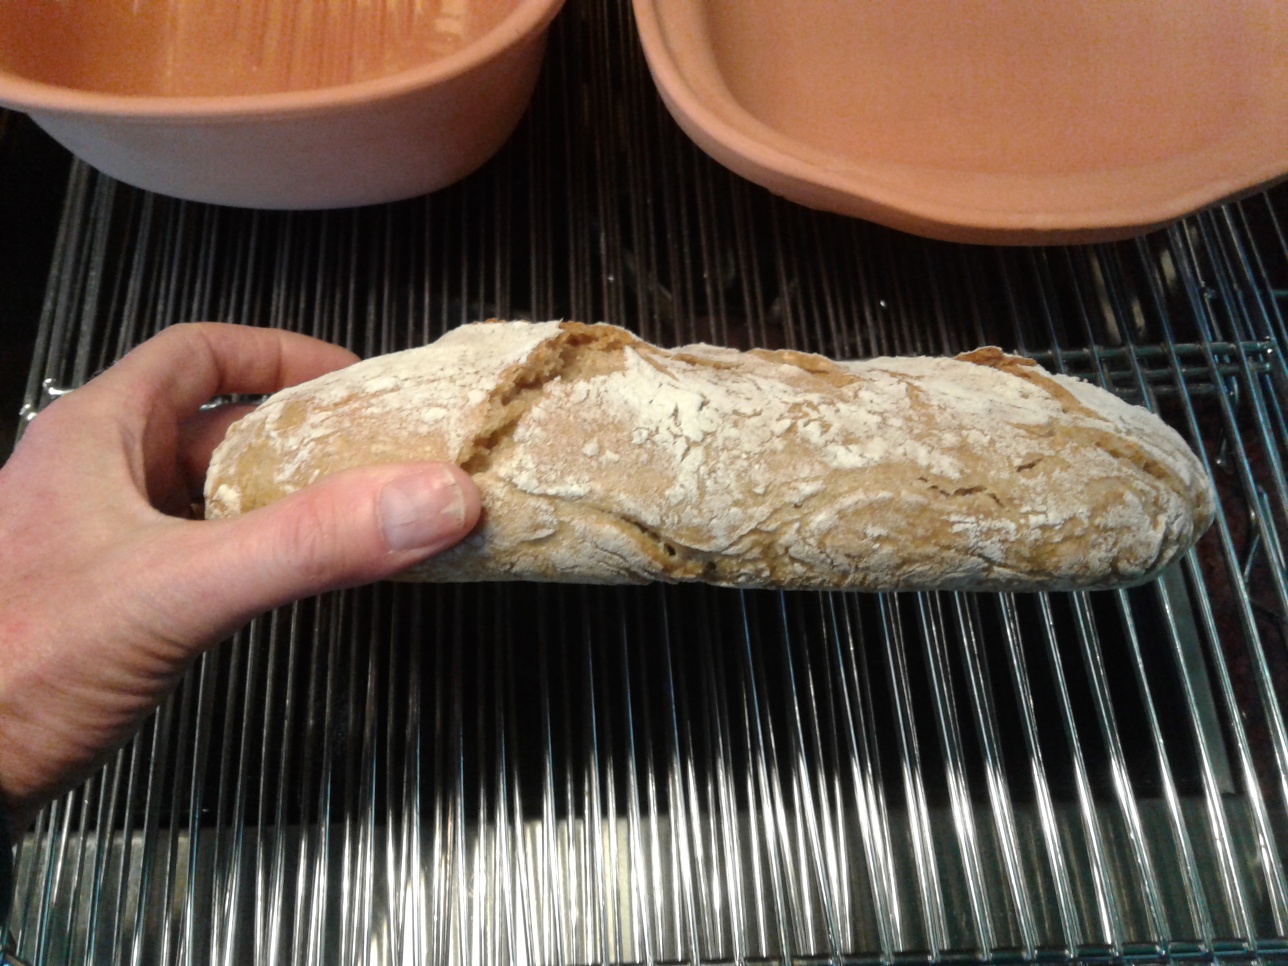
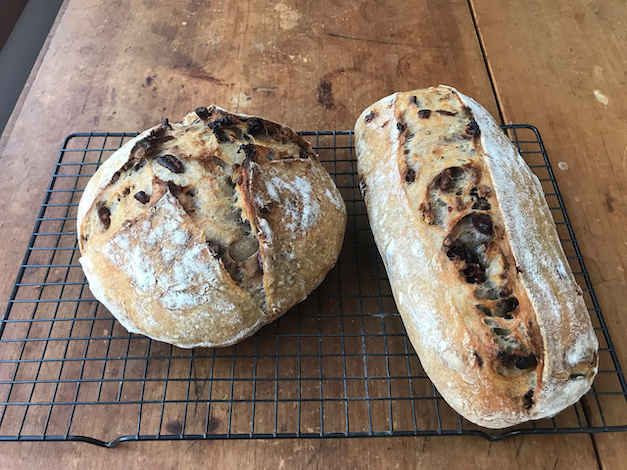
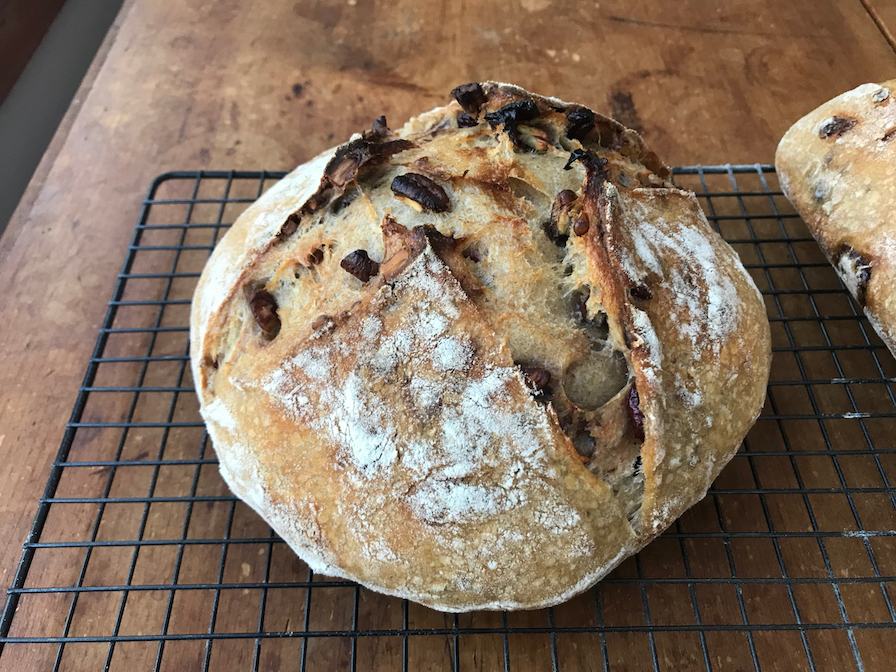
My latest cranberry pecan loaves. Sadly these were both gifts for others, so I didn’t get to taste them nor did I see the insides. But they got great oven spring, even a bit of ears on the boule, and the color and smell were great, so I’m guessing they’re okay.
Rather than no-knead, I mixed up a double batch of the recipe minus the cranberries and pecans, let sit for an hour, then performed several stretch-and-folds in the bowl at half hour intervals. For the third S&F, I stretched the dough out on the counter to laminate and folded the cranberries and pecans in at that point. Did one final S&F in the bowl about 30 minutes later. Then left to bulk overnight, and the next morning I divided the dough, shaped and proofed the loaves, and baked at 475 F in a dutch oven and an oblong clay baker (from @breadtopia) for about 37 minutes total. I was finished around 10:30 am, so this was a project for when I don’t have to go into work (or the weekend).
Dan – My recipe hews pretty closely to Eric’s original recipe for cranberry-pecan, though with a smidge less water. I do a number of stretch and folds so this isn’t technically no-knead. Thia recipe makes two loaves.
650 g - white (I used half AP, half bread flour)
190 g - whole wheat flour (mostly freshly ground hard red winter wheat with a small amount of kamut and spelt thrown in, to finish off some nearly empty bags)
640 g - water
17 g - salt
120 g - 100% hydration starter (mine is a whole wheat starter - roughly
1 cup chopped walnuts
1 cup chopped cranberries
Including the amount of water and flour in the starter, total hydration is 78%.
Just a few days ago I made another variation on this with dried figs and walnuts, and I upped the hydration to 79% (total). That turned out great, and since the nuts and fruit absorb some of the water I think I’ll try sticking with that recipe. I think the hydration in Eric’s recipe is 80-81%.
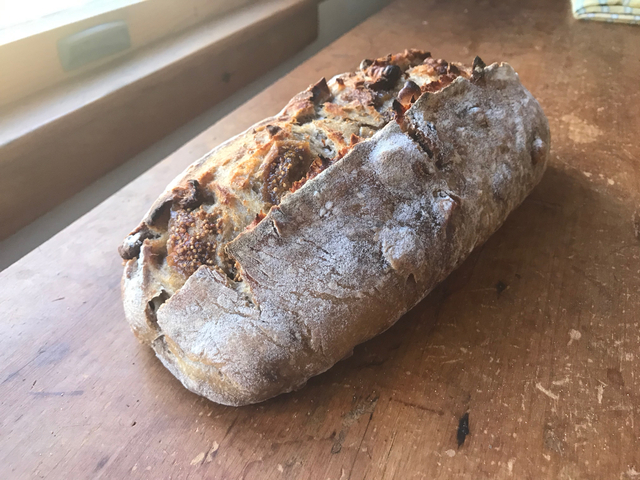
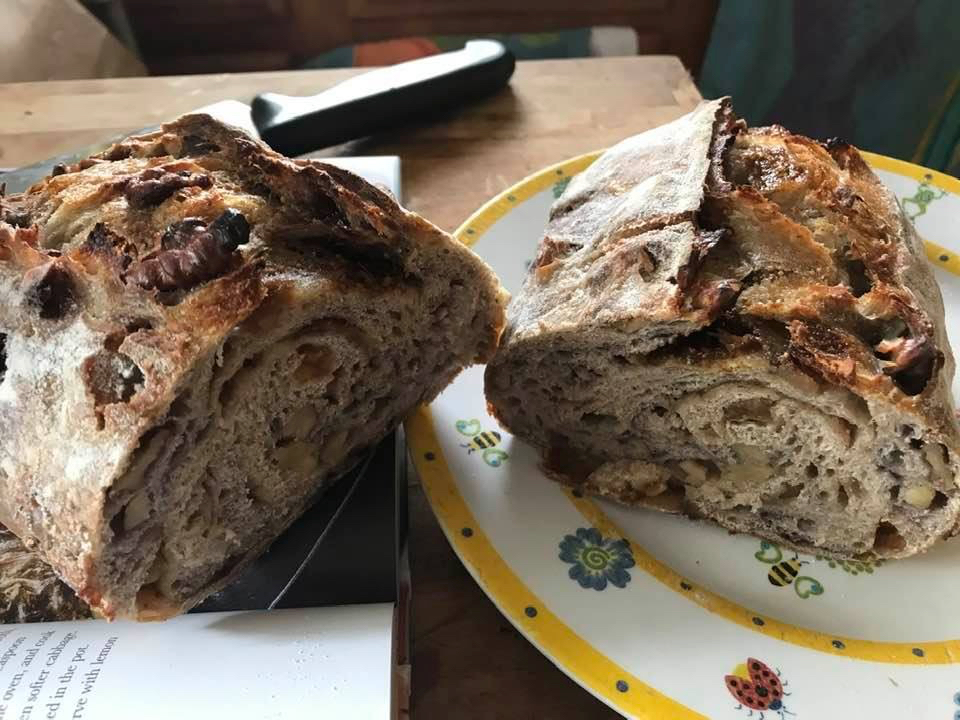
Why do I keep making these for other people and not for myself? Here’s a fig-walnut version I made last week for a friend recovering from an illness. Thoroughly medicinal. I have not tasted the bread, but it sure smelled delicious, and the loaf got great oven spring and a nice ear. My friend kindly texted me a photo of the crumb after she cut into it. The basic dough recipe closely matches Eric’s. For this loaf, I first mixed the dough only, did two rounds of stretch and folds, and added the fruit/nuts using the lamination technique described so well by Melissa (@Fermentada). I did one more stretch and fold after that, I think.
75 g - whole wheat
25 g - rye
170 g - all purpose flour
170 g - bread flour
340 g - water
9 g - salt
60 g - starter (more or less)
1/2 cup chopped sun-dried figs
1/2 cup chopped walnuts
Susan, thanks for the quick response. Two simple questions: Was the overnight bulk at room temp or in the fridge? Also, approximately how long was the final proof and was it based on the size of the rise?
Dan - this loaf bulk fermented overnight – total bulk time from mixing until preshape was about 15 hours. I let the condition of the dough be my guide…the dough didn’t seem sufficiently “fluffy” or bubbly at 12-13 hours, the top of the dough not yet domed and smooth, so I let it bulk longer (by the way, I use a tinted pyrex bowl to bulk, not a straight-sided clear container). Also, the temps in our house are around 67 degrees, down to 64-65 during the night.
When the dough seemed ready I shaped the loaf, let it sit on the counter for about 20 minutes, and then put it into the refrigerator for about 8 hours and baked it in the evening straight from the fridge.
preheated oven and oblong clay baker to 475,
lowered temp to 450 after placing loaf in oven
baked with cover on for 25 minutes, cover off for another 13 (internal temp was around 208).
I often proof at room temp and bake immediately but in this case cold proofed. I wonder if that may be part of the reason I got such a good result. l should be more systematic about this and keep better records, a la Melissa!
Melissa - I think the even distribution you are noticing is a result of both laminating in the additions early-ish in bulk ferment (though after 2 stretch and folds, and followed by one more), and the rolling method I used to shape the oblong loaf – squish/stretch the dough out into a rectangle, then roll/fold from the far end about 3-4 times, using the heel of my hand to lightly press after each roll (if that makes sense). Kinda-sorta the way demonstrated in this video beginning at 6:26: https://www.kingarthurflour.com/videos/professional-techniques/techniques-for-the-professional-baker-4-shaping
That video is excellent - thank you for sharing the link!
What I especially liked was the explanations for some things you don’t see in many videos … what fingers and thumbs are doing “underneath” the dough and why it is important.
I watched the entire video and will watch again. I’ve only recently been paying more attention to shaping and it shows particularly in the crumb.
I agree with @anon66425146 – that was a great video. Thanks for sharing.
I just wish they somehow covered how to shape Chinese steamed pork buns (bao zi). Utterly off topic though it is leavened dough. I was working on them a few months ago with an appalling lack of success despite gluing myself to YouTube!