New Year's Panettone Resolution

I am determined to get the technique down for making panettone this year and be ready by Christmas to have some for gifts. My mother used to try every year to follow Carol Fields’s recipe from The Italian Baker, but it was always a disappointment.

I have dug up some pretty helpful links (below), but I was wondering if anyone here has useful experience?

From what I can gather, the crucial step in baking Panettone with a wild yeast starter is to go through a process of building your starter by refreshing it every 4 hours for a couple of days in preparation for creating the loaves, and you have to keep it quite warm during this period—around 85° F.

Here are the links I have come up with.

Wild Yeast Panettone: Original Recipe
Wild Yeast: Panettone in Miniature
Wild Yeast: Panettone update

The Panettone Project

San Francisco Baking Institute: Maintaining an Italian Starter

I’ll try to post on my progress as I go along—failures as well as successes. Candied fruit is kind of expensive, so I think I’ll start out with pandoro, which is similar to panettone but doesn’t have raisins or candied citrus. If anyone else wants to do this, too, that would be fantastic.

I’m interested! I went so far this past year as to buy the panettone paper holder thingies and candied citrus that I’ve since eaten :joy:

My first steps in learning to make panettone with a wild yeast starter have been only semi successful. I decided that the first thing to do would be to make some kind of sweet rolls with my starter. I decided that, even though it is early, hot cross buns would make a good sweet dough trial. For two days I refreshed my starter every 4-6 hours, then made a larger sponge from that. To the sponge I added eggs, sugar, enough flour to make a medium dough. (Sorry, I am not much of a measurer. No matter how good my intentions are to calculate the water/flour percentage, I always end up adding more of one or the other to get the dough to the consistency I want.) Finally, I added 4 ozs. (one stick) of butter—chopped up—and beat it, brioche style, into the dough.

At this point the dough looked fantastic—smooth, elastic, great “window panes.” I soaked about a cup of mixed dried fruit (sultanas, dried cranberries, and dried currents) in a mixture of warm brandy and water, drained them and mixed them into the dough. (I drank the leftover brandy mixture. It was quite good.)

I let the dough proof for about 4 hours. It did rise pretty well, if slowly. I formed buns, about 2-1/2 inches in diameter, and set them to rise. Four hours later, around 11 o’clock that evening, they still had not risen sufficiently, so I put them in our unheated mud-room and went to bed. In the morning, they still looked rather small—well, they were semi-frozen—but I was fed up, so I just baked them anyway. (450° for 5 minutes, then 12 more minutes at 350°. No baking stone.)

They rose a surprising amount in the oven. The flavor is excellent; but, yeah, they are a bit dense. Wild yeast has a hard time with lots of fat and sugar, no doubt about it.

In the Panettone recipes I have been reading, they stress feeding your starter every 4 hours and keeping it at 85° F. in order to get the yeast really hopping. This, I think, is my main problem. I have a small kitchen and in the winter there is no place in our house that goes much above 65°. So, I am thinking that my next thing will be a proofing box made of a small ice chest with plastic bags full of hot water inside to maintain the temperature (I can’t use the oven because there is no pilot and, besides, the last time I tried that someone came along and turned on the oven with the loaves proofing inside covered with dishtowels). I have no idea where I am going to put my makeshift proofing box without driving the rest of the household crazy.

That’s all for now. Stay tuned for updates.

1 Like

Thanks for sharing your progress!

When i do sourdough cinnamon rolls, milk buns, challah…enriched anything, the timing is painfully slow for me too.

I did once use a ton of regular starter instead of sweet stiff starter on my Hokkaido milk bun recipe and things moved faster. I wonder if there is a way to tinker with the panettone approach in that way.

Part of me thinks that if the goal is to make your starter be more yeast-filled and behave like yeast … might as well just use yeast? Or at least yeast water? This is the part of me that’s perhaps not yet up for the Panettone Challenge hahaha

I just might jump into this challenge :slight_smile: … but I’m jumping in with at least a comment as I’ve made/been making sweet rolls, doughnuts (with a Brioche dough) and since Christmas an adaptation of Smitten Kitchen’s Baklava Babka: all using a stiff sweet starter. Melissa (@fermentada) got me started on using the stiff sweet starter with doughnuts about a year ago. The results have been fluffy and light … even the Baklava Babka which I really hoped would NOT be so fluffy!

My approach has not been all that technical and I did NOT think about how the dough felt or even much about how the starter looked. I just followed a recipe and used timing that somewhat matched what I do for bread. My normal starter is 100% hydration WheatMontana White All Purpose flour which is a hard red wheat milled local to me. Water is straight from my tap but I’m rural and so it is well water with no chemical treatment. The starter has always been active with first feed out of the refrigerator and I tend to feed it once in the morning and make a levain in the evening which I use the following day. So, for the sweet stiff starter, I feed my “white flour starter” in the morning. It rises early afternoon and starts backing off early evening. I stir it completely down and make the sweet starter with: 90 grams white flour, 20 grams brown sugar, 25 grams “white” starter, 40 grams water. Mix well and let it sit at room temp 12 hours. My house is 62-64F and I put this starter under a desk lamp in a warmer corner. This boosts the ambient temp around the starter to approx. 68F.

I don’t do a float test or any kind of test. The sweet starter doesn’t really look active but I just carry on! Put all of the sweet starter and the rest of the ingredients in a stand mixer and mix at medium high until the dough is clinging to the dough hook and kind of slapping the side of the bowl. Scrape/pour the dough into a clean bowl, cover (I use the reusable shower cap kind of bowl covers) and let sit at room temp for 6 or so hours and then into the frig. Next morning, I turn the dough out on a floured counter and knead lightly. The cold dough is not airy and is pretty dense … nothing like bread dough, more like a stiff brownie batter. BUT, after the light knead and maybe an hour on the counter, it is soft and now looking like sweet roll dough. I now roll it out and make a babka, sweet rolls or cut doughnuts. I’ve used the following brioche type dough for all three (it is the SK dough with the starter amounts backed out)

1/2 cup milk
130 g sugar
3 eggs
1.5 tsp vanilla
482 g flour
Pinch salt
6 T butter (I always buy salted so I backed off salt from original recipe)

If you decide to try the above, you need to measure by weight and forget about look and feel … at least that is my advice :slight_smile: . I know that my flour, if subbed by measure, needs more liquid. But when I sub flours by weight, I seldom adjust anything else. It sounds like you have same temp range at your house.

So, bottomline, I think some of the issue is expecting things to look similar to what bread looks like ??? I have had no issue with needing longer timing for the enriched doughs.

Above is one of the Baklava Babkas: whole and interior.

My two cents :smile:

1 Like

I realize my dough recipe is not a Panettone recipe … included if you are testing making an inexpensive sweet dough. I did find this: Chef John’s Panettone (natural leaven). Is it close to what you are using?

My obsession with making panettone began when I stumbled on a recipe in a bread machine recipe book over a decade ago. I quickly graduated from the bread machine recipe to other domestic, yeasted recipes, but I always found them a bit lacking lacking in flavor and without that soft, silky “mouth feel” you get from a good panettone. About 5 years ago, I got serious about making a panettone strictly with natural leavening. (It is the reason why I originally purchased my sourdough starter from Breadtopia!) I finally decided that if I really wanted an authentic Milanese panettone, I should be looking for recipes from the Italian panettone masters. After several years of mediocre (and failed!) attempts, I eventually settled on a recipe from the Milanese master, Iginio Massari. I got it through an Italian baking blog site called Fables de Sucre. The recipe makes 2 500 g panettones, though I usually scale up the recipe to make 3 or 4 at a time. Link below:

Disclaimer: The site is entirely in Italian. However, many browsers now incorporate translation engines. I found that Google Translate (augmented by that year of college Italian I took back in my foolish youth) did a reasonable job of translation. Their instructions were pretty good, once you get around some of the awkward translations. They also have a very good general tutorial on making your own panettone, including tips on maintaining your sourdough starter specifically for panettone. Here is the link (again, page is in Italian):

I personally think that using natural leavening helps soften the gluten (along with all the egg yolks and butter!) to give that soft, silky crumb that I love. It also contributes a complexity to the flavor profile.

I start prepping my starter about 2 weeks prior to my first panettone bake. First, I convert my 100% hydration starter into a stiff starter (50% hydration) and start refreshing it every 12 hours (with bread flour to increase the gluten content). I keep it in my proofing box, starting at 75 degrees F and then slowly ramping up the temperature a couple degrees every few days until I get to 85 degrees F just before I am ready to bake. The goal here is to make sure the starter is active enough to triple in volume within 4 hours after refreshment. I also monitor the pH of the starter (with pH paper), targeting an optimal pH of 4.0 – 4.5. If the sourdough is too acidic (lower pH number), I do a double refreshment and if it is not acidic enough, I increase the proportion of starter to refreshment flour/water.

Then, the day before mixing the first dough, I start feeding the starter every 4 hours, making sure that the starter triples in volume each time. Instead of getting up every 4 hours overnight, for the last refreshment of the day I adjust the starter hydration down to 40% and then form it into a log, cover it in cling wrap, wrap it in a stout kitchen towel and bind it with a strong cord, sort of like a salami. This slows the starter maturation process so that it does not get too acidic for 8 hours over night. Remember, the goal of the 4 hour refreshment schedule is to minimize the acidity of the starter so that you don’t get that soughdough “twang” in your sweet panettone. The link below describes the starter binding process, again in Italian.

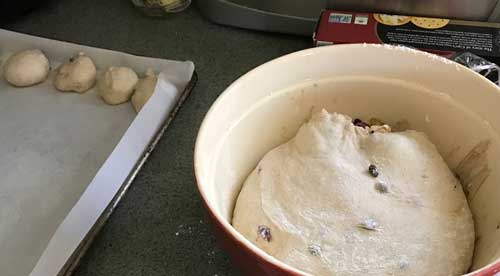
During that second day of 4 hour refreshments, I prepare the aromatic mixture, though I use vanilla extract instead of using vanilla beans. (I substitute 2 – 3 tsp of vanilla extract for 1 vanilla bean. Someday I’ll spend the money to actually use real vanilla beans.) That evening, I mix my first dough. I pretty much follow the Fables de Sucre recipe as written, with just a couple tweaks. First, I use high gluten flour for panettone. A good panettone will rise up to 6 times the original volume of the dough and that requires some pretty strong gluten, especially since you add so many egg yolks and so much butter. I got some General Mills All Trumps Flour with 14.2% protein from an on-line website. I also found that I had to add more water to the first dough than the recipe called for, just to get the dough to come together before adding the egg yolks and butter. Once the dough is done (passes the window pane test), I put it in a large cylindrical food-grade container, mark the dough level and put it in the proofing box at 85 degrees F over night.

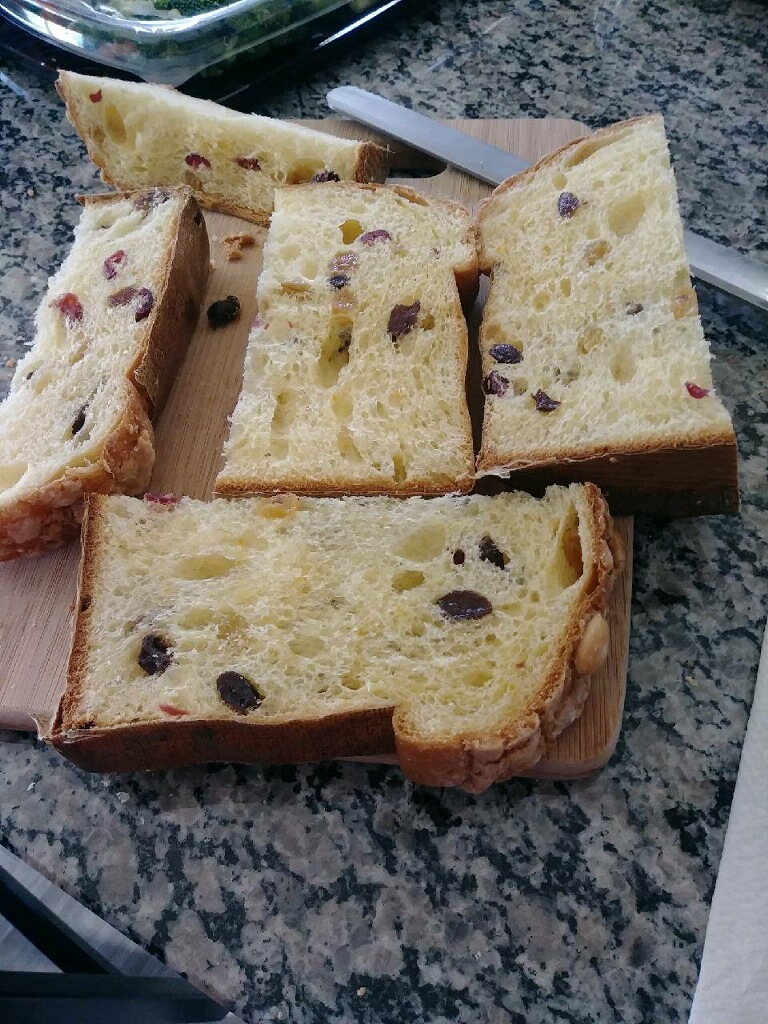
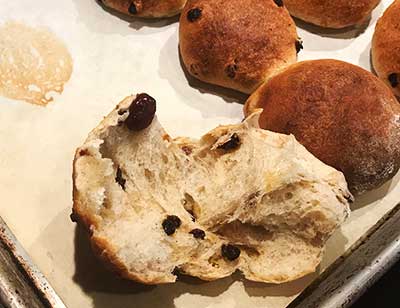
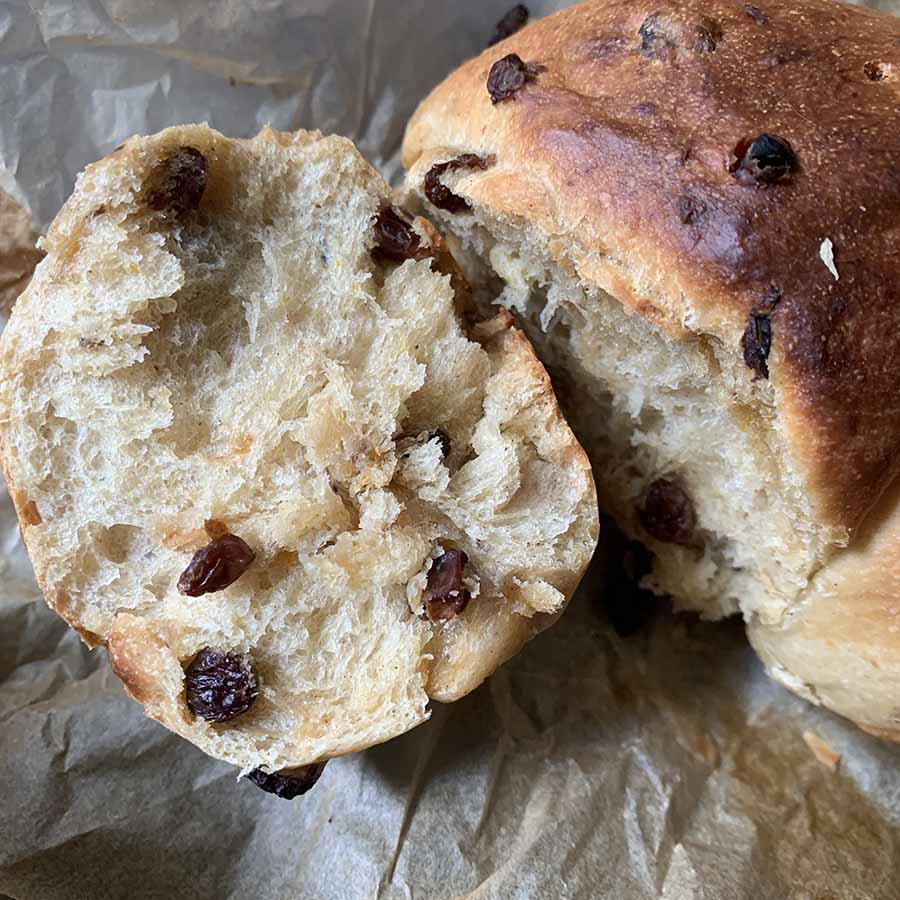
Before going to bed, I prepare the dried fruit inclusions. I am not a huge fan of the candied fruit rind used in traditional panettones, so I substitute a combination of raisins, golden raisins and dried cranberries. I use equal amounts of each for a total weight that corresponds to the same total weight of raisins + candied fruit rinds listed in the Fables de Sucre recipe. To re-hydrate the raisins, I use equal amounts of water and white rum to just cover them. For the dried cranberries, I use equal amounts of water and brandy. I cover the containers with cling wrap and let them soak over night.

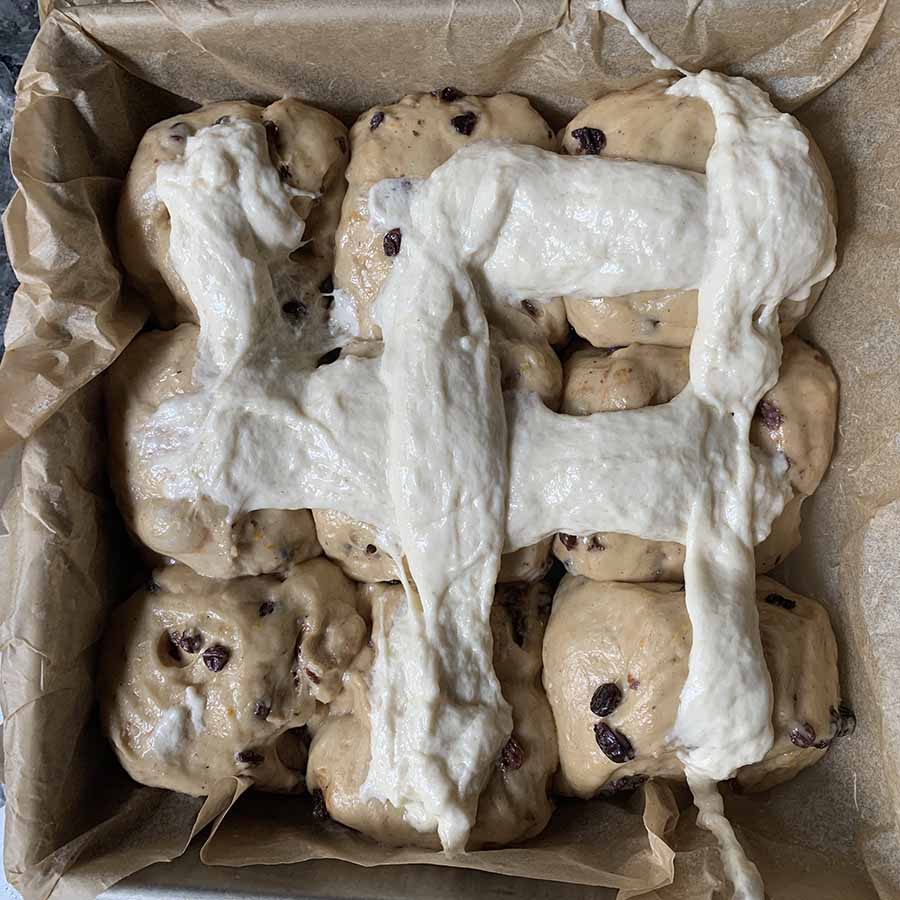
The next morning I drain raisins/cranberries and remove the excess moisture with paper towels. By this time, the first dough should have tripled in volume after rising for about 12 hours. I follow the recipe for the second dough pretty much verbatim, except I only add about half the water listed in the recipe. Note, I pre-load long wooden skewers (11.75”) into the panettone molds before placing the final dough into them, as recommended by the Wild Yeast blog. I also have reduced the amount of dough they specify per loaf from 550g to 530g for a 5.25” panettone mold. After loosely covering the loaded molds with plastic bags, its back into the proofing box for the final rise. It takes another 8 – 10 hours or so before the dough crests above the panettone molds and is about ½ inch below the top of the mold at the sides.

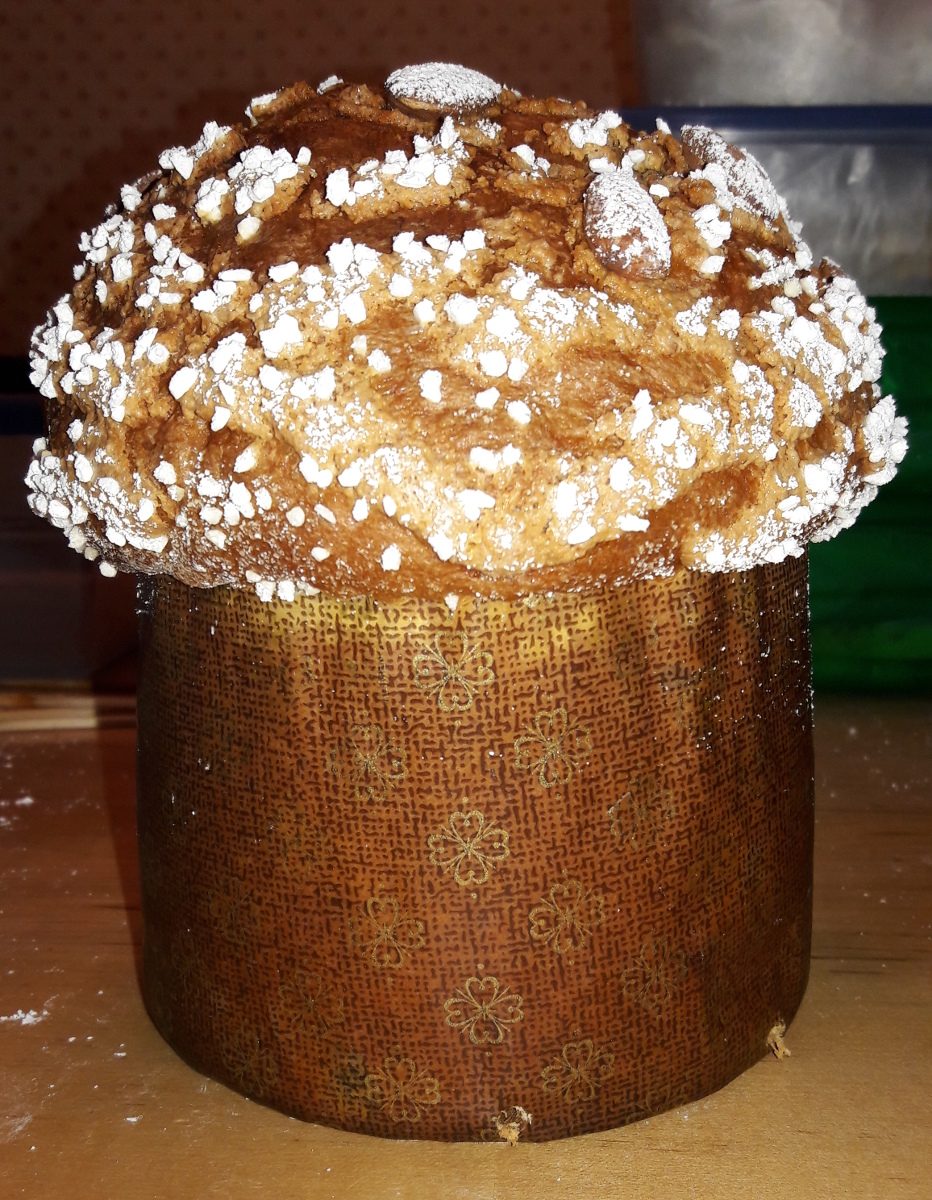
Before going in the oven, I like to use a hazelnut almond topping with some Swedish pearl sugar on my panettone. I got that recipe from the Martha Stewart web site from an Italian master baker by the name of Gabriele Riva. He also has his own panettone recipe there.

I bake them, as in the recipe, for 50 minutes at 329 degrees F until the internal temperature is at least 201 degrees F. . Well, here are the results…
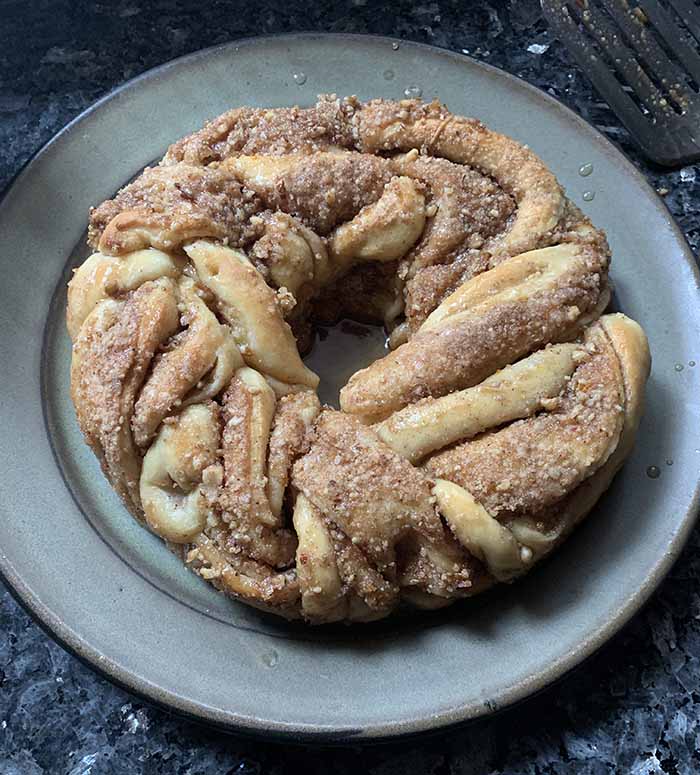

1 Like

Thanks for the detailed description and photos! Happily, I still speak, or at least understand, Italian, which I learned as a boy when our family was stationed on the Ligurian coast for two years. It seems pretty clear that the route to excellent panettone lies in preparing the starter properly. My challenge will be to figure out how to do it in a very small (and shared) kitchen in a small house that hosts a pretty constant stream of friends and extended family members. My choices may come down to winning the lottery so we can get a bigger house or doing the starter in my study—which is not out of the question, but it will have to compete with the other projects that I don’t have room for.

My experiments with sweet doughs in general are coming along, though—even without being able to keep my starter at the optimal temperature. I’ll try to include some photos next time.

By the way, it is the height of the citrus season right now. Does anyone have a recipe they would recommend for candied citrus peel? It would be a shame to perfect the bread part of panettone and then spoil it with candied fruit from the supermarket.

Glad to hear that the Italian websites will not be a problem for you. Since that is the case, you might enjoy looking at some panettone recipes from other Italian masters on the same Fables de Sucre website. Just do a Google search on “Fables de Sucre Panettone”. I have seen at least 3 others there. There is also an intriguing recipe on the Giallo Zafferano site (the site that hosts the Fables de Sucre blog) from Alfonso Pepe and that site includes an associated video of the process. In his recipe, he uses an entire mandarin orange, not just orange zest, to make his aromatic blend. (Link: https://ricette.giallozafferano.it/Panettone.html). You can also substitute oranges or lemons. Perhaps you could make some ahead of time with some fresh citrus and freeze it? It might work.

Also, as I mentioned in my earlier post, I think it was the high gluten flour that made the difference between a so-so panettone and one with a high domed top and a light, airy crumb. This past Holiday season I ran out of high gluten flour during my last bake, and used bread flour that I enriched with gluten powder to get the same protein content as my high gluten flour. It actually worked quite well. I created a spreadsheet calculator to make it easier to do the enrichment calculations, but I couldn’t attach it here since the formum only allows photo uploads. However if you or anyone else is interested, let me know and we’ll figure out how to share it. Maybe through Melissa?

I just came up with a workaround for the gluten enrichment spreadsheet sharing issue. I created a calculator that does the same thing on InstaCalc.com. Here is the link:

https://instacalc.com/52460

Just enter the amount of enriched flour you want, the desired % protein(gluten) of the enriched flour, the % protein of your flour and the % protein of your wheat gluten and the calculator will tell you how much flour to use and how much wheat gluten to use. Remember to enter the % protein numbers as percentages (number followed by ‘%’). If you don’t know the % protein, just divide the amount of protein per serving (that is listed on the flour package) by the serving size and use that number.

Cool! Thanks for sharing that.

Dear anon66425146—I forgot to say thank you for your long piece about sweet dough and sweet starters and for the pictures of your babka. So, THANKS! I didn’t really know anything about sweet starters, but I am following your links (and those of others) and, if I ever get the problem of how to find a warm enough place for proofing solved, I’m off to the races.

Last summer I worked on doughnuts, which I had never made; but I was making cake doughnuts, not raised. But now, since I am working on wild yeast sweet doughs (in preparation for panettone), I am thinking that that is the project I’ll bring to the family cabin at the lake—where there are enough eaters to justify doughnuts.

Let me know what kind of fat you use for deep frying. I was just using Canola oil, but I went to a lecture a few months back about the pros and cons of various oils and animal fats and now I am at a loss. I am NOT going to fry doughnuts in olive oil, that’s certain!

Cheers

Jake

Okay, with all this information, I am becoming more terrified! But I am going to work on the solid starter and try using it for hot cross buns for Easter.

little steps, right?

By the way, we are at the height of the citrus season. It’s a good time to make your own candied orange peel. Here’s a recipe:

Candied Orange Peel (or other citrus fruit)

2 large oranges, 1/4 inch of top and bottom cut off
4 cups sugar, divided
3 cups water

  1. Cut peel on each orange into 4 vertical segments. Remove each segment (including white pith) in 1 piece. Cut into 1/4-inch-wide strips. Cook in large pot of boiling water 15 minutes; drain, rinse, and drain again.

  2. Bring 3 cups sugar and 3 cups water to boil in medium saucepan over medium heat, stirring to dissolve sugar. Add peel. Return to boil. Reduce heat; simmer until peel is very soft, about 45 minutes. Drain.

  3. Toss peel and 1 cup sugar on rimmed baking sheet, separating strips. Lift peel from sugar; transfer to sheet of foil. Let stand until coating is dry, 1 to 2 days.

  4. Saving candied peel in the freezer keeps it from drying out. Wrap it well to prevent freezer burn.

1 Like

I’m using rice bran oil after a lot of reading … probably same as you heard at your lecture. Rice bran oil is what is used for tempura per my reading. I find it is milder and even more neutral than Canola and there is not the same “fry oil” odor. I think many use Peanut Oil. I haven’t used that and am not sure where it falls in the pro/con list.

Another wrinkle in the doughnut thing. End of the year, I had a toaster failure and ended up going back to a toaster oven. Mostly because of size, I selected a Cuisinart that is smaller and square AND has air fryer basket. And it turns out that both old fashioned doughnuts and the yeast raised will air fry! Additionally, the brioche dough freezes well. I live in a 1 human house hold and do not need to make a dozen doughnuts at a crack (although the fried doughnuts freeze and rewarm ok). I like the raised best made from the same dough I made for the Babka. I roll out the dough, cut doughnuts and freeze the raw doughnuts on a cookie sheet and then into a Ziploc when frozen. I have a 1.5 quart Staub enamel cast iron petit French oven and can “deep fry” 1 doughnut in that but most often, I air fry one. The air fry texture is not as light and airy as deep frying but it is good.

The photo in the link is an old fashioned but you can see the texture: Air fry vs deep fry doughnuts

To further complicate things, here is a baked not fried sourdough-leavened donut-ish thing on my to-make list :slight_smile:

1 Like

Sorry! I did not mean to overwhelm you with too much information! I personally enjoy looking at different panettone recipes to see the similarities and differences in ingredients, techniques and hydration levels, etc. However, I generally do this in the “off-season”. When it gets close to my first bake of the season, I just focus on one recipe.

Your idea of small steps is a good one. You can use your hot cross buns effort to help you get confident in managing your solid starter. In the months leading up to the holidays I would suggest going over the Fables de Sucre “Panettone fatto in casa” tutorial and the Panettone di Massari recipe and if you follow their recommendations, I am sure you’ll do fine!

It’s almost Easter and my efforts with sourdough Hot Cross Buns have been wildly successful—But I think I am going to start saying “Wild Yeast” instead of “Sourdough.” Using the very stiff starter recommended for Panettoni has had some interesting ramifications: none of my bread tastes particularly sour. Since I don’t really like the San Francisco style of sourdough bread, this is a great moment for me!

2019-Hot-Cross-Buns-1

My recipe for HCBuns calls for 3/4 cup of sugar and half a pound of butter—not the vast amounts required for Panattone, but still significant. I was really pleased at how well they rose. It took longer than with commercial yeast, but the final results were, I think, lighter and more tender—not what you think of as your typical sourdough texture!

I used a combination of 1 tsp. ground cardomom (white, not green) and 1 tsp. ground allspice, instead of cinnamon, which is the standard spice used. Me, I am a little tired of cinnamon in everything. For the dried fruit inside, I used a combination of dried currents, cranberries and sultanas (white raisins), which I soaked with Marsala wine and water before I mixed the fruit into the dough. (I drank the soaking liquid afterwards. Pretty good.) The reason for this is that the currents were quite dried out, and I didn’t want them sucking water from the dough.
2019-Hot-Cross-Buns-2
As you can see, I got lazy and didn’t make the crosses out of flour paste, like you should do with really authentic HCBuns. Instead, I made crosses out of frosting made from powdered sugar, orange juice and flavored with grated orange peel, which I piped on later. Unfortunately, I forgot to take a picture of the finished product with the crosses in place and the buns disappeared almost immediately under my neices’ onslaught.

I feel that I am really getting the hang of using wild yeast in very fat and sweet doughs and I’m very optimistic that I am going to ace the Panettone challenge come Christmas. My next sweet dough/wild yeast project is going to be raised doughnuts. I’ll try to take better pictures.

1 Like

In case anyone is curious about how to make the “authentic” crosses on Hot Cross Buns, you make a kind of batter out of water and flour (1/3 – 1/2 cup water, 1/2 cup flour) and pipe the crosses onto the buns with it just before you bake them. For some reason, the buns brown during the baking process, but the crosses made of this paste stay white. After baking, you glaze the buns with a frosting made of 1/4 cup milk and 2 cups powdered sugar that has been lightly cooked—sort of like the frosting on a glazed doughnut. You can also make a similar glaze with powdered sugar, the zest of one orange and 1/4 cup of the juice of the same orange.

1 Like

Thank you for this explanation!! I spent a LOT of time looking at recipes and finally chose this one. It uses the paste. Many recipes and I think many U.S. bakeries use frosting after the glaze. At any rate, I didn’t understand how this was supposed to work.

So far, I have a test bake of 4 buns: no cross or glaze.

I’m very happy with interior and taste! I used currants soaked in apple juice (your Marsala wine soak sounds wonderful!), cinnamon, nutmeg, ginger, clove for spices.

Now for my main batch … my piping of the paste is horrible, we’ll see what happens in the bake ??

My test bake rolls popped quite a lot so I’m hoping these pop up around the paste and somehow are recognizable as hot cross buns.